|
|
Post by mustang1989 on Feb 22, 2024 16:10:12 GMT -6
That stinks on the paint and your health! I get to visit with my Cardiologist for our annual talk online today... kind of weird its online and not in person! Had my physical on Tuesday and passed that fine. It'll all be good Joe. One day at a time brother. |
|
|
|
Post by JCON on Feb 22, 2024 17:09:24 GMT -6
That stinks on the paint and your health! I get to visit with my Cardiologist for our annual talk online today... kind of weird its online and not in person! Had my physical on Tuesday and passed that fine. It'll all be good Joe. One day at a time brother. Yeah she said to change my diet and exercise more, ha, ha!!! Basically cut down on the good stuff and add more of the blah stuff, ha, ha!!! |
|
|
|
Post by BUCKY on Feb 23, 2024 0:42:55 GMT -6
Wow! Take care of the ticker you guys! I've had my pacemaker since 2013, and will probably have to have it replaced sometime this year. All in the process of staying above ground level! LoL
That's rather annoying about the paint job, Joe, but I believe you'll rectify the problem with not too much trouble.
|
|
|
|
Post by mustang1989 on Feb 23, 2024 6:36:09 GMT -6
It'll all be good Joe. One day at a time brother. Yeah she said to change my diet and exercise more, ha, ha!!! Basically cut down on the good stuff and add more of the blah stuff, ha, ha!!! Right?!! We're members of the "If it tastes good, spit it out" diet. lol |
|
|
|
Post by JCON on Feb 23, 2024 10:45:53 GMT -6
Seems to be so Joe!
|
|
|
|
Post by mustang1989 on Jun 15, 2024 15:40:21 GMT -6
Ok gang......It's been a while but here I am once more to get some updates going on this thing and move forward with it. Hope you guys are all doing well. OK folks......alot has taken place since the last update but I've made some good progress with this one after a few weeks of wet sanding, priming, and reshooting paint on the affected areas, decaling, glossing the whole thing and then wet sanding and another gloss coat and finally polishing. It's progressing but not as fast as I'd like. The good news is that I'm happy with the results.    |
|
|
|
Post by JCON on Jun 16, 2024 12:22:43 GMT -6
Pretty color! Health wise I'm doing OK Joe. Just got back from a trip to the other side of the state for my oldest grandsons wedding. Was good to be with family!
|
|
|
|
Post by BUCKY on Jun 16, 2024 15:24:03 GMT -6
I like the color, too, and it sure has a DEEEEP gloss to it! I'd say you nailed it!!
|
|
|
|
Post by mustang1989 on Jun 16, 2024 16:58:42 GMT -6
JCON: Glad to hear that you were able to enjoy some time with your family. Thank you for the kudos. BUCKY: Thank you for the good words of encouragement as well Keith. Been a slow process but we're getting there.......
|
|
|
|
Post by JED on Jun 20, 2024 5:42:38 GMT -6
WOW that's come out nice n shiney
|
|
|
|
Post by mustang1989 on Jun 28, 2024 9:02:08 GMT -6
WOW that's come out nice n shiney Thanks Jed!  I was almost ready to call this one done and even had some glamour shots but I just didn't like how the headlight lenses came out. I cut both locator pins off but then found out that the headlight lenses were very thick causing them to give the front end a bug-eyed look when fitted. I ended up having to thin both lenses out and installing. They sat flush with the rest of the grille area but weren't wide enough for the headlight openings.  First, I removed both headlight buckets from their cavities in the nose of the car. Then I corrected the lenses by applying a light coat of semi-gloss black and putting a coat of Wet Look Clear over them......and now after two days of cure out.....installed without the buckets behind them so they'd sit a little recessed into the nose. IMO this really is a MUCH better look anyway. Just gives it a more aggressive look and took care of the incomplete lenses as well as the mounting tab issues that would've shown through the lenses had I left them in place and had decided on going the clear route. I'll be posting the updated glamour shots soon. Here's where we are as of now.   |
|
|
|
Post by BUCKY on Jun 28, 2024 9:31:41 GMT -6
Camaro looks great! Looking forward to seeing the new eyeballs on it.
|
|
|
|
Post by JED on Jun 30, 2024 13:08:10 GMT -6
Looks very nice and sleek
|
|
|
|
Post by mustang1989 on Jul 1, 2024 7:51:50 GMT -6
Keith and Jed: Thanks alot fellas! Keith, the blacked-out lenses are indeed the new "eyeballs".  Well folks, I’ve got this one finished up after a LONG time at the bench with it.. This is not my usual automotive area as I normally build classic cars and trucks, however, a good friend of mine was set to retire late last year and owns one of these cars & I wanted to build one for him. AMT just so happens to have this very car in kit form, so I bought one. Upon opening the kit and going over the instructions I could not believe the amount of detail that AMT put into this model. Engine detail was better than most other models out there and the interior had a lot as well. What caught my eye was the number of parts and attention given to the suspension. This not only stuck out to me on the instruction sheet but during the build as well. There are nearly 50 parts to the suspension/ undercarriage with most of those dedicated to the intricate rear suspension. Just beautiful. The good points on this build are, as mentioned, the chassis, engine and engine bay and the interior are well thought out and detailed. The chassis required a lot of tedious building but is very rewarding when finished. Engine assembly and installation was straight forward as the interior. One thing that I got hung up on with the interior was the two-tone colors of the seats and how to replicate them. I chose grey decals that I ended up making templates for, cutting out and applying. Areas of frustration with the kit were the headlight lenses with locator pins on each side which results in a very unconvincing look. I cut both locator pins off but then found out that the headlight lenses were very thick causing them to give the front end a bug-eyed look when fitted. After thinning the OOB lenses and trimming I found that on installation the lenses didn't fill the headlight cavity sufficiently sooooo......I had to source another pair of lenses.... and completely remove the headlight buckets from the nose. After that I shot a coat of black over the lenses and coated that with a good coat of Testors Wet Look Clear shot through an airbrush. THAT....gave me the look that I was hoping for and the headlight lenses sat recessed in the headlight cavities giving a much more convincing look. Before the correction. You can see what I'm talking about with the lenses. 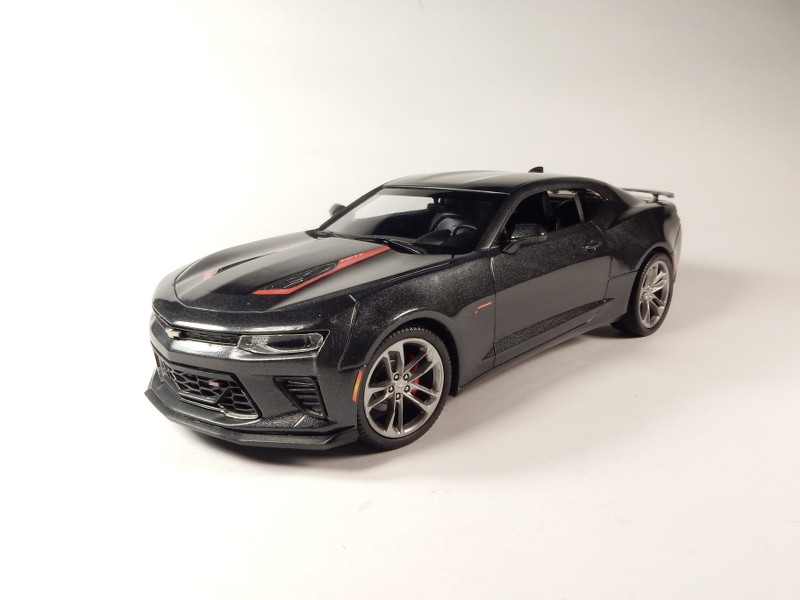 Another area of concern is fitting the chassis/ interior into the body. I had to trim the leading edge of the dash all the way across the width of the dash. I also had to trim back the leading edge of the windshield because it contacted the dash and then repaint the inside black so as not to have blemishes along the bottom of the windshield. The exhaust tips are shown to be installed at the very start of the build. I saved this for the very end of the build so I could get the spacing correct. This was a fun model to put together and was very rewarding at the end aside from a couple of kit shortcomings. I used Gravity Colors Nightfall Grey for the body color and Testors Wet Look Gloss Clear dispensed and shot through an airbrush. This is a mostly OOB build save for the rear license plate which carries the personalized tag that my friend has on his car. Other liberties that were taken by me was to lower the car all the way around by a scale 1” all the way around and display the driver’s window in the down position by removing that part of the glass assembly. The finished product.....with the corrected lenses. 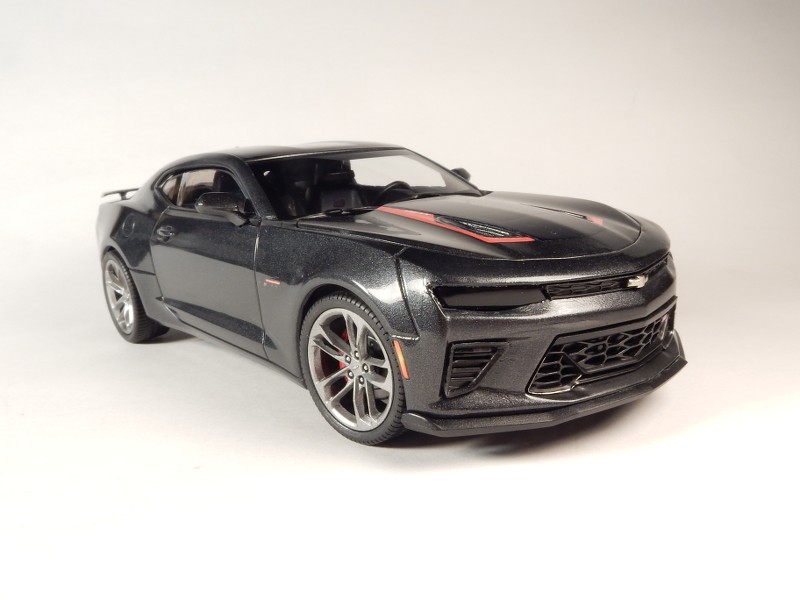 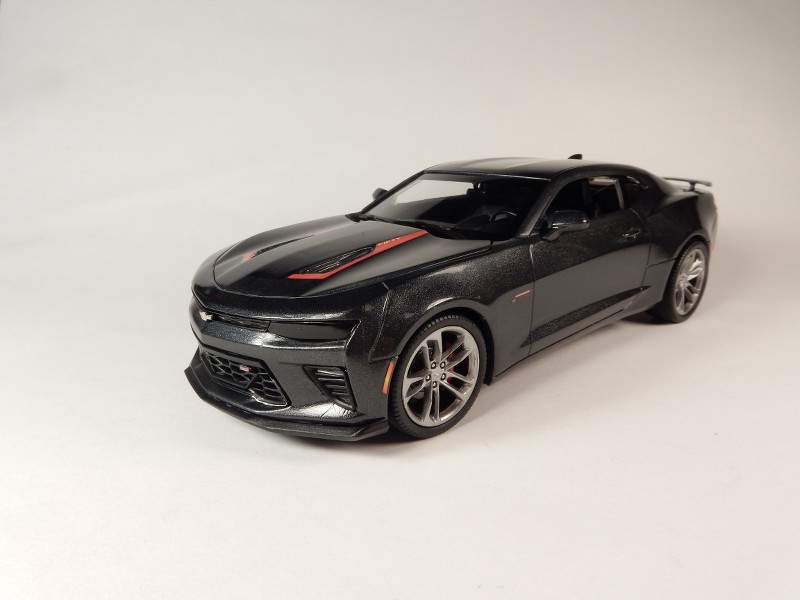 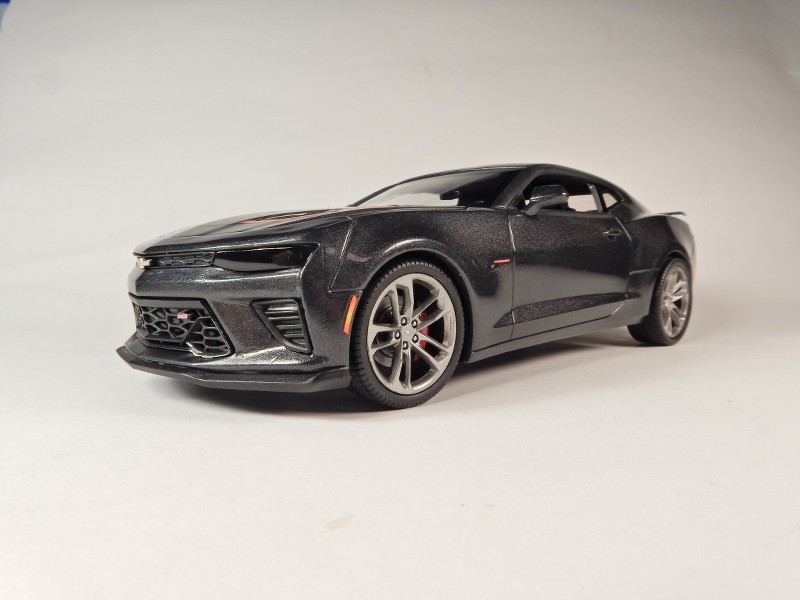 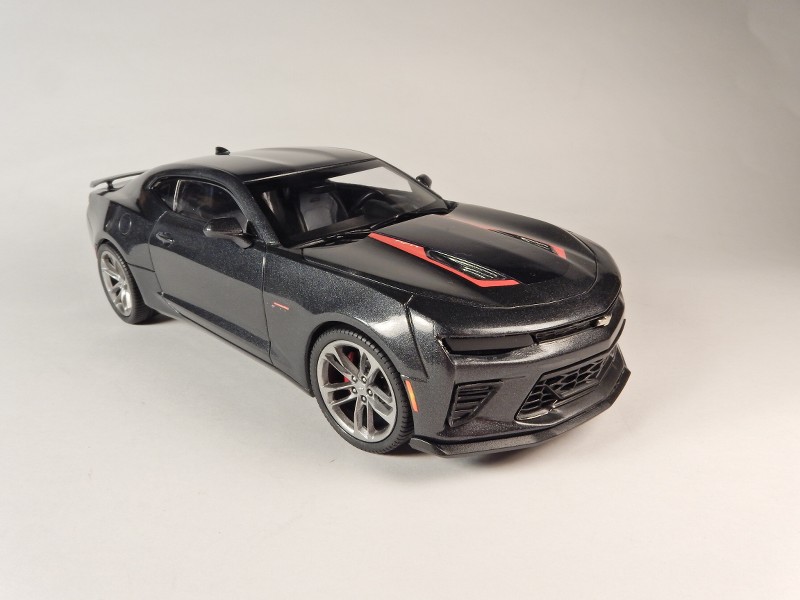 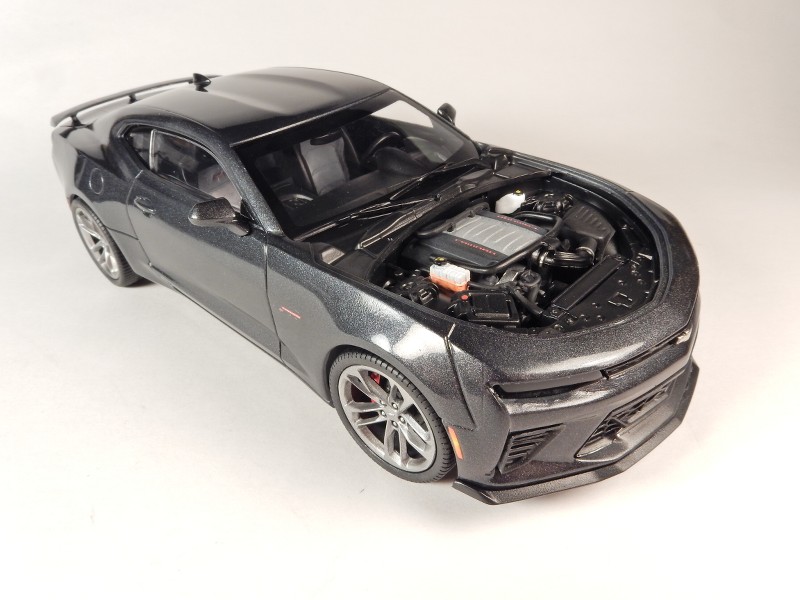 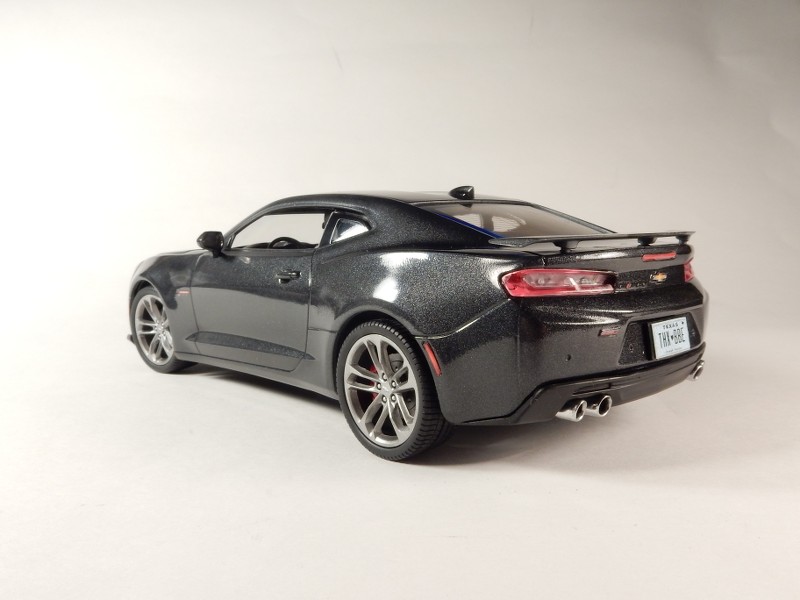 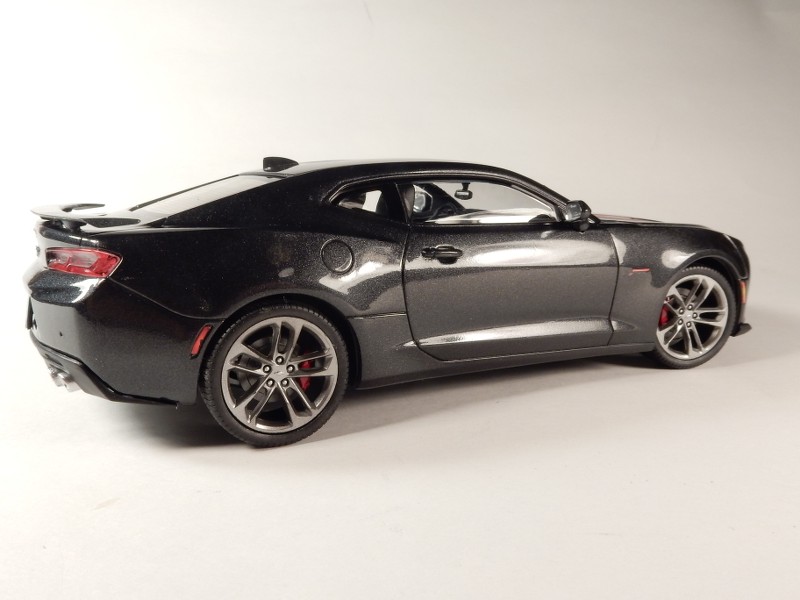 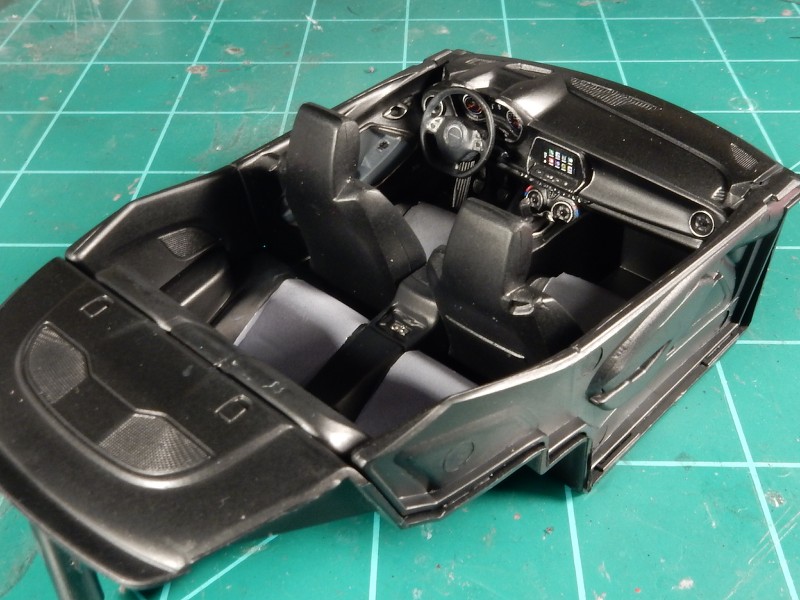 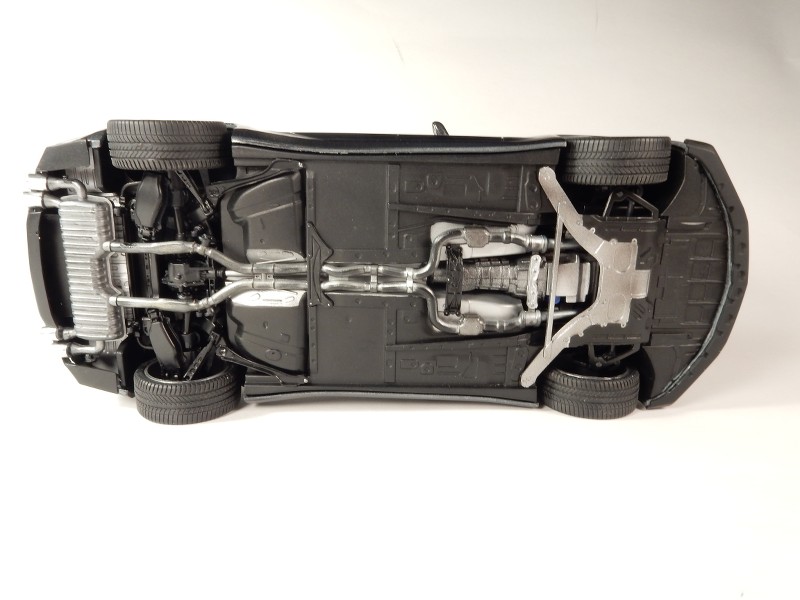
|
|
|
|
Post by JCON on Jul 1, 2024 10:47:48 GMT -6
Well done Joe!!! A beautiful build and a great review! Your friend is going to love it!!!
|
|
|
|
Post by BUCKY on Jul 1, 2024 20:37:47 GMT -6
Mighty nice looking Chevrolet there, bro! Top Shelf work!!
|
|
|
|
Post by JED on Jul 1, 2024 21:27:39 GMT -6
Great build and result
|
|
|
|
Post by mustang1989 on Nov 2, 2024 21:30:22 GMT -6
Well done Joe!!! A beautiful build and a great review! Your friend is going to love it!!! Mighty nice looking Chevrolet there, bro! Top Shelf work!! Thank you all and I'm very sorry for the late reply. I'll explain later but I have been one busy guy over the last few months. |
|
|
|
Post by JCON on Nov 3, 2024 0:20:43 GMT -6
No worries Joe, life does that sometimes! We can wait!
|
|
|
|
Post by BUCKY on Nov 4, 2024 13:05:04 GMT -6
No worries Joe, life does that sometimes! We can wait! That's right! We're fairly patient around here! LoL |
|