|
|
Post by JED on Jan 10, 2024 14:41:53 GMT -6
Glad to hear your gran is doing better and the truck is back on the road, when it rains it pores!!!!
|
|
|
|
Post by mustang1989 on Jan 14, 2024 6:28:13 GMT -6
Thank you for the comments Joe ( JCON ) and Jed ( JED ). Things are starting to get back on track around here so I should be finding myself with a little more time at the bench. Speaking of which..... The interior is now finished!!! The rough edges between the borders of the two tone seats is ALOT less noticeable in real life and is more the camera picking these up. I decided to go with decals from the Foose FD-100 kit for the light gray portion of the seats which resulted in a cleaner demarkation line than I could've done with paint. Masking on these irregular surfaces to achieve the same effect would've been dang near impossible. This interior was almost as difficult as the '67 Mustang interior that I just got through with a few months ago. LOTS of masking and LOTS of different shades of black with the details being picked out. Now..............moving on to the car body. Completed Interior Shots: 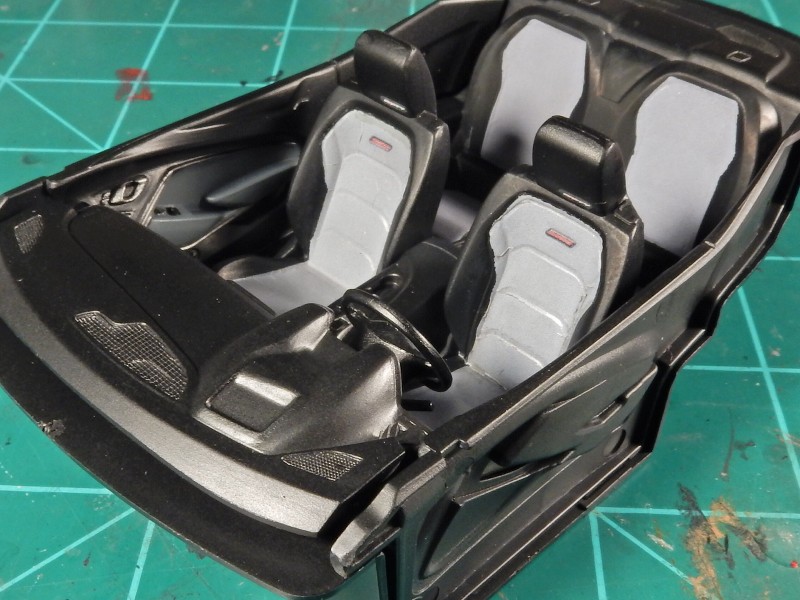 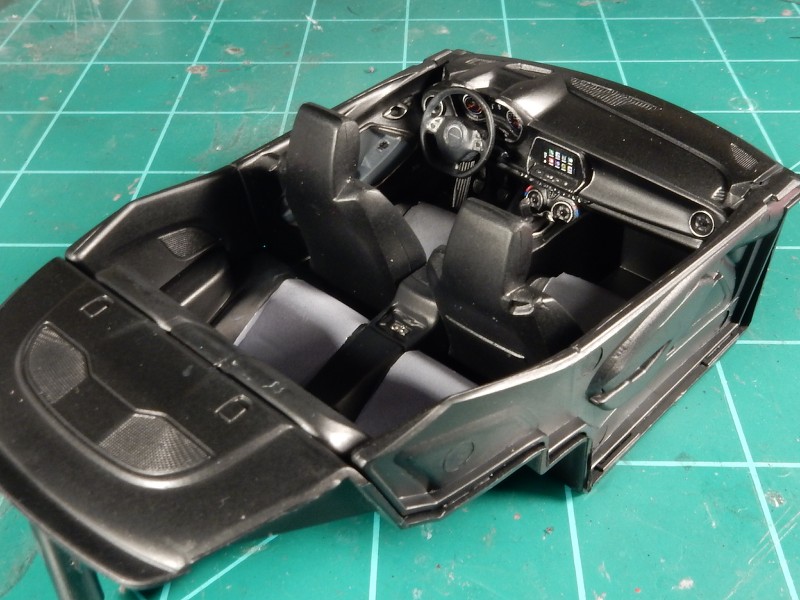 |
|
|
|
Post by JED on Jan 14, 2024 8:41:24 GMT -6
Looking good
|
|
|
|
Post by JCON on Jan 14, 2024 14:18:45 GMT -6
I'm liking the look of this! Beautiful work going on as always brother!
|
|
|
|
Post by mustang1989 on Feb 3, 2024 17:10:17 GMT -6
Sorry fellas. I've been frickin' slackin'. Will get some updates on this one.
|
|
|
|
Post by mustang1989 on Feb 3, 2024 17:40:20 GMT -6
It took some fancy footwork but I got the body whipped into shape and primed. Before: 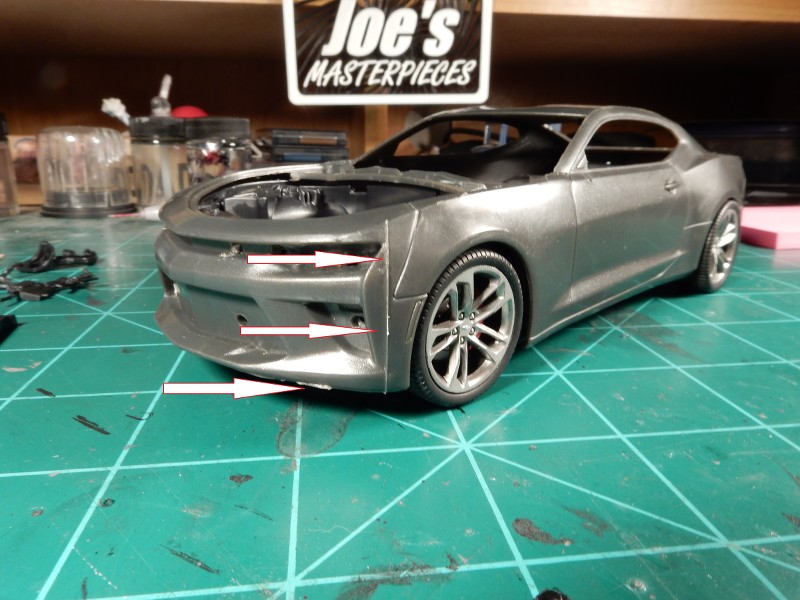 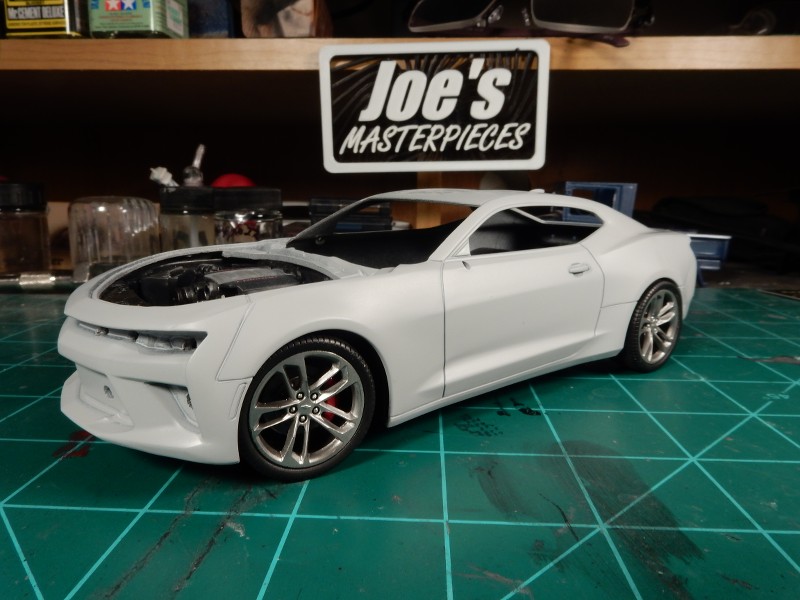 Before: 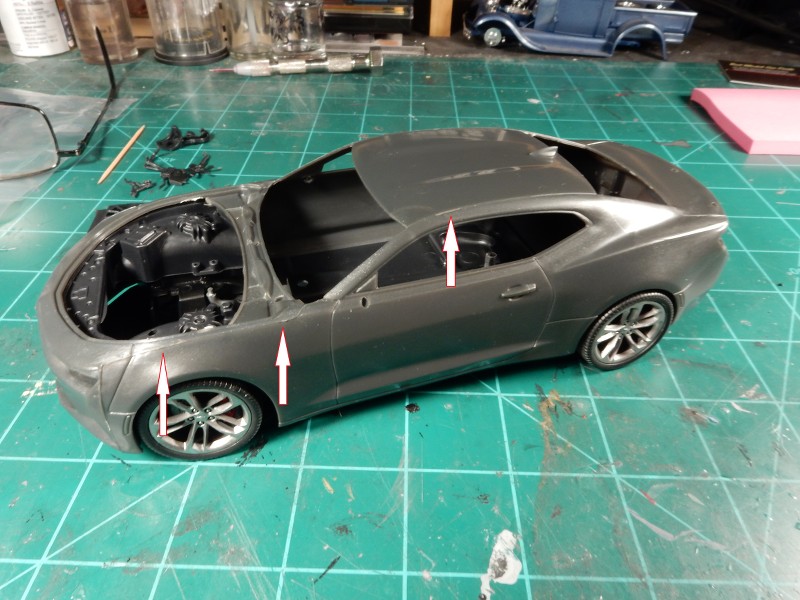 and after: 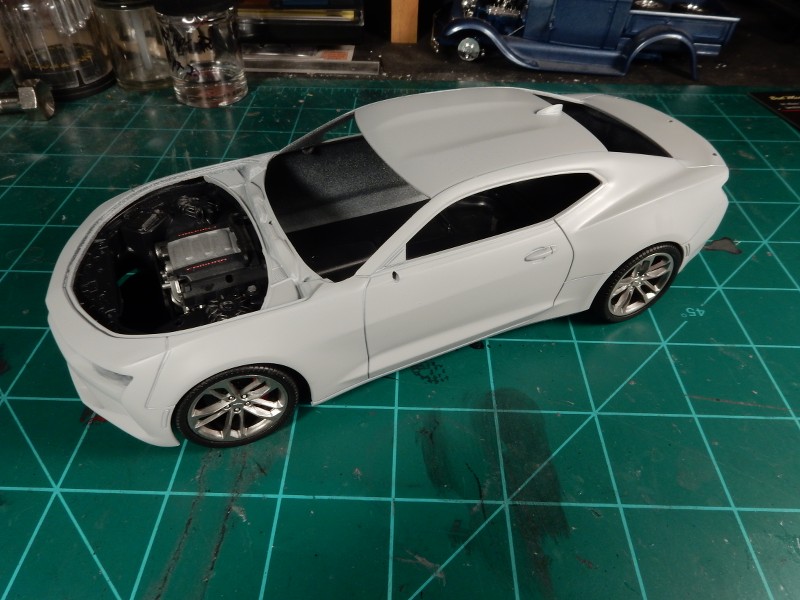 Before: 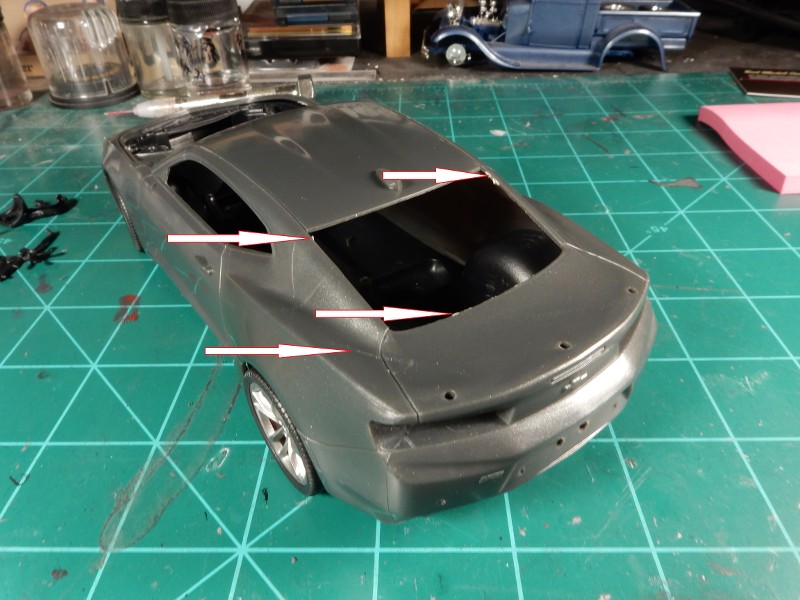 aaaaaaaaand after: 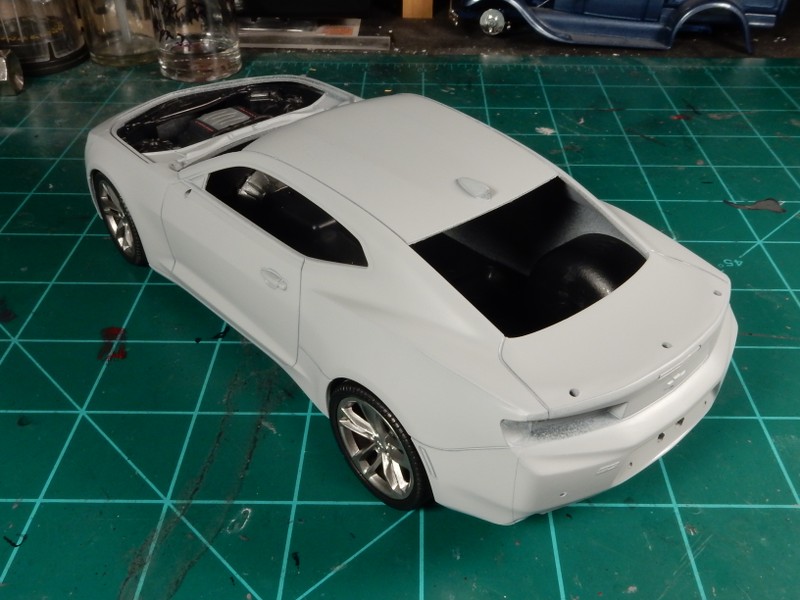 |
|
|
|
Post by JCON on Feb 3, 2024 18:40:20 GMT -6
Way better there Joe! Well worth the effort to redo it correctly!
|
|
|
|
Post by mustang1989 on Feb 4, 2024 7:21:48 GMT -6
Way better there Joe! Well worth the effort to redo it correctly! Thanks Joe. Yeah, there was a LOT of work involved in straightening that car body out!! A little progress on the engine bay. When dealing with black in these areas, I tend to use a lot of different shades and add every detail I can to keep it from being boring. Bit by bit things are shaping up in here.  |
|
|
|
Post by JED on Feb 4, 2024 9:18:06 GMT -6
I hate the one step forward two steps back times!! Cracking job in the end though
|
|
|
|
Post by mustang1989 on Feb 6, 2024 21:11:07 GMT -6
I hate the one step forward two steps back times!! Cracking job in the end though Thanks Jed! I've got the engine compartment finished up save for getting the radiator true with the core support. Dunno what happened there but I'll get it all fixed up in the coming updates. 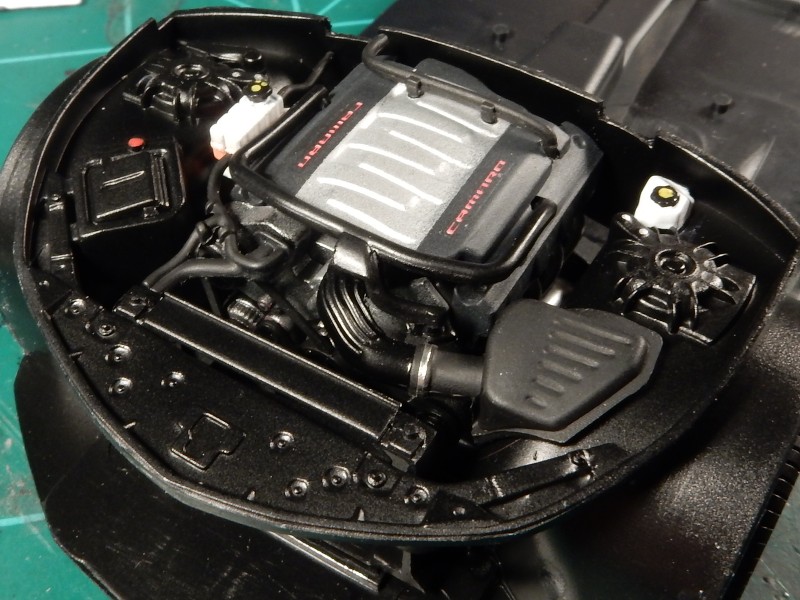 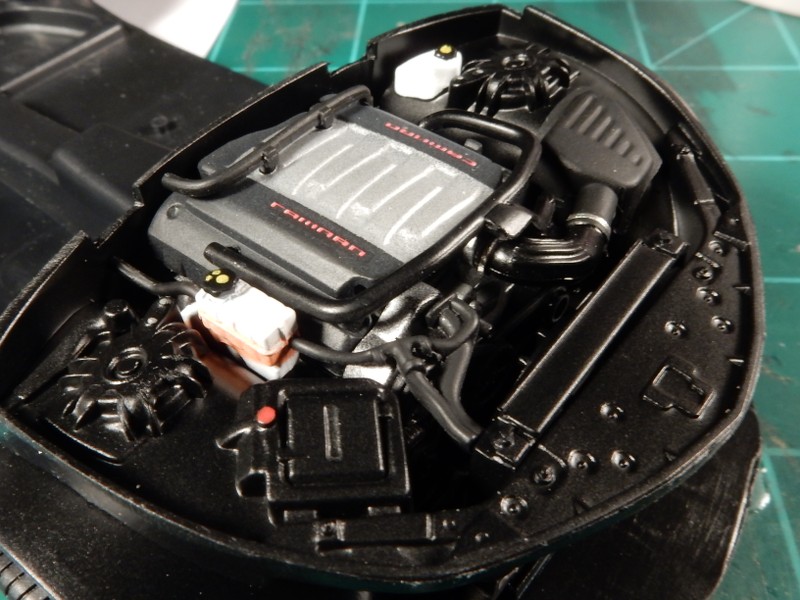 |
|
|
|
Post by JCON on Feb 6, 2024 22:22:02 GMT -6
That is one tight engine bay Joe!!! Wow!!!
|
|
|
|
Post by mustang1989 on Feb 7, 2024 5:20:41 GMT -6
That is one tight engine bay Joe!!! Wow!!! Thanks Joe. There were several lusters of black brought into the mix to add interest to the bay and keep it from being bland. |
|
|
|
Post by JED on Feb 9, 2024 8:37:25 GMT -6
Never enough room in modern engine bays!!
|
|
|
|
Post by BUCKY on Feb 10, 2024 21:07:03 GMT -6
Quite a nice project! Got here late, but I'm following, now.
|
|
|
|
Post by mustang1989 on Feb 11, 2024 7:36:43 GMT -6
Never enough room in modern engine bays!! There for a while the manufacturers were cleaning engine bays up rather well. Now......there's no wasted space in any given area of a vehicle. lol Quite a nice project! Got here late, but I'm following, now. Thanks Keith.  Getting these panel inserts into the body is proving to be a tricky process. I'm having to thin out & slightly trim the edges of the outer inserts & headlight buckets as well as the lower grille to get them to fit in the recesses properly. Before :  and after:  I do like what AMT did with the outside rearview mirrors. They pretty much pinned the mirrors OOB:  and they fit pretty well once inserted into the holes. Maybe a little clean up but this is definitely a step in the right direction so the mirrors will stay in place when handling later.  |
|
|
|
Post by BUCKY on Feb 11, 2024 9:23:44 GMT -6
I like that touch on the mirrors.
|
|
|
|
Post by JCON on Feb 11, 2024 12:12:37 GMT -6
Good job trimming the inserts! I've found a few kits with the mirrors pinned lately. That white Porsche Carrera I just finished has them too!
|
|
|
|
Post by BUCKY on Feb 11, 2024 19:03:01 GMT -6
That's good, cause sometimes drilling and pinning those mirrors is not the easiest of tasks.
|
|
|
|
Post by mustang1989 on Feb 22, 2024 8:38:16 GMT -6
Good job trimming the inserts! I've found a few kits with the mirrors pinned lately. That white Porsche Carrera I just finished has them too! Thanks fellas. I'm glad more kits are using that feature as they've needed it for a VERY long time. Sorry for the long absence fellas. Been prepping up for a heart ablation procedure which I had yesterday. Pretty much in recovery now and will be off of work for the next few days. I managed to get the color coat on the body, hood and rear spoiler. Such a pretty coat too and THEN.....I accidentally knocked the body over and it fell out of the drying booth and onto bottles/ tools and everything else below. Welp.....there aint a thing I can do but wait a few days for everything to cure out and wet sand the affected areas and march on. Man....it was looking THAT good too. Passengers side along with the roof line and R/H front on that same side took the hits. I've found a darker primer to use once I get the affected areas wet sanded and smoothed out. Then it'll go in the paint booth again to get it all straighted out. 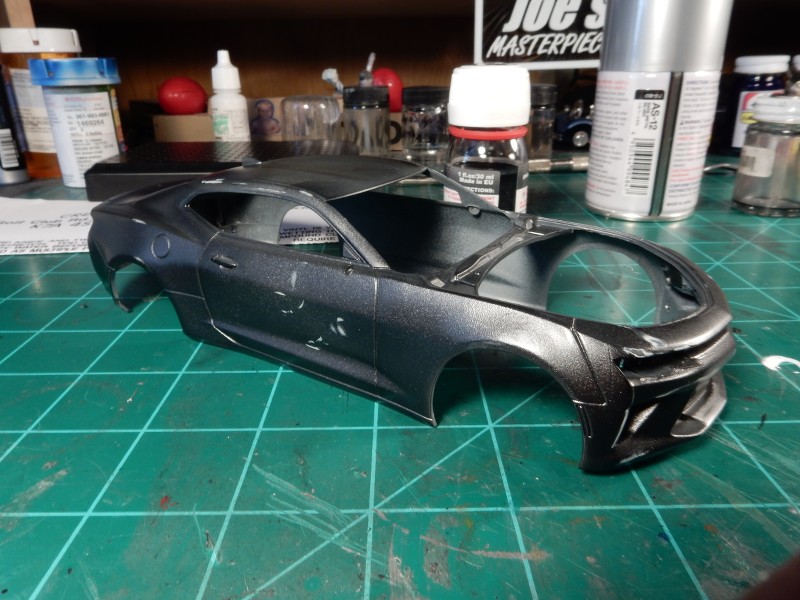 Drivers side turned out like a dream aside from the far left hand corner up front. Stay tuned......I'll get it all ironed out. 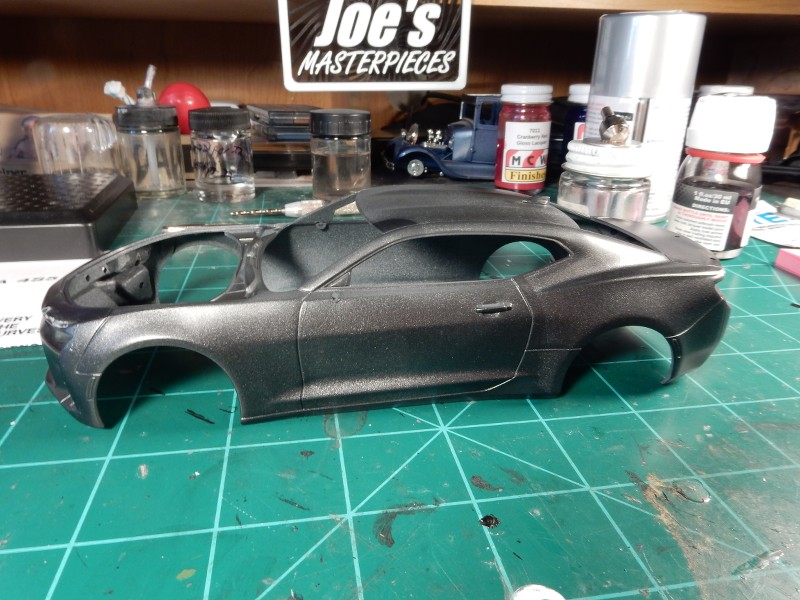 |
|
|
|
Post by JCON on Feb 22, 2024 10:47:48 GMT -6
That stinks on the paint and your health! I get to visit with my Cardiologist for our annual talk online today... kind of weird its online and not in person! Had my physical on Tuesday and passed that fine.
|
|