|
|
Post by mustang1989 on Nov 19, 2022 9:09:17 GMT -6
I've been working on a pair of 1970-1/2 Camaros for the last couple of months. I was almost finished with my Z/28 version and was just about to get started on the Baldwin Motion Camaro when I found out that a good friend of mine at work is going to retire in late November. He owns a 2017 Camaro "Fiftieth" Edition and I thought I'd build him a going away present. It's rare when I do this as I always tend to feel under the gun of a time frame. In any case, Here's the kit. 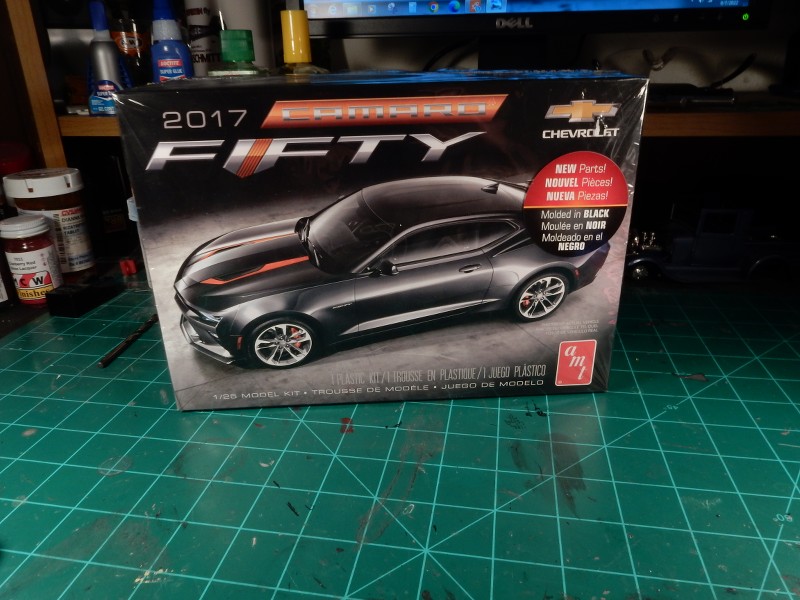 |
|
|
|
Post by JCON on Nov 19, 2022 9:39:57 GMT -6
Looks like fun!!!
|
|
|
|
Post by mustang1989 on Nov 19, 2022 10:08:17 GMT -6
This is actually a really REALLY good kit Joe. LOTS of details on the chassis. (50+ parts) |
|
|
|
Post by mustang1989 on Dec 1, 2022 6:18:09 GMT -6
|
|
|
|
Post by JCON on Dec 1, 2022 10:11:41 GMT -6
Looks good!!!
|
|
|
|
Post by mustang1989 on Dec 2, 2022 4:10:45 GMT -6
Thanks Joe. The only chrome parts in the whole kit were the wheels and these aren't supposed to be chrome. They are more of a silver with a contrasting darker color used for the inlay areas of the wheel. 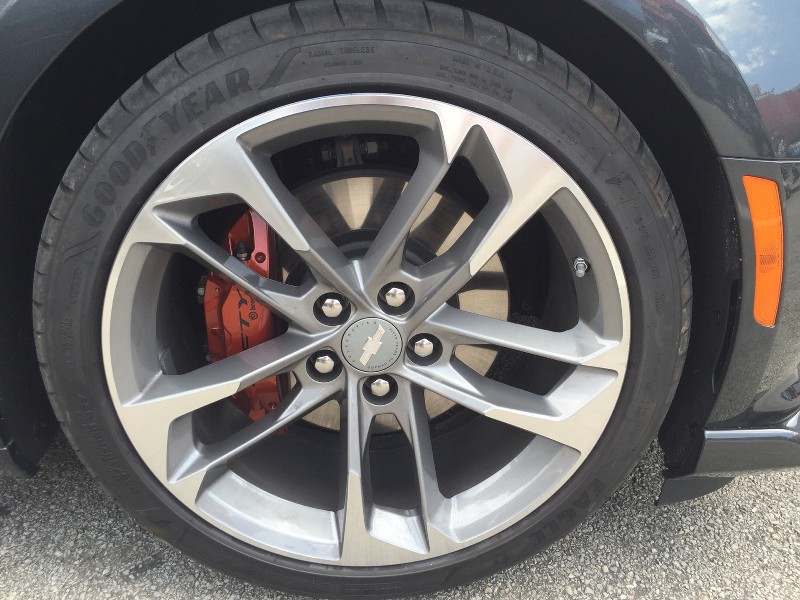 So I went to work by stripping all of the chrome off of the wheels and cleaning them up. 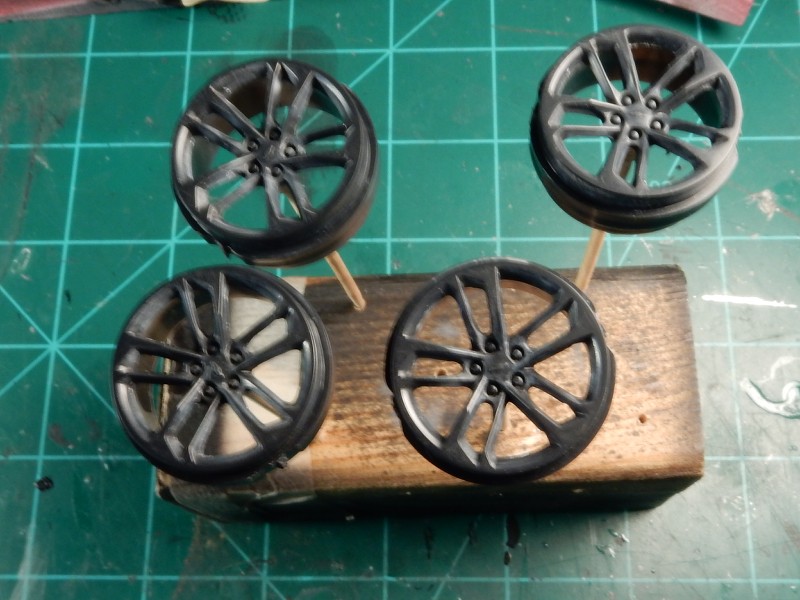 Here they are finished up. One of the problems with silver is that any leftover flash at all will show up in pictures. In real life you've really gotta be looking to see it. I used Vallejo Silver for the wheels and shaded the darker areas with ground up black pastel. Just didn't feel comfortable painting the inlay areas. I then put a dot of Molotow Chrome on the lugnuts and then used a toothpick to apply MM Chrome Silver to the Bowtie emblem in the middle of each wheel. 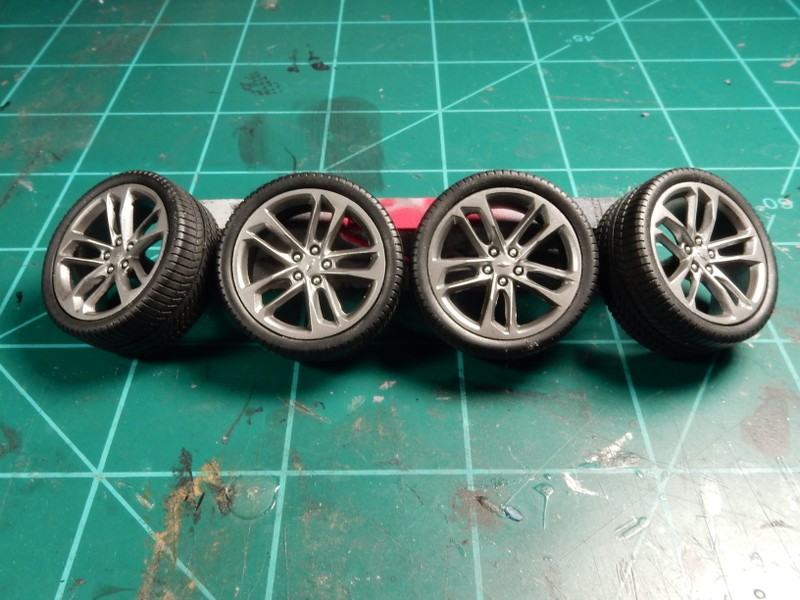 |
|
|
|
Post by JCON on Dec 2, 2022 9:35:27 GMT -6
They turned out great!!!
|
|
|
|
Post by ogrejohn on Dec 4, 2022 14:06:53 GMT -6
Nice work on the wheels!
|
|
|
|
Post by mustang1989 on Dec 30, 2022 9:28:01 GMT -6
Thanks fellas! I started on the chassis by getting the brake rotors and brake calipers all ready. I really wished there were some "Camaro" scripts for the calipers as they are going to be extremely visible through the wheels. But...that's that and they aint there so....moving on now. I also started the aluminum shielding for the exhaust painting this morning. I'll be touching up the chassis in areas that didn't get adequate coverage/ overspray/ or totally missed in the days coming.  |
|
|
|
Post by ogrejohn on Dec 30, 2022 17:16:36 GMT -6
Lookin good!
|
|
|
|
Post by mustang1989 on Dec 31, 2022 18:04:22 GMT -6
LOTSA work going on with this one just trying to figure out how to get the stance right. After numerous hours, I finally got the front where I want it after sanding the heck out of the mounting pad on the chassis to get the upper control arm to sit further up. This gave me the scale inch or so lowered that I wanted, and I may be able to tweak it just a wee bit more. Test fit:  To help illustrate the difference between the OOB stance and the modified stance.... The OOB stance:  One thing this kit has going for it is a completely detailed out undercarraige. Very high parts count (over 40 parts) and a great effort by AMT on replicating it. 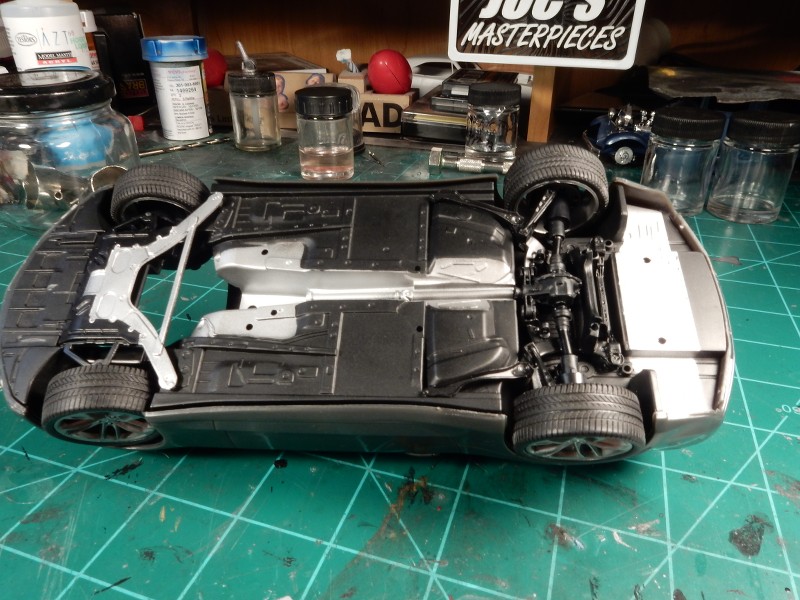 |
|
|
|
Post by JED on Jan 1, 2023 5:08:00 GMT -6
Great job. The wheels definitely look better
|
|
|
|
Post by JCON on Jan 2, 2023 12:35:55 GMT -6
I like it also!!!
|
|
|
|
Post by mustang1989 on Dec 4, 2023 13:17:46 GMT -6
Thanks fellas! To say that this is one of the better chassis builds I've completed would simply be an understatement. AMT did VERY well on this one. In looking at the reference photos that I had to work with, I knew I had my work cut out for me if was to replicate something with so many different shades of the same color as well as the aluminum & steel paneling that provided the base work for the chassis that included almost 50 parts by the time it was all said and done. 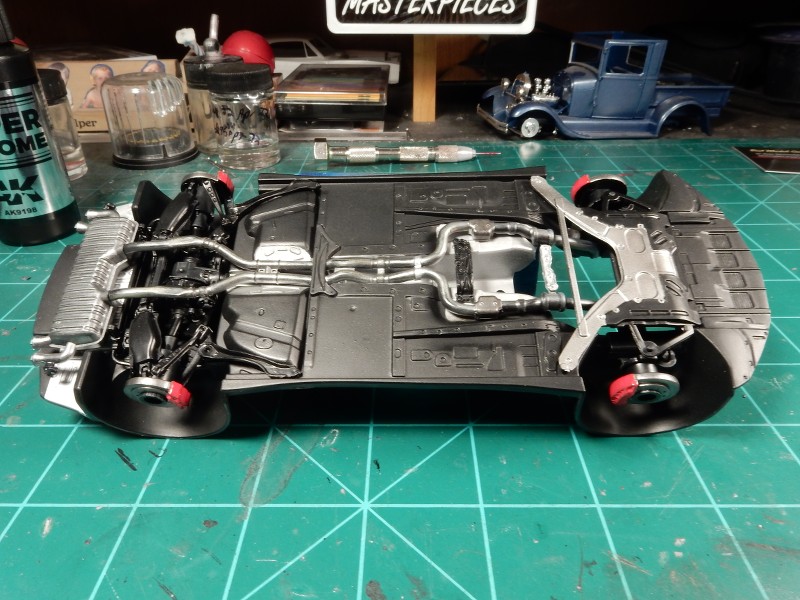 Most of the parts were in the rear suspension. I'm in awe at the amount of detail that was provided. Getting everything to look non "Blase" was a trick in itself. 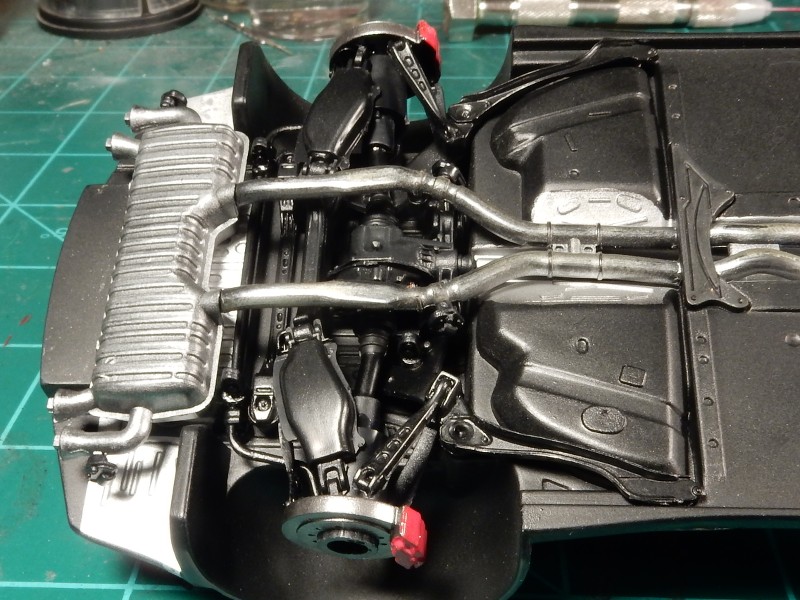 |
|
|
|
Post by JCON on Dec 4, 2023 13:47:18 GMT -6
I think you have definitely achieved that look that captures one's attention to the detail! I do have a question though... when you use the Molotov do you use if straight from the pen or do you use a brush to get finer detail work? Just my preference but I really don't like the pens themselves and would prefer a thin brush.
|
|
|
|
Post by mustang1989 on Dec 4, 2023 14:48:15 GMT -6
I think you have definitely achieved that look that captures one's attention to the detail! I do have a question though... when you use the Molotov do you use if straight from the pen or do you use a brush to get finer detail work? Just my preference but I really don't like the pens themselves and would prefer a thin brush. Thanks Joe. I usually use a brush as well and have been known to AB Molotow on larger items like bumpers or wheels to get the desired chrome effect. I'm out on the pens as well. lol |
|
|
|
Post by JCON on Dec 4, 2023 14:54:05 GMT -6
Glad to hear it wasn't just me on the pens, ha, ha!!! I haven't tried AB it yet... did you thin it?
|
|
|
|
Post by mustang1989 on Dec 4, 2023 15:19:59 GMT -6
Glad to hear it wasn't just me on the pens, ha, ha!!! I haven't tried AB it yet... did you thin it? Right??!! It all shoots straight out of the bottle with no thinning required. Clean up with windex through the airbrush and straight alcohol to clean up the paint cup. Easy peezy!! |
|
|
|
Post by JCON on Dec 4, 2023 15:21:29 GMT -6
Glad to hear it wasn't just me on the pens, ha, ha!!! I haven't tried AB it yet... did you thin it? Right??!! It all shoots straight out of the bottle with no thinning required. Clean up with windex through the airbrush and straight alcohol to clean up the paint cup. Easy peezy!! Nice, I'll have to give it a go down the road! Thanks for the info! |
|
|
|
Post by mustang1989 on Dec 4, 2023 15:28:50 GMT -6
Right??!! It all shoots straight out of the bottle with no thinning required. Clean up with windex through the airbrush and straight alcohol to clean up the paint cup. Easy peezy!! Nice, I'll have to give it a go down the road! Thanks for the info! Stuff shoots on like a dream. The rear wheels on this truck were shot with Molotow, cleared with Spaztix Ultimate Chrome Clear and given a light airbrushing of Tamiya Smoke.  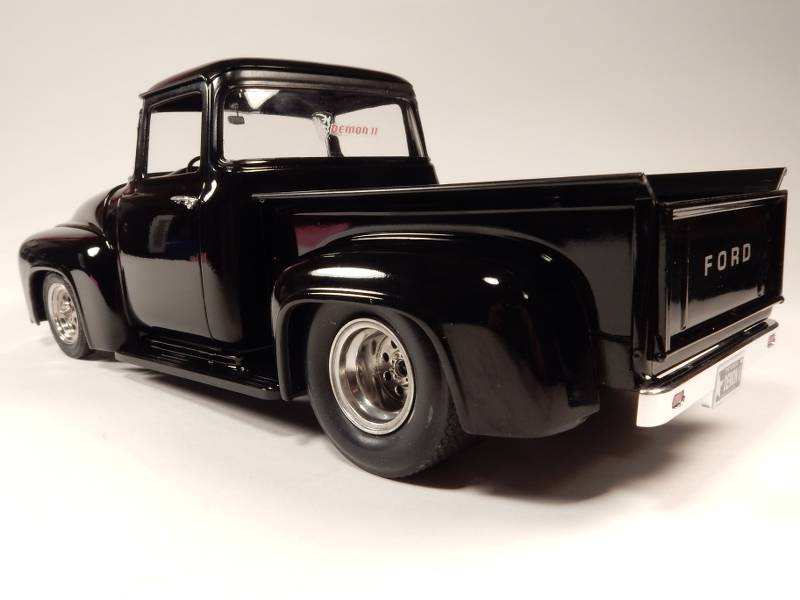 |
|