|
|
Post by JED on Sept 17, 2019 11:06:33 GMT -6
Great work Ernie,you've certainly submerged yourself in these builds 😳😬😳😬😂😂
|
|
|
|
Post by BUCKY on Sept 17, 2019 20:47:39 GMT -6
Great work Ernie,you've certainly submerged yourself in these builds 😳😬😳😬😂😂 Now, THERE'S a hat and coat moment!!! LOL |
|
|
|
Post by JED on Sept 17, 2019 23:42:32 GMT -6
Great work Ernie,you've certainly submerged yourself in these builds 😳😬😳😬😂😂 Now, THERE'S a hat and coat moment!!! LOL I do try Bucky,I've a few hats and coats to wear 😃😃 |
|
|
|
Post by JCON on Sept 21, 2019 9:49:14 GMT -6
Now, THERE'S a hat and coat moment!!! LOL I do try Bucky,I've a few hats and coats to wear 😃😃 Striving for some depth there Jed!!! I'll get me hat and coat and join ya!!!  |
|
|
|
Post by JED on Sept 24, 2019 10:43:44 GMT -6
I love the dad jokes/ one liners,it annoys my kids all the time but I think inside they love it really,what are dads,grandad 's,great grandad' for 😂😂
|
|
|
|
Post by JCON on Sept 24, 2019 12:11:01 GMT -6
Without us they wouldn't be here, ha, ha!!!
|
|
Ernie
SETTLING IN
   Just goin' where the plastic takes me.....
Posts: 358 
Likes: 853
|
Post by Ernie on Sept 29, 2019 22:10:16 GMT -6
So, its been almost a year now since I ended up in the hospital with a perforated colon. One of the things I decided I needed to do after I was feeling better was to inventory my kits and supplies and books etc. for my wife. I had hoped to get it done before my reversal surgery in June, but have been a bit behind the ball. Anyway, I am almost done with that chore  finally!! And I should be able to get back to building with a vengeance! I had many kits get damaged several years ago while they were in storage thus I now have many bagged kits. These are hard to store and so I have decided to make a concerted effort to build those up first along with any and all started kits I have found along the way. Of course there will be a few new kits thrown in as well, but the goal is to first finish off those kits that are hard to store or already started before they end up with lost and missing parts etc. and can't be finished. So, anyway, now that the inventory slowdown is nearly past, the factory should be ramping up production shortly! |
|
|
|
Post by JED on Sept 30, 2019 7:51:40 GMT -6
Looking forward to the production phase,as for the inventory,is that so the boss lady can fetch the next in line for you,proper production line that is !!?
|
|
Ernie
SETTLING IN
   Just goin' where the plastic takes me.....
Posts: 358 
Likes: 853
|
Post by Ernie on Sept 30, 2019 20:48:57 GMT -6
Looking forward to the production phase,as for the inventory,is that so the boss lady can fetch the next in line for you,proper production line that is !!? Na, so the boss lady can give the list to a model club I used to belong to and let them figure out what to do with all the stuff     |
|
|
|
Post by Dukemaddog on Oct 2, 2019 17:09:48 GMT -6
Ernie I'll be praying for a swift and full recovery so you can get many more of those models built.
|
|
Ernie
SETTLING IN
   Just goin' where the plastic takes me.....
Posts: 358 
Likes: 853
|
Post by Ernie on Oct 3, 2019 0:07:41 GMT -6
Thank you Duke, much appreciated. I had my colostomy reversed on June 21, and so far everything is going well! This was much better than what I experienced last October for sure. Now I just need to get some time at the workbench!  |
|
Ernie
SETTLING IN
   Just goin' where the plastic takes me.....
Posts: 358 
Likes: 853
|
Post by Ernie on Nov 13, 2019 11:00:49 GMT -6
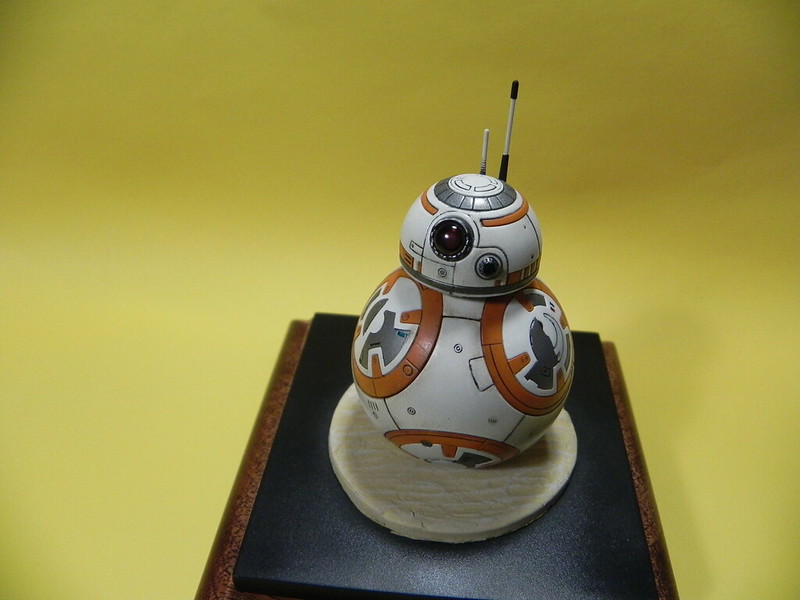
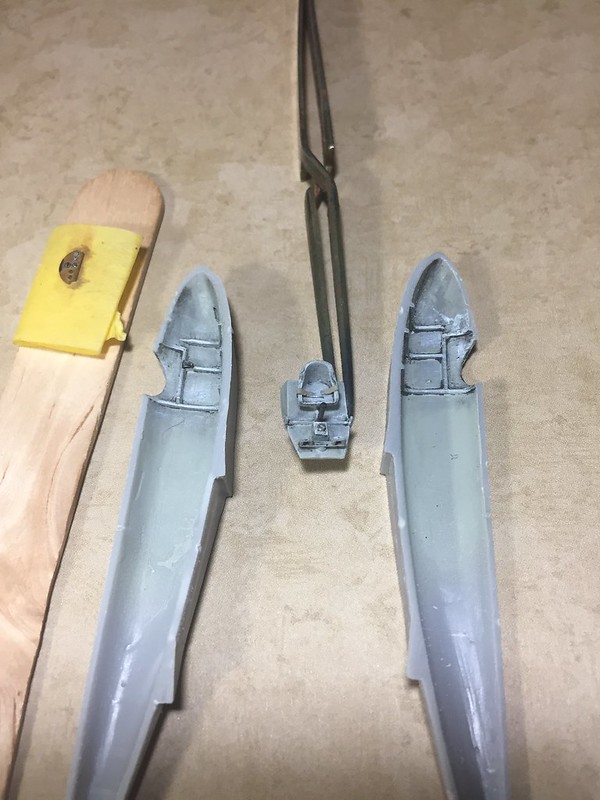
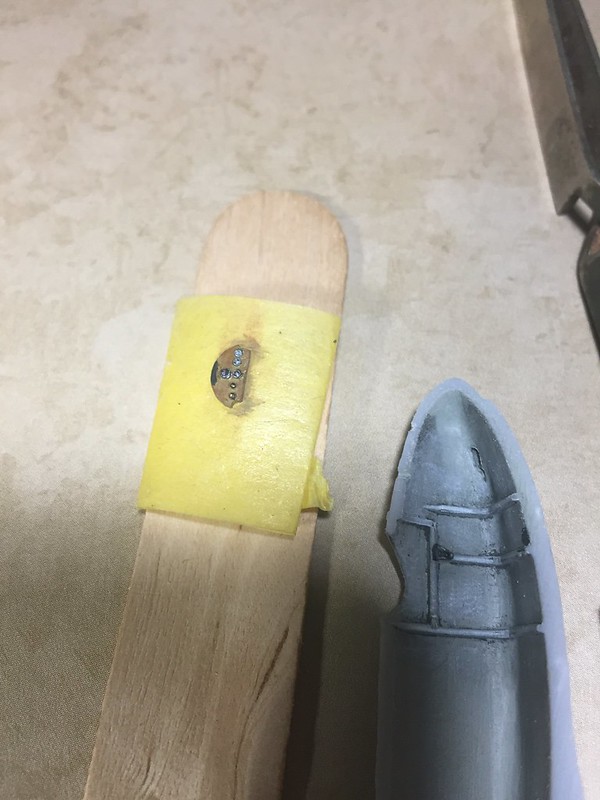
Ok, so time for an update; a lot of the inventory work is done, and I have been able to spend a generous amount of time at the work bench over the past couple weekends, so hold on this is going to be kind of a large overview  So, the Aurora Guided Missile sub got new numbers for the sail as the kit decals were horrible and completely useless. Fortunately I found a set of the correct numbers from Fantasy Printshop on Ebay so once they arrived I added those.  The kit supplied display cradle also need a new decal as again the kit supplied one proved to be unusable. I opted to make on using a suitably resized image of the box art from the original release of the kit. It is much more dramatic and colorful that the box are of the 1972 reissue I had, This was printed onto white decal paper and applied to the base.  Next I made a couple of aerials for the sail as the kit doesn't really supply anything that even closely resembles something you would see poking oout of the top of a submarines sail! These were made from random pieces of plastic rod and tub, brass wire and spare photoetch.  Once these were painted up and added to the sail she was given an overall coat of Dullcoat and attached to the display cradle.    The final detail was to use Micro Scale Krystal Kleer tinted with Tamiya clear blue to fill the open windows in the front of the sail. I also did the same with clear red and clear green to add the nav lights to the top of the sail. So, I will call this one done at this point. It was a very fun nostalgia build of an old Aurora kit, I remember seeing the kit as a kid but never building it, so I am very happy and thankful that I had the opportunity to build it now, spruce it up a bit, and sit it next to some of the modern subs on the display shelf! So, next up are these guys....  I was going to start with R2-D2, but well, BB8 just kind of took my eye, so I went with him first. I found an online source of paint mixes for these. Even though the are molded in color, I prefer to paint them rather than leave them in their unpainted plastic. So, I first mixed up the blue for R2, and the orange and slightly off white for BB8 from Tamyia color. The mix charts gave Gunze paint callouts, so I just substituted the Tamyia colors.  There were a lot of smaller parts that needed to be airbrushed, so I stuck them to pieces of cardboard according to the color they were going to be painted to make them easier to hold, and also to keep track of.  After the paint dried (doesn't take long for Tamiya paint to dry  ), I did a little test run to see how the colors looked together, I was happy as when comparing them to photos of the filming miniatures, the colors looked very close, so that was good.  Assembly was pretty quick as well since these Bandai kits fit together so well. BB-8's body basically consists of building six circular panels and plugging them into a central core, then adding the trim pieces between them.  Even though the pieces snap together, I usually add a little glue just to make sure they stay together. Of course this means some ozzed out and softened the paint leaving a nice fingerprint on one of the discs. After it dried some very careful sanding, masking, and touch up painting fixed things again almost as good as new. I made a base using the parts supplied in the kit, the little square plastic base, and there is a clear dished base supplied as well to set BB-8 into. That clear plastic base was epoxied to the plastic base and then mulliput epoxy putty applied to make the ground work and to hide the clear plastic dish BB-8 would sit in. I sculpted in the ridges in the desert base and then used the cap off a can of spray paint like a cookie cutter to form the epoxy putty into a nice circle.  While the base was setting up, BB-8 got a dark grey wash around the details and then some weathering was added around the body disc panels using enamel weathering products. I used an earth color wash to add dirt around the body panels. This was kept fairly light as I want to show some grime from him rolling around, except just not through mud puddles. The filming miniatures also displayed varying amounts of weathering depending on the scene they were used in. The base was paint Model Master Desert Sand and then drybrushed with a very light, almost white Italian sand color to bring out the details of the ripples in the sand.  The final details on BB-8 were tinting the lenses on his head, photos showed the larger on had a red tint, so Tamiya Clear Red was applied to the inside of the lens, while the smaller one showed a blue tine so Tamiya Clear Blue was applied to the inside of that one. These were then placed on the head and the two antennas on the back side of the head were added before ‘ole BB-8 was stuck to the base.   Next is this little guy….  The Shorts Cockle was a small flying boat that was unique in that it was the first all-aluminum hulled flying boat built in England. It was incredibly underpowered but did manage to take to the skies on several occasions and paved the way for the much larger and more complex flying boats shorts became known for. This is a very nice short run 1/72 scale kit from the Ukraine. It is not too bad overall and has a very nice decal sheet with both marking options carried by the Cockle. The cockpit is adequate for the scale with a stick, floor, rudder pedals, seat and instrument panel. The cockpit was painted light grey, given a dark wash and drybrushed to bring out the detail. The instrument panel was paint in wood tones and 1/72 instrument decals place where the instruments were. The seat had lap belts made from lead foil.   And the fuselage together. I was quite surprised to the fuselage halves mated up very well with on a small amount of seam work needed.  This will have to do for now, there is more, but I have just been summonsed to work early so must get ready to leave |
|
|
|
Post by Dukemaddog on Nov 13, 2019 12:04:59 GMT -6
Wow, I love long updates like this! Especially when they have such incredible detail and progress. Way to go Ernie! I'm thrilled to see you back at the bench.
|
|
|
|
Post by dogfish7 (R.I.P.) on Nov 13, 2019 14:11:34 GMT -6
Yes. That made up the gap and then some. Some very nice work.
|
|
|
|
Post by JCON on Nov 13, 2019 18:57:49 GMT -6
Excellent work my friend!!!
|
|
Ernie
SETTLING IN
   Just goin' where the plastic takes me.....
Posts: 358 
Likes: 853
|
Post by Ernie on Nov 14, 2019 0:16:30 GMT -6
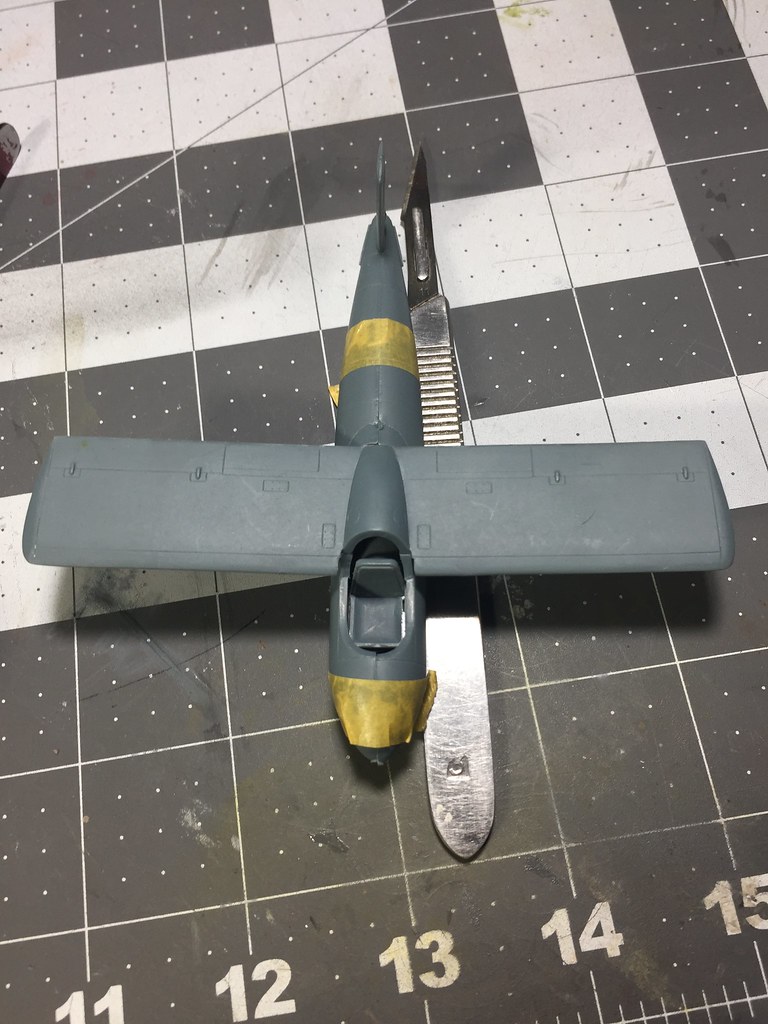
Thank you guys so much! I really appreciate the comments. It has been very nice to get back to the bench on a more consistent basis, It is also nice that I have gotten a lot of my kits and materials cataloged and organized somewhat. Still have some bagged kits to go through, and all my decals to sort, catalog, and place into binders. But, still have made a lot of progress so that is good. Anyway, to pick up where I left off when I got called to work I still have a couple of other things that are progressing towards being finished.  This is one of my bagged kits that I am going to finish. This is an early Zevezda kit repackaged by Italeri.  This is how far I got with it back in the '90's when it was first released. It is not a bad kit, but could do with adding some extra details to really bring it up a notch or two. So I ordered up some nut/bolt/washer castings from Grandit line and Master Club.  These added some necessary missing details.  I am now working on the base plate of the mortar. This is a very unique piece and is really the focal point of the model. This is really a fun little project, and a great skill building project in several areas. And, lastly, is this little guy, it is really a neat looking little plane and a Luft '46 type. One of the aspects of this hobby I really enjoy is sampling products of all those manufacturers out there cranking out kits, decals, accessories, etc. that make our hobby so interesting and fun. So in this case, I have never built a Brengun kit, so when this kit caught my eye, and it was reasonably priced I grabbed one just to see what it was like.  All the parts come on one sprue with the exception of the clear canopy.  Brengun also put out a separate photo etch detail set for the kit, so I picked up one of those as well.  Most of the construction deals with the cockpit, and being a limited run type kit, a bit of sanding, grinding, and fiddling is needed to get everything to fit properly, not a huge deal and everything fits in the end.  And a test fit with the wing set in place. For a 1/48 scale kit, it is very small.  The cockpit area was panted with Tamiya German Grey and then given a nice gloss coat to prepare it for a wash and detail painting.  So, there we are all caught up. Lots going on, but also a lot of fun! |
|
|
|
Post by RLFoster on Nov 14, 2019 8:29:25 GMT -6
Outstanding updates, Ernie (both of them)!
It's really good to see some of your work grace the site once again.
|
|
|
|
Post by JCON on Nov 14, 2019 19:01:20 GMT -6
Very cool subjects!!!
|
|
|
|
Post by Dukemaddog on Nov 15, 2019 15:23:35 GMT -6
Ernie, great looking models and some interesting subjects to boot. Way to go! Like Robert said, it's great to see more of your work here.
|
|
Ernie
SETTLING IN
   Just goin' where the plastic takes me.....
Posts: 358 
Likes: 853
|
Post by Ernie on Nov 16, 2019 13:00:55 GMT -6
Thank you guys so much for the positive comments and support, it means a lot to me. Robert and Duke, thank you so much, it is nice to have some time to build again, and share what I am doing here. Can't guarantee I will be quick about it but you will see everything that crosses my humble workbench.
|
|