rustybaer
ROLLING ON
 
Posts: 854
Likes: 1,932
Mini-Profile Background: {"image":"","color":"bde619"}
|
Post by rustybaer on Jun 11, 2022 9:45:41 GMT -6
Or: what to do with a parts kit. I had so much fun doing the first one that I decided to do it again, but this time do one without the added armor with slightly different stowage arrangements, using the knowledge I gained from all the people that chipped in on the first one. Plus, this time I can do some of the mods it was too late to do on the first one. Not only is it easier this way, I have most of the "construction" methods down. So this time I've "updated" the engine deck and done the upper glacis correction before I assembled the hull. Schweet. Pics so far:  IMG_3229 IMG_3229 by Russel Baer, on Flickr  IMG_3230 IMG_3230 by Russel Baer, on Flickr  IMG_3231 IMG_3231 by Russel Baer, on Flickr  IMG_3232 IMG_3232 by Russel Baer, on Flickr 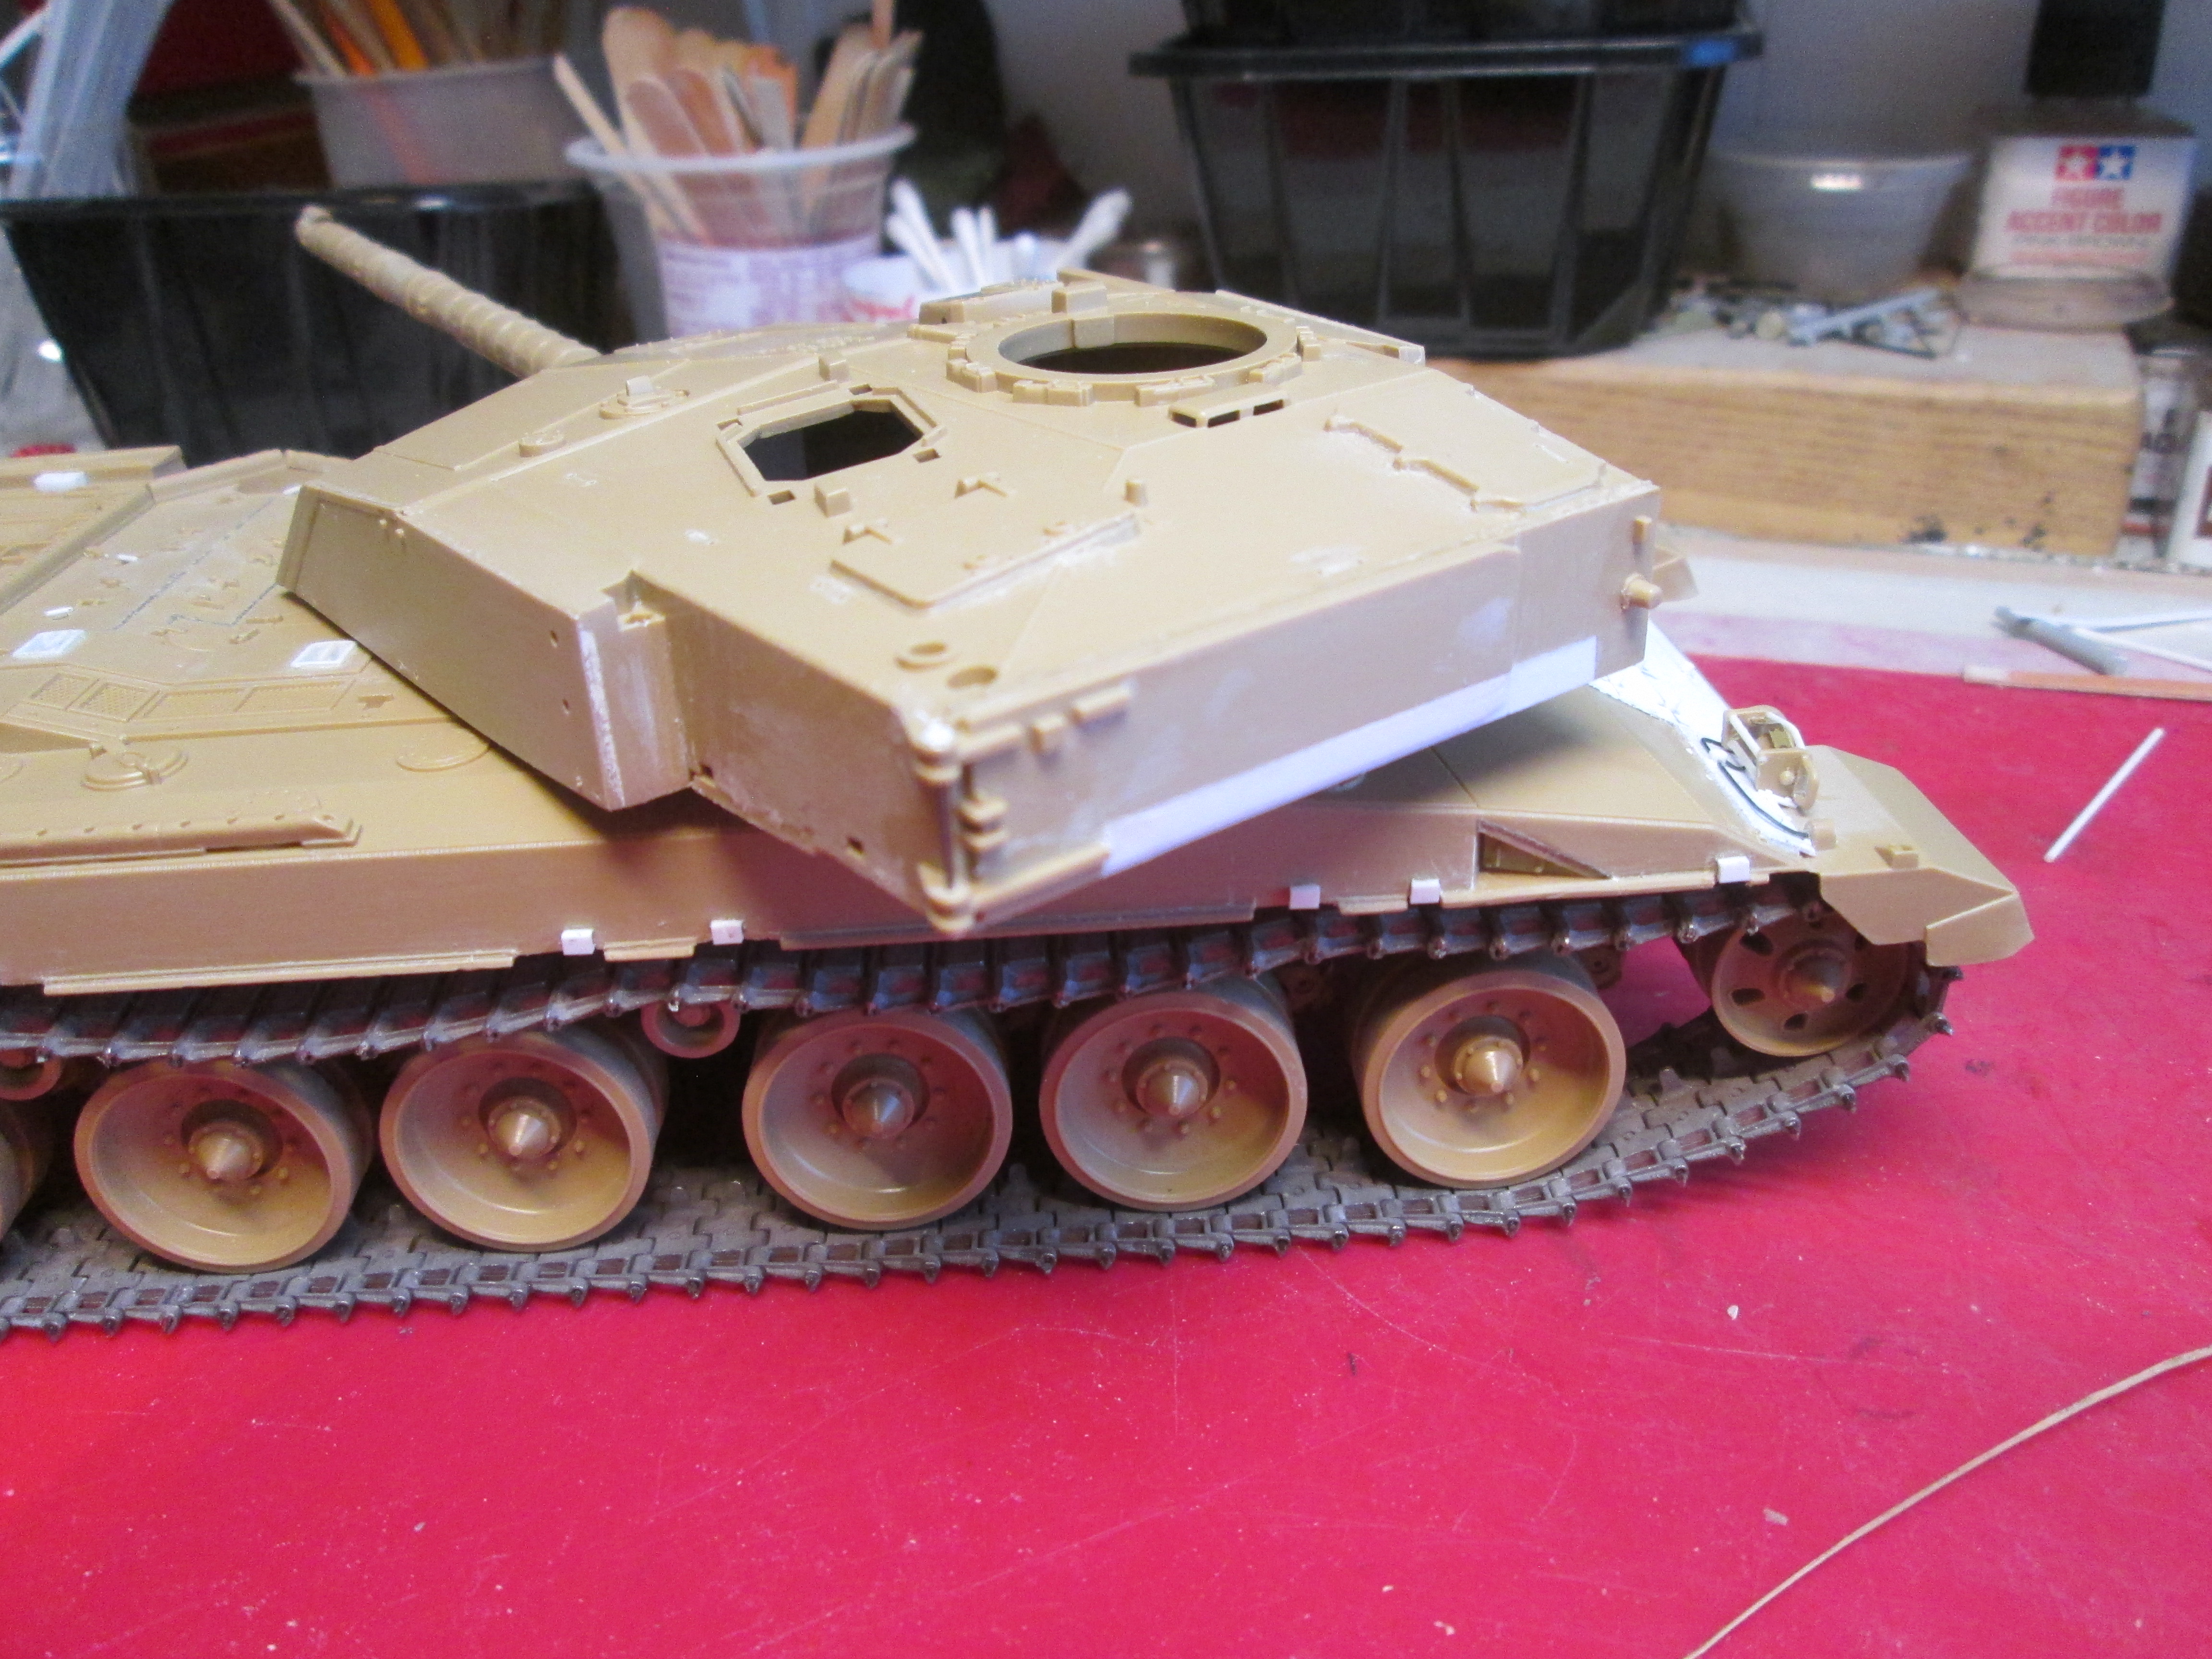 IMG_3233 IMG_3233 by Russel Baer, on Flickr Shaving molded-on details off now is so much easier..... |
|
|
|
Post by JCON on Jun 12, 2022 8:27:41 GMT -6
Nice quick work!!!
|
|
rustybaer
ROLLING ON
 
Posts: 854
Likes: 1,932
Mini-Profile Background: {"image":"","color":"bde619"}
|
Post by rustybaer on Jun 12, 2022 12:50:15 GMT -6
It helps when I just did all this stuff...... or most of it anyway. This one will be slightly different. This is a quick pic of the junk added to the hull sides, mostly stuff for tow cable brackets and hangers, some of unknown purpose but obvious in pics.  IMG_3238 IMG_3238 by Russel Baer, on Flickr One thing different on this one than the last: I'll be scratching the later exhaust outlets with no thermal shrouds. Still pondering material: Brass or plastic? |
|
rustybaer
ROLLING ON
 
Posts: 854
Likes: 1,932
Mini-Profile Background: {"image":"","color":"bde619"}
|
Post by rustybaer on Jun 13, 2022 20:41:46 GMT -6
I'll have to wait until these are set up enough to clean up, but I did the exhaust covers this morning, tee-dee-us! I hope they clean up, sure don't want to try again...  IMG_3239 IMG_3239 by Russel Baer, on Flickr  IMG_3240 IMG_3240 by Russel Baer, on Flickr I'm thinking I'm going to try and scratch some empty extra fuel drum racks too, or just use the kit stuff, then the tow cable brackets and gun travel crutch will finish the lower hull... probably. |
|
|
|
Post by JCON on Jun 14, 2022 8:54:19 GMT -6
Nice scratching!!!
|
|
rustybaer
ROLLING ON
 
Posts: 854
Likes: 1,932
Mini-Profile Background: {"image":"","color":"bde619"}
|
Post by rustybaer on Jun 14, 2022 16:05:58 GMT -6
Thanks J. Here's a pic with it all cleaned up and more scale sized...  IMG_3283 IMG_3283 by Russel Baer, on Flickr I did a few things on the turret today too, and built the gun travel crutch and the extra fuel drums. Once the drums were dented up they look pretty good. I may use them as-is rather than scratching empty mounts. I kind of like the look. |
|
rustybaer
ROLLING ON
 
Posts: 854
Likes: 1,932
Mini-Profile Background: {"image":"","color":"bde619"}
|
Post by rustybaer on Jun 21, 2022 14:12:00 GMT -6
Bunches of tiny bits done since last post: turret is started, with the footman's loops from wire this time, tiny bits of .020" plastic for the "feet", giving a definite 3D look instead of the PE I used last time. Also done are all the tow cable fittings on the hull sides and the exhaust covers. 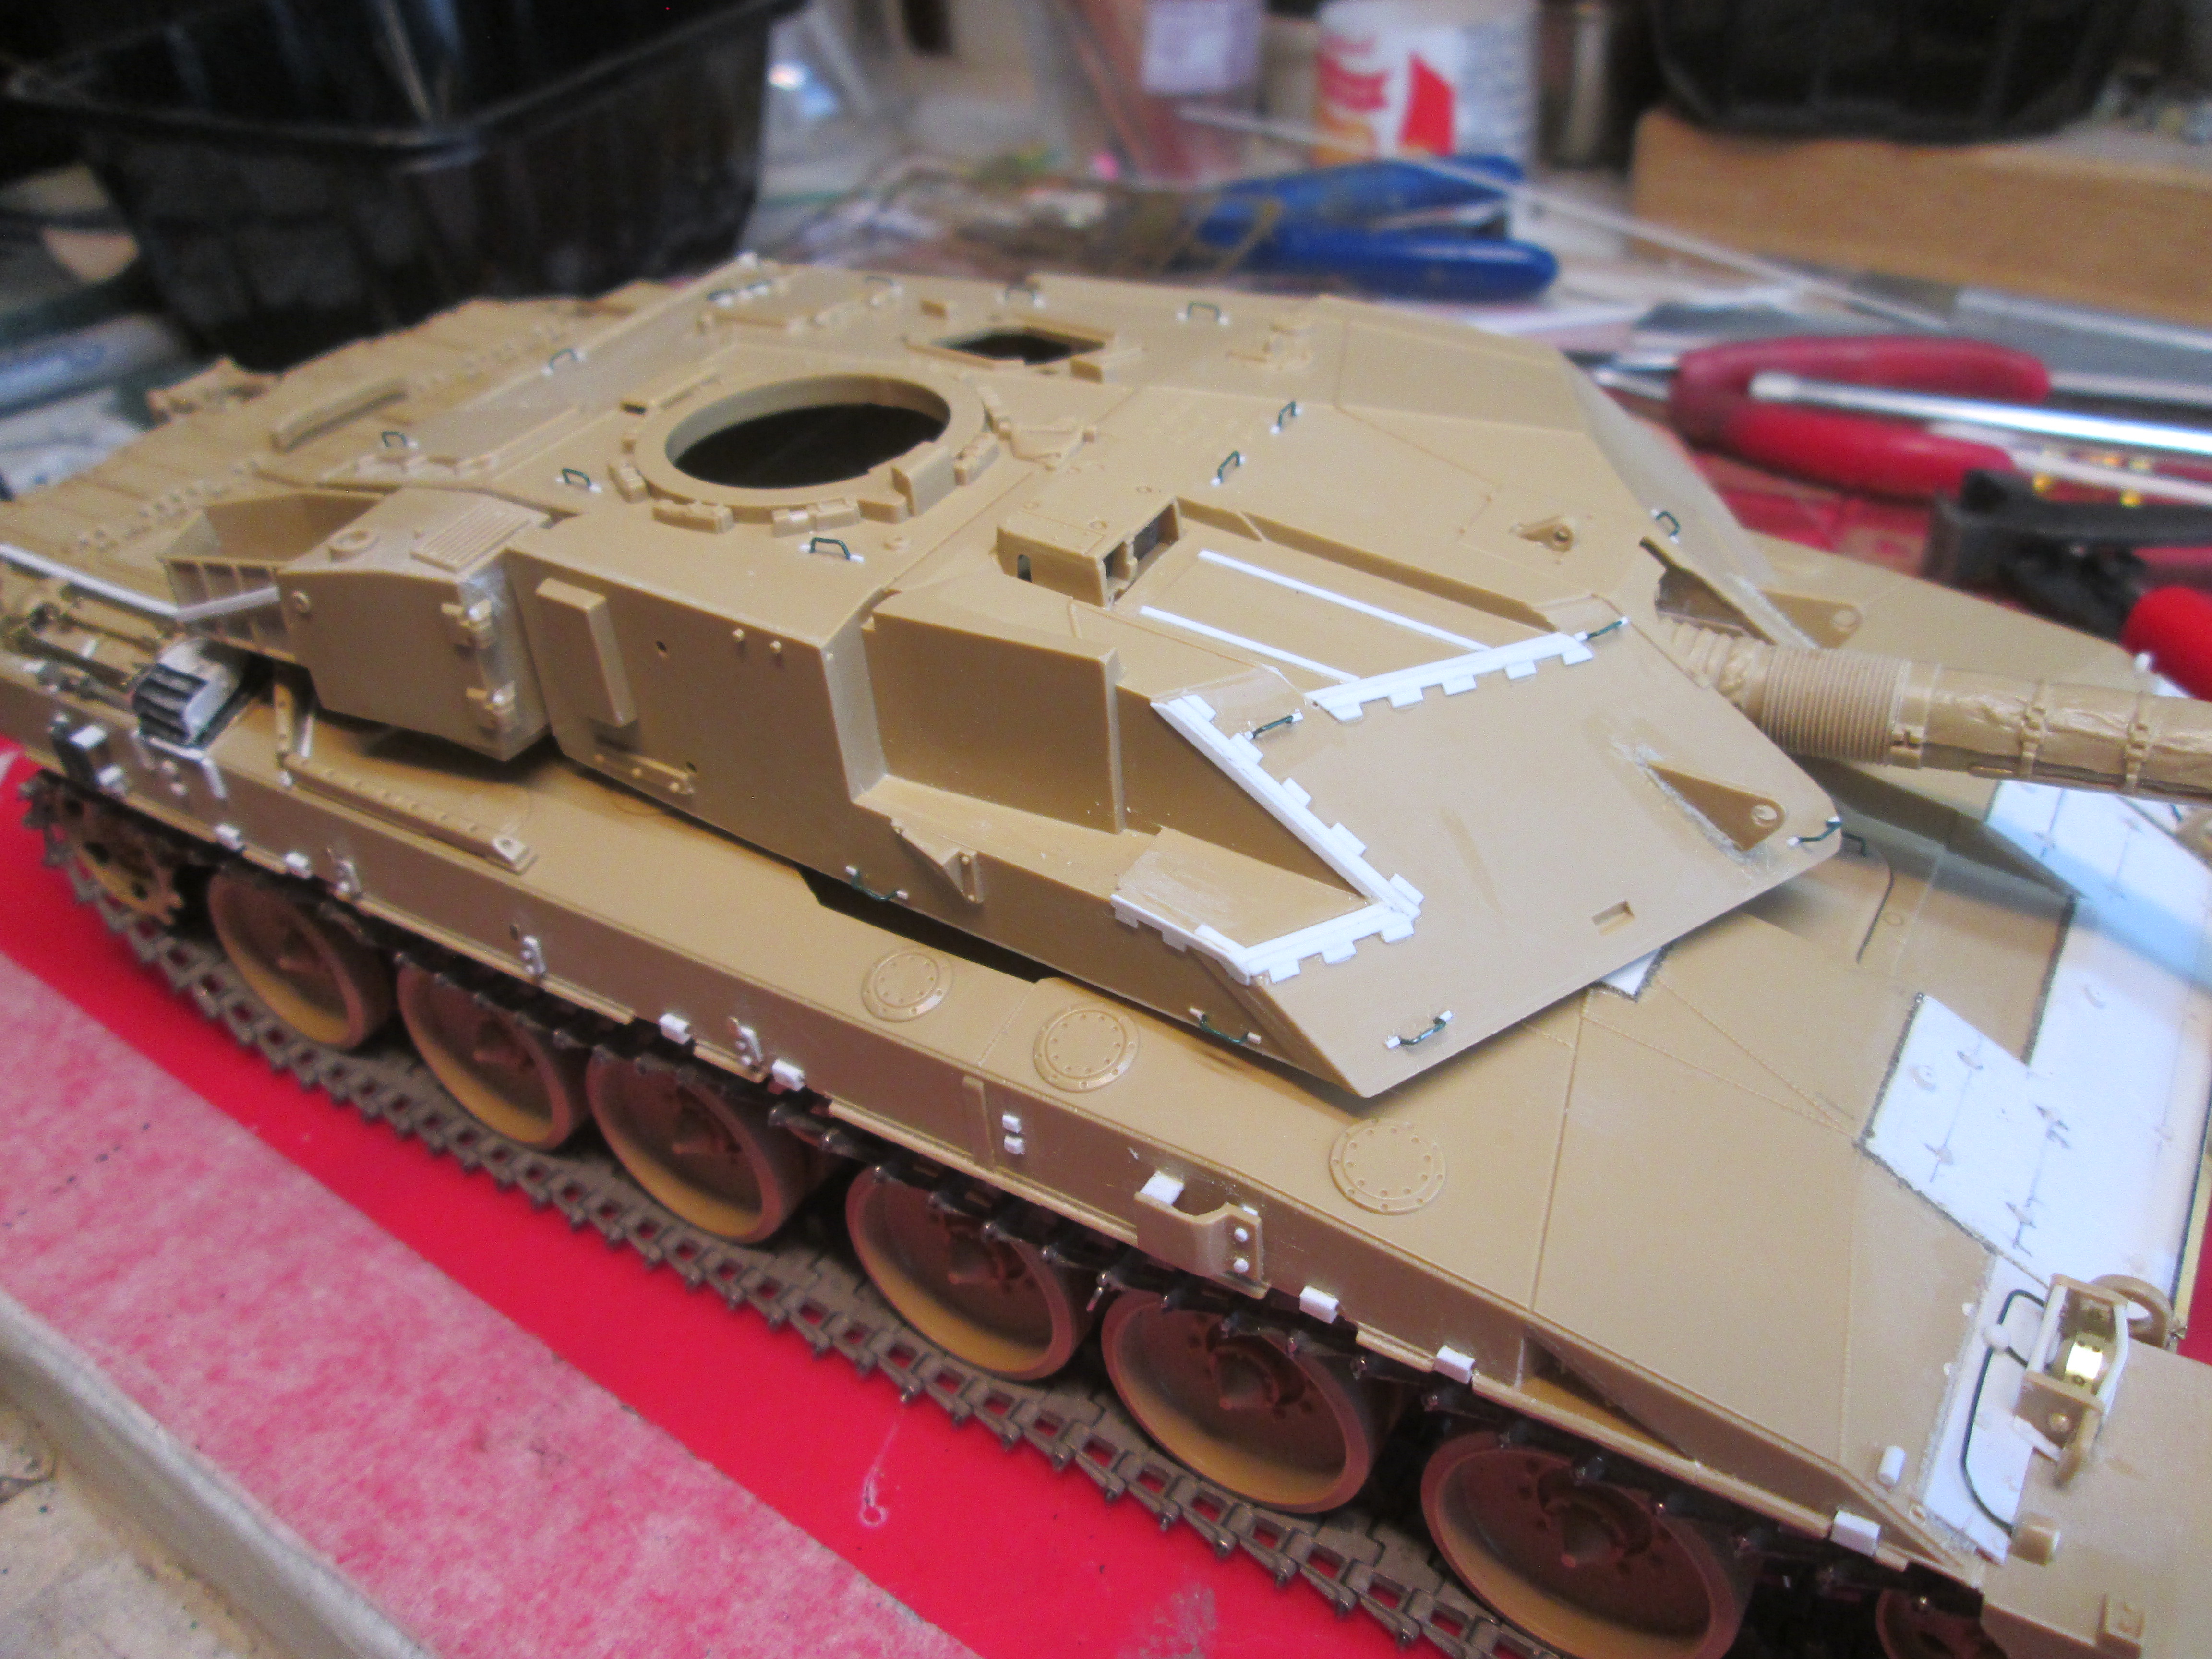 IMG_3369 IMG_3369 by Russel Baer, on Flickr 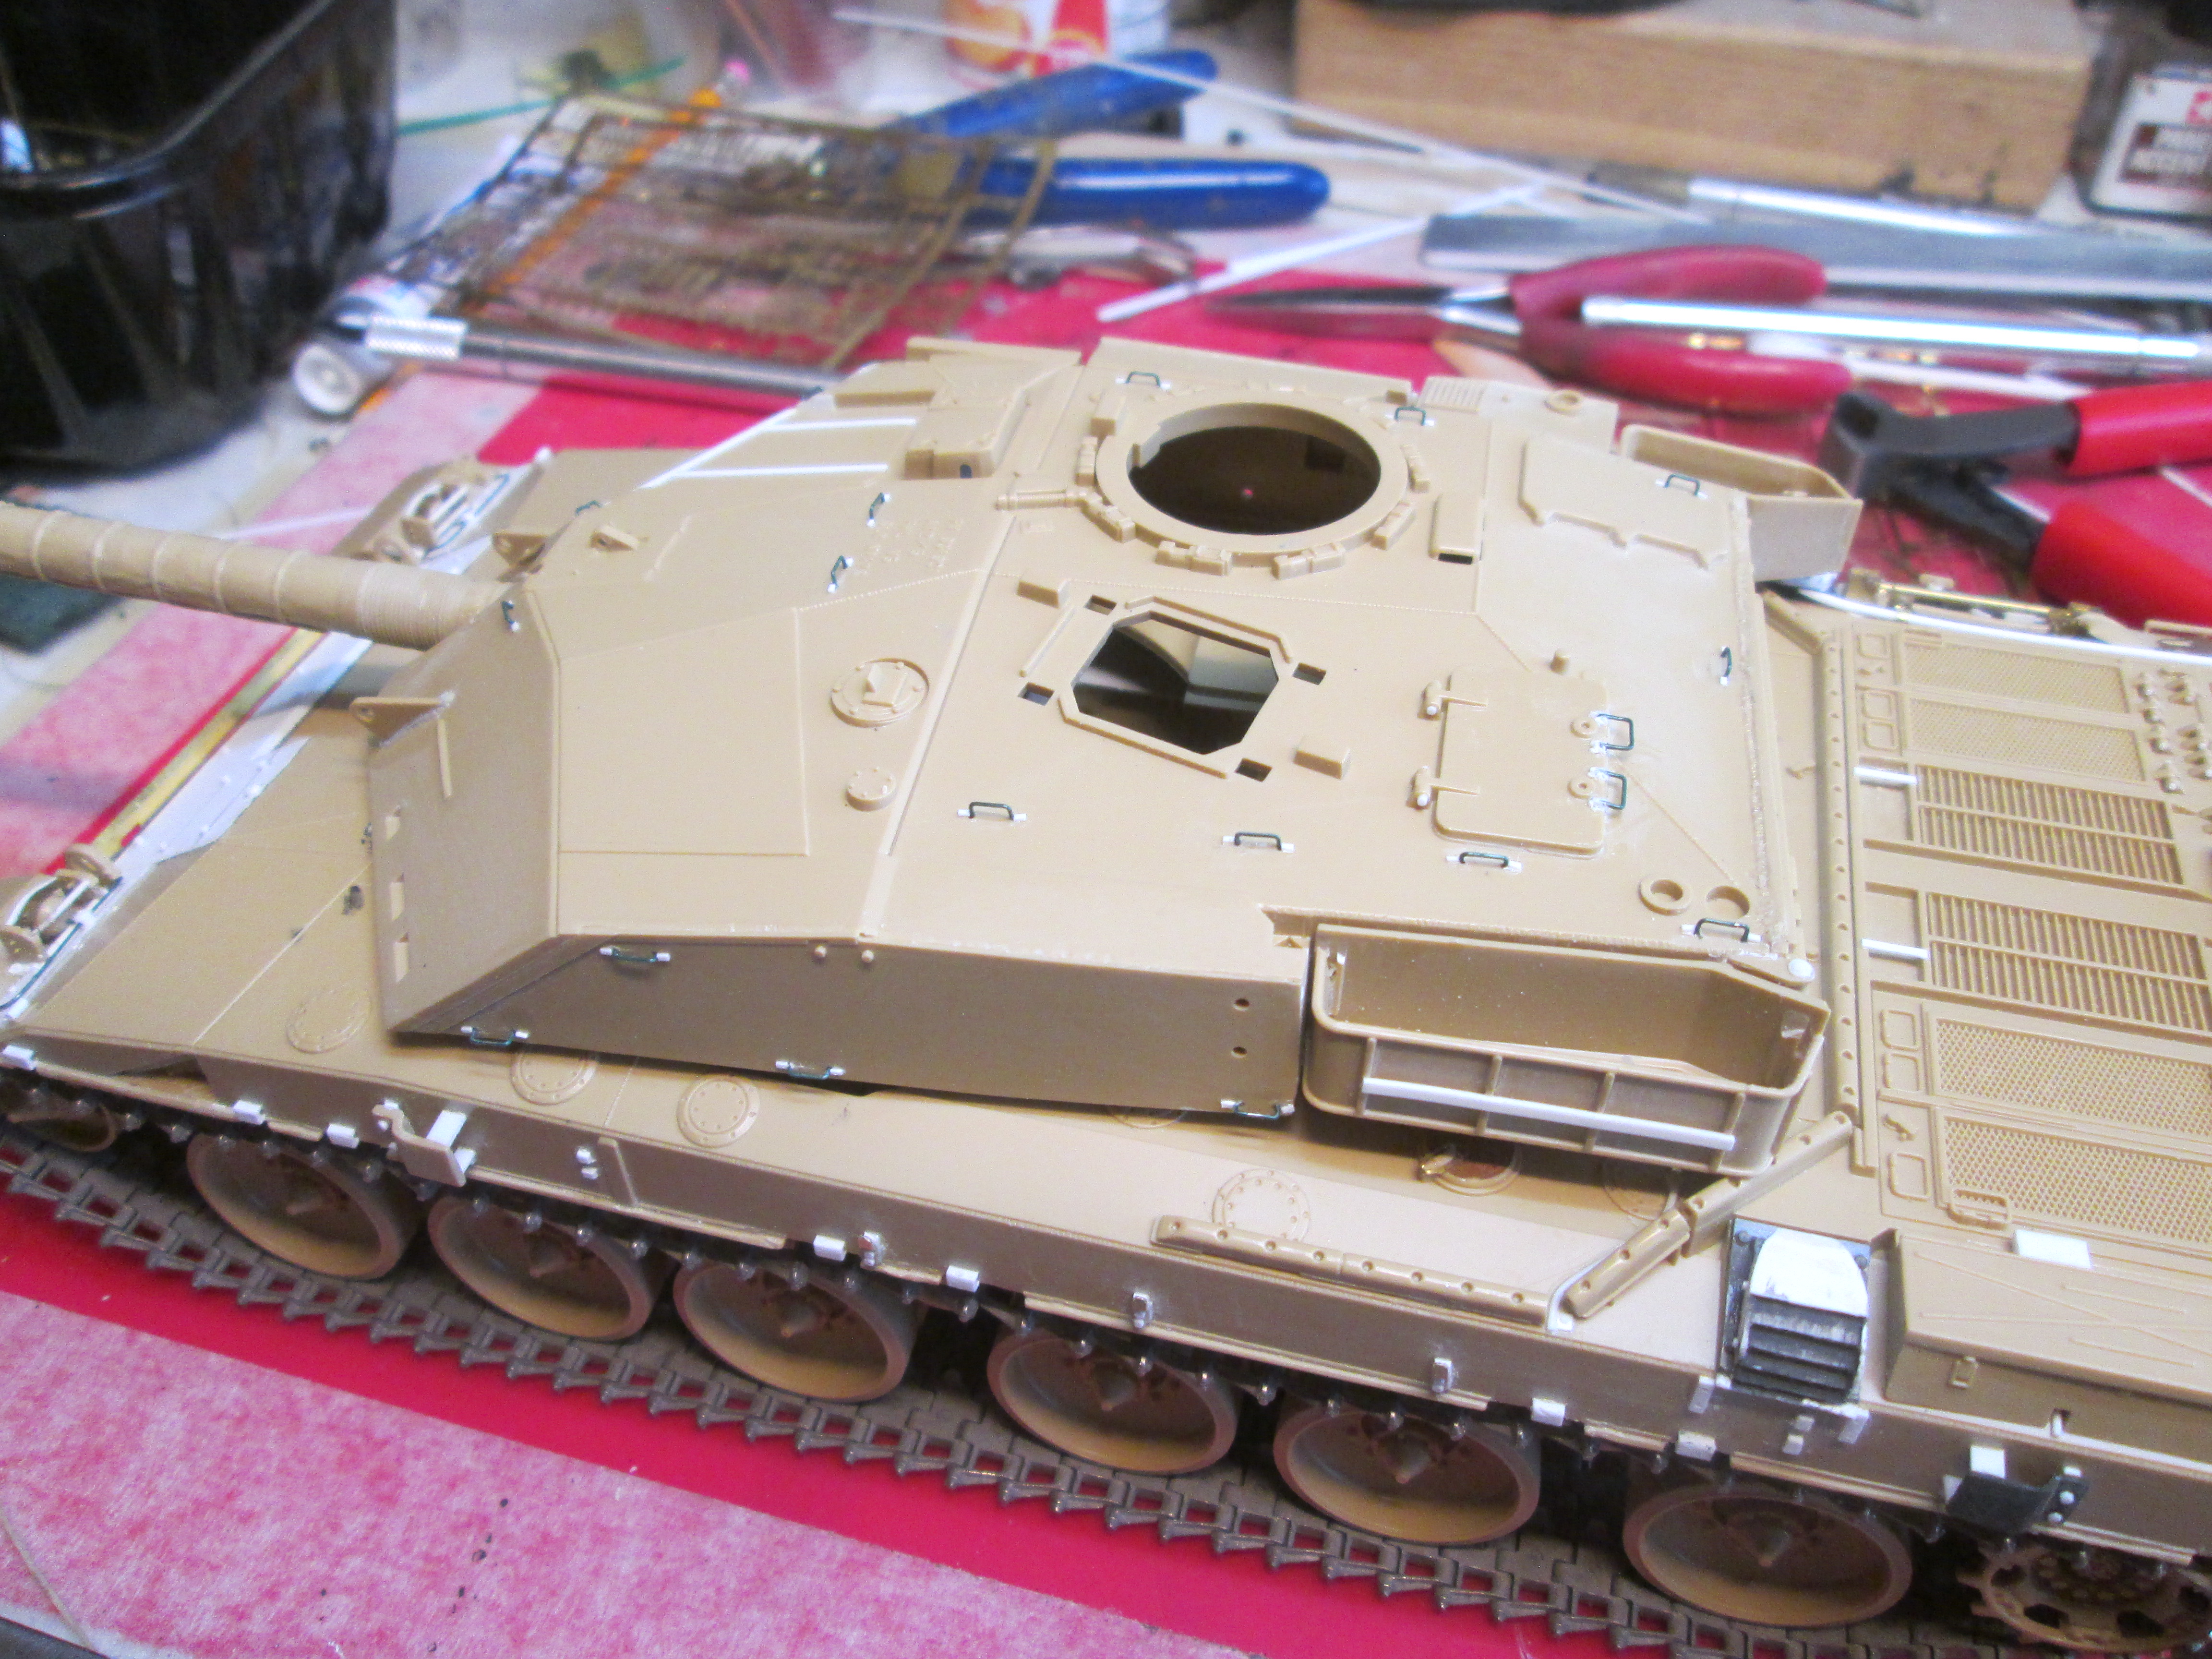 IMG_3370 IMG_3370 by Russel Baer, on Flickr I'm going to scratch another turret bin (it's always easier the second time, right?) and both mesh turret side baskets, should tomorrow unless I'm working. One can always hope. |
|
rustybaer
ROLLING ON
 
Posts: 854
Likes: 1,932
Mini-Profile Background: {"image":"","color":"bde619"}
|
Post by rustybaer on Jun 24, 2022 6:52:40 GMT -6
Rear bin is finished. I built it exactly the same as the first one, with the exception of the main hinges: all plastic this time since I lost two of the PE parts, but I think I like this one better. Plus, it's a cleaner build.  IMG_3397 IMG_3397 by Russel Baer, on Flickr  IMG_3396 IMG_3396 by Russel Baer, on Flickr It's always easier the second time, right? |
|
|
|
Post by JCON on Jun 24, 2022 8:34:01 GMT -6
More nice work...
|
|
rustybaer
ROLLING ON
 
Posts: 854
Likes: 1,932
Mini-Profile Background: {"image":"","color":"bde619"}
|
Post by rustybaer on Jun 27, 2022 14:16:56 GMT -6
Side basket, part two: 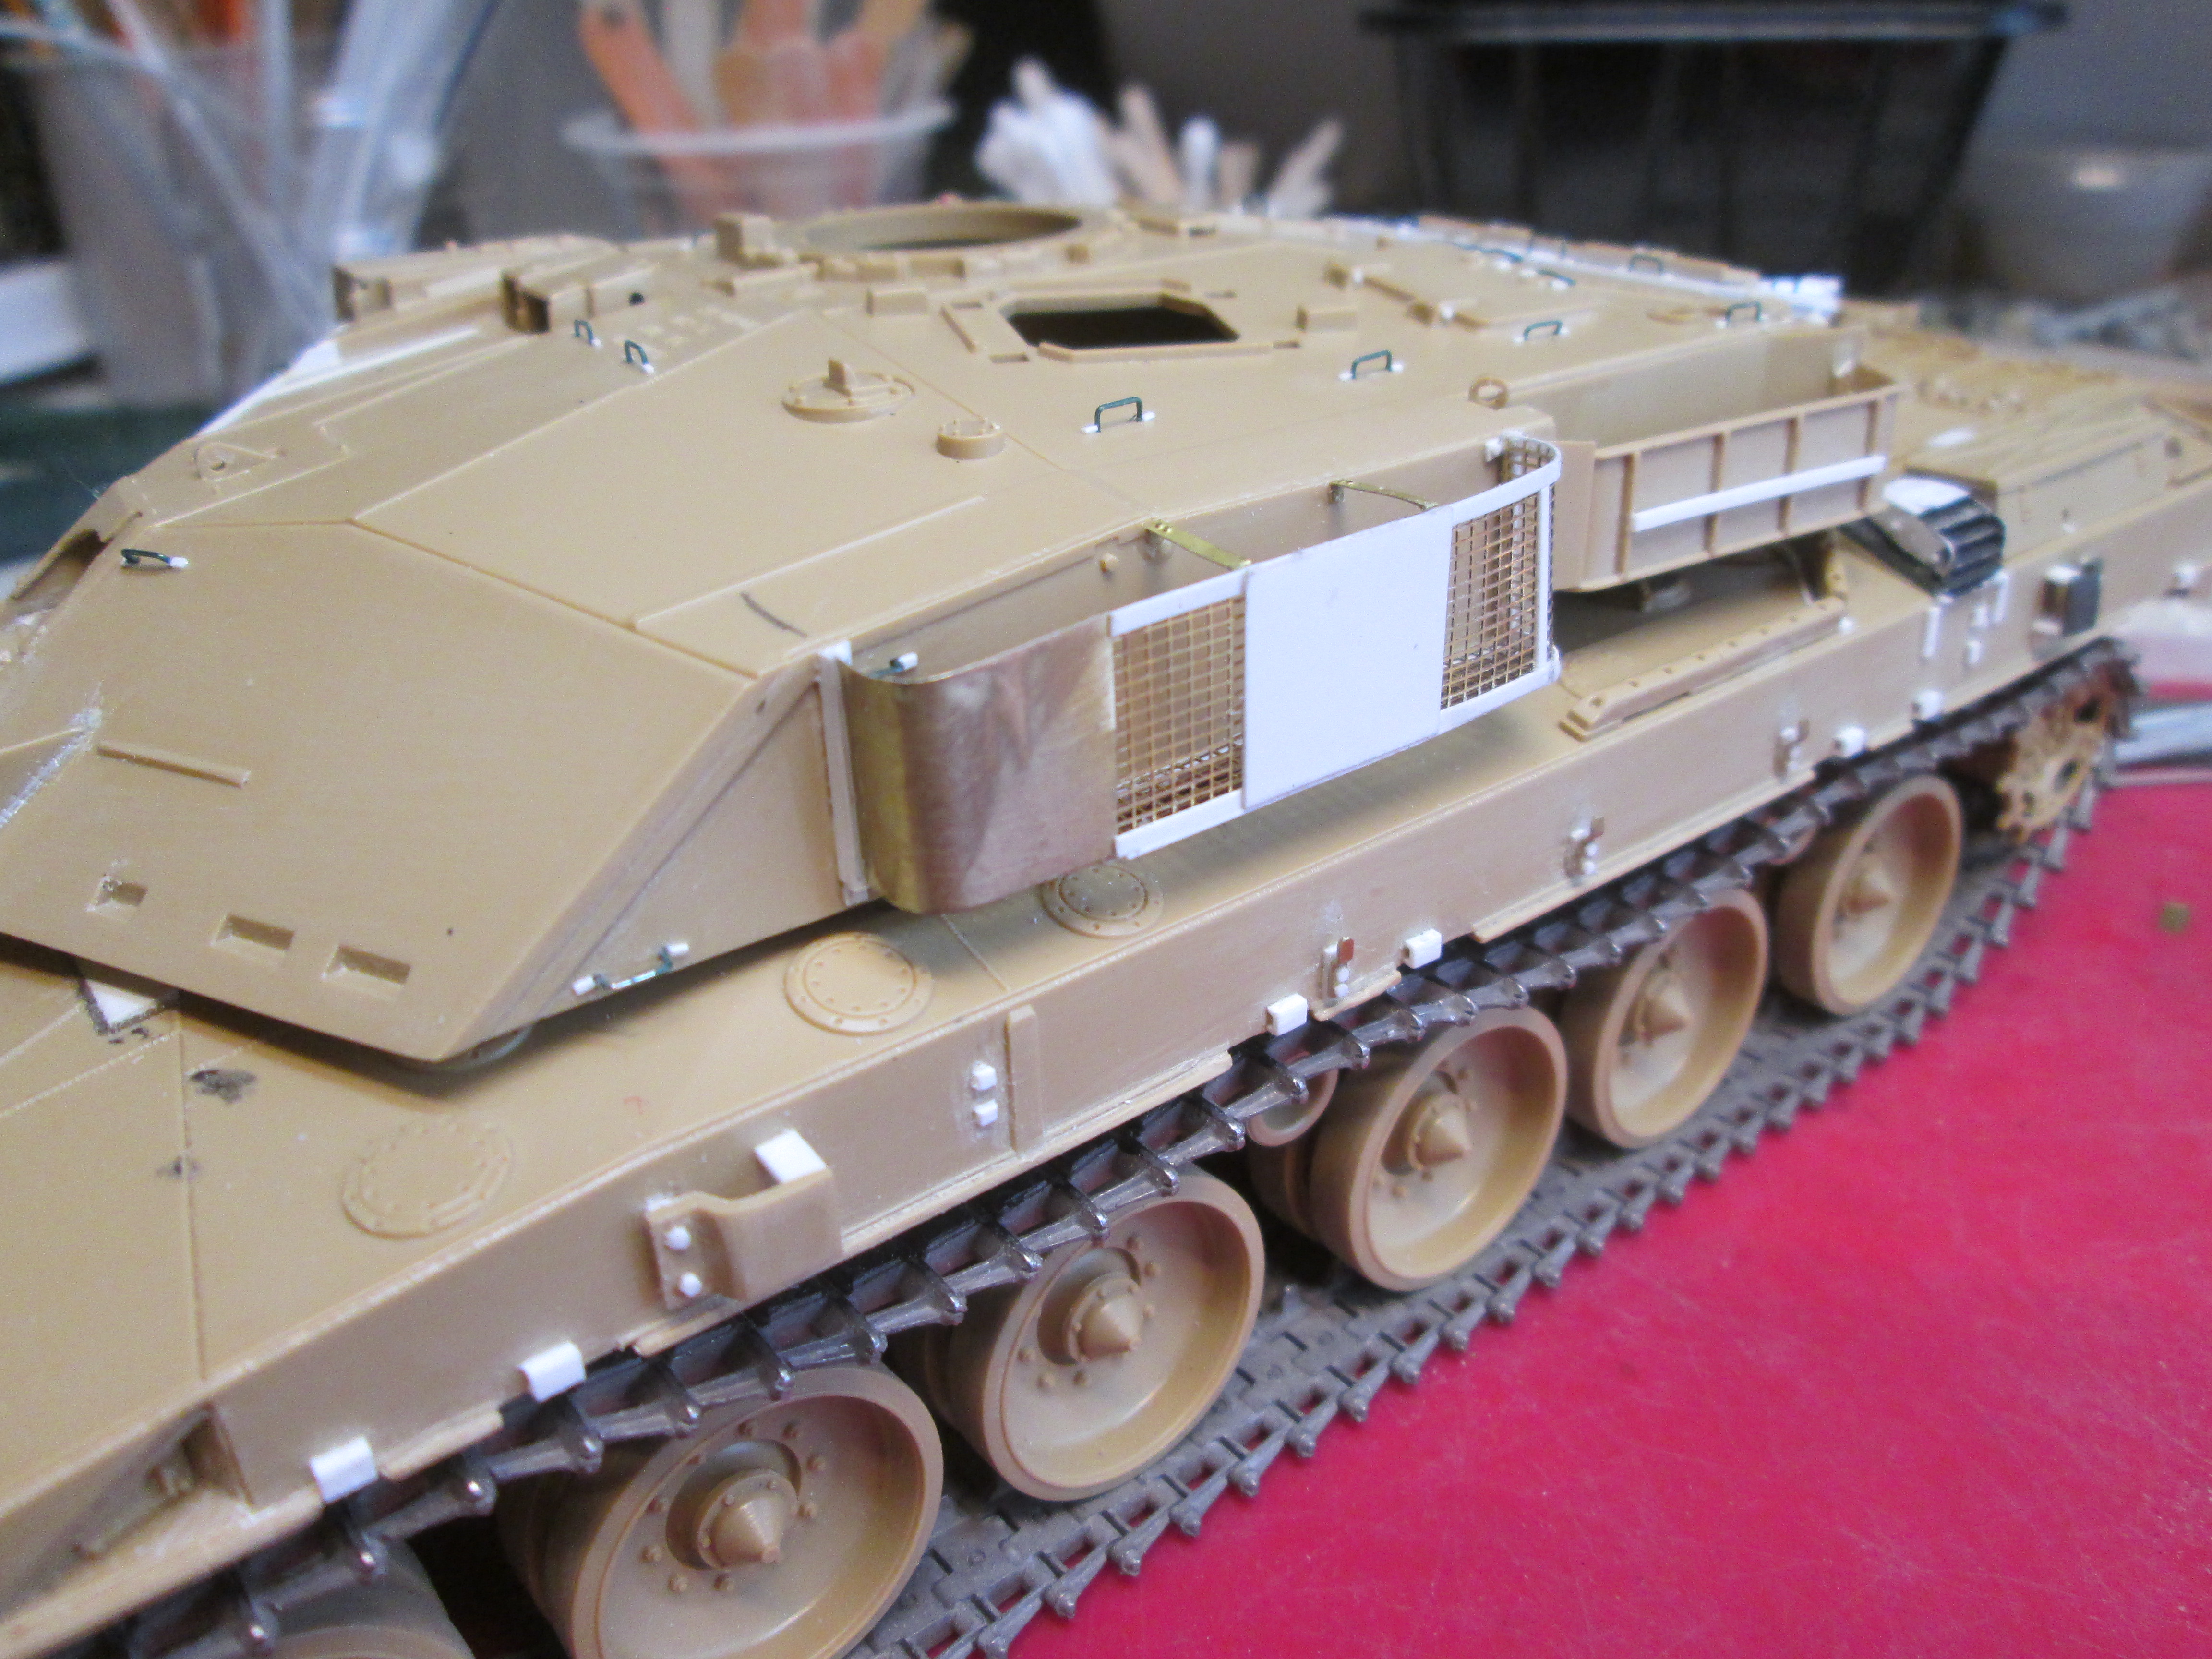 IMG_3469 IMG_3469 by Russel Baer, on Flickr Trying to duplicate the same thing from the first build again, took less time but still fiddly. This tank gets a smaller version of this basket on the right side as well, in place of the enclosed bin the first one has. Joy again. |
|
rustybaer
ROLLING ON
 
Posts: 854
Likes: 1,932
Mini-Profile Background: {"image":"","color":"bde619"}
|
Post by rustybaer on Jun 29, 2022 15:01:15 GMT -6
Hull front has some more PE added, should cover it:  IMG_3472 IMG_3472 by Russel Baer, on Flickr And the right side basket on and done, with the corner bin cover well along:  IMG_3471 IMG_3471 by Russel Baer, on Flickr Finally, the left side corner bin, cover on, just needs straps:  IMG_3470 IMG_3470 by Russel Baer, on Flickr Still lots of stuff to add to the turret top and front.... |
|
rustybaer
ROLLING ON
 
Posts: 854
Likes: 1,932
Mini-Profile Background: {"image":"","color":"bde619"}
|
Post by rustybaer on Jun 30, 2022 16:15:40 GMT -6
Not much jumps out as different, but I had a good afternoon of modeling, and all the major bits are done. There's a lot of smaller items to finish up, but I may get to primer late next week. 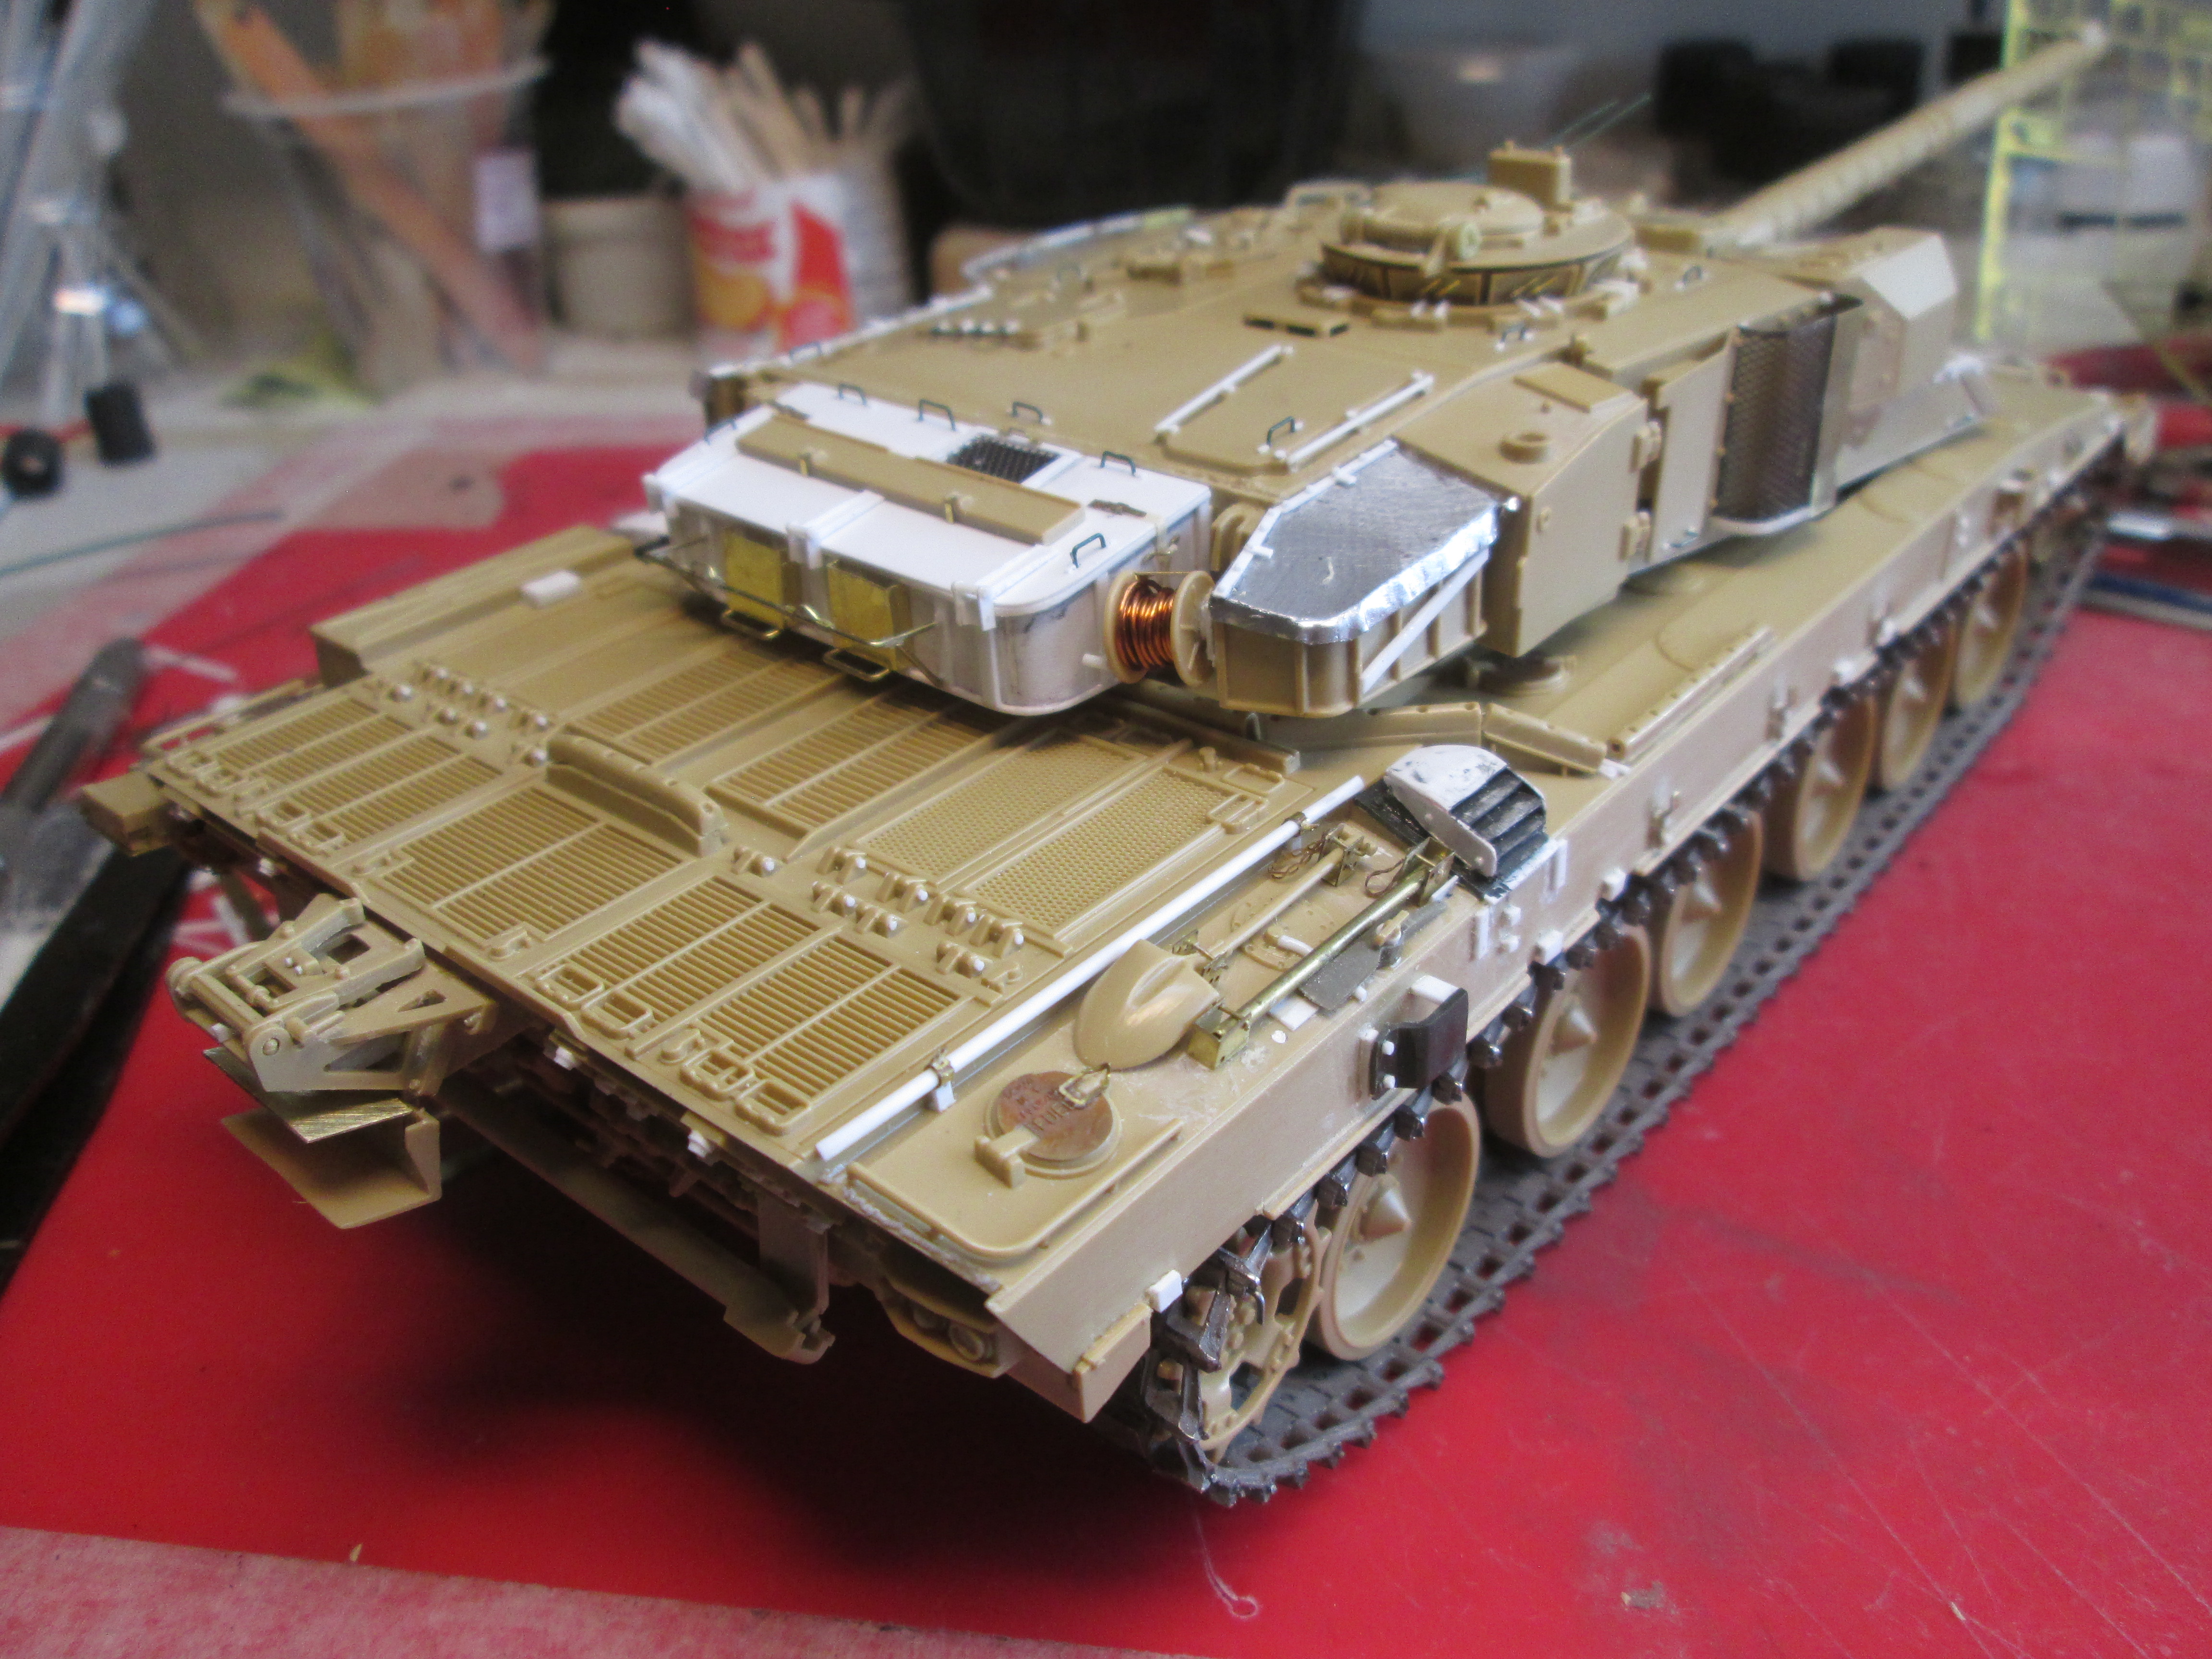 IMG_3476 IMG_3476 by Russel Baer, on Flickr  IMG_3475 IMG_3475 by Russel Baer, on Flickr I'm contemplating doing the smoke dischargers empty, just for contrast with the other one. I'll ponder.... |
|
|
|
Post by mustang1989 on Jul 9, 2022 7:22:11 GMT -6
I can really never get enough of all of these details that you put into your builds Russ. Just so much to see. Looking forward to more progress on this build bud.
|
|
rustybaer
ROLLING ON
 
Posts: 854
Likes: 1,932
Mini-Profile Background: {"image":"","color":"bde619"}
|
Post by rustybaer on Jul 9, 2022 18:24:49 GMT -6
Thanks! Okay, here's something small. I only had an hour or so the last few days to do fun stuff, so I did the smoke grenade launchers. The bracket is severely over scale thickness, so it got sanded and filed to something close to real, I added the cutout at its base and made a data plate from scrap PE. Easily done, and, well, why not?  IMG_3477 IMG_3477 by Russel Baer, on Flickr Work is picking up and my assignments are all over the place. I did 300 miles Thursday for two, in the Miata since the MINI is broken, again. Five hours at 5K RPM on I35 and a few select backroads and all I wanted to do when I got home was sit on the couch and veg, not an ideal frame of mind to take to the bench. Anyhootch, maybe Monday I'll do some more goodies on the turret, like tools and stuff. |
|
rustybaer
ROLLING ON
 
Posts: 854
Likes: 1,932
Mini-Profile Background: {"image":"","color":"bde619"}
|
Post by rustybaer on Jul 11, 2022 15:03:45 GMT -6
Since I broke one of the antenna mounts in the first one and robbed this kit for it, I had to do something for this one's mounts. I decided to scratch them both since the chances of making one just like the kit part were remote. While I was there I re-did the hardware on top of the grease gun too. I wasn't real happy with the other one, and the kit part is weak... 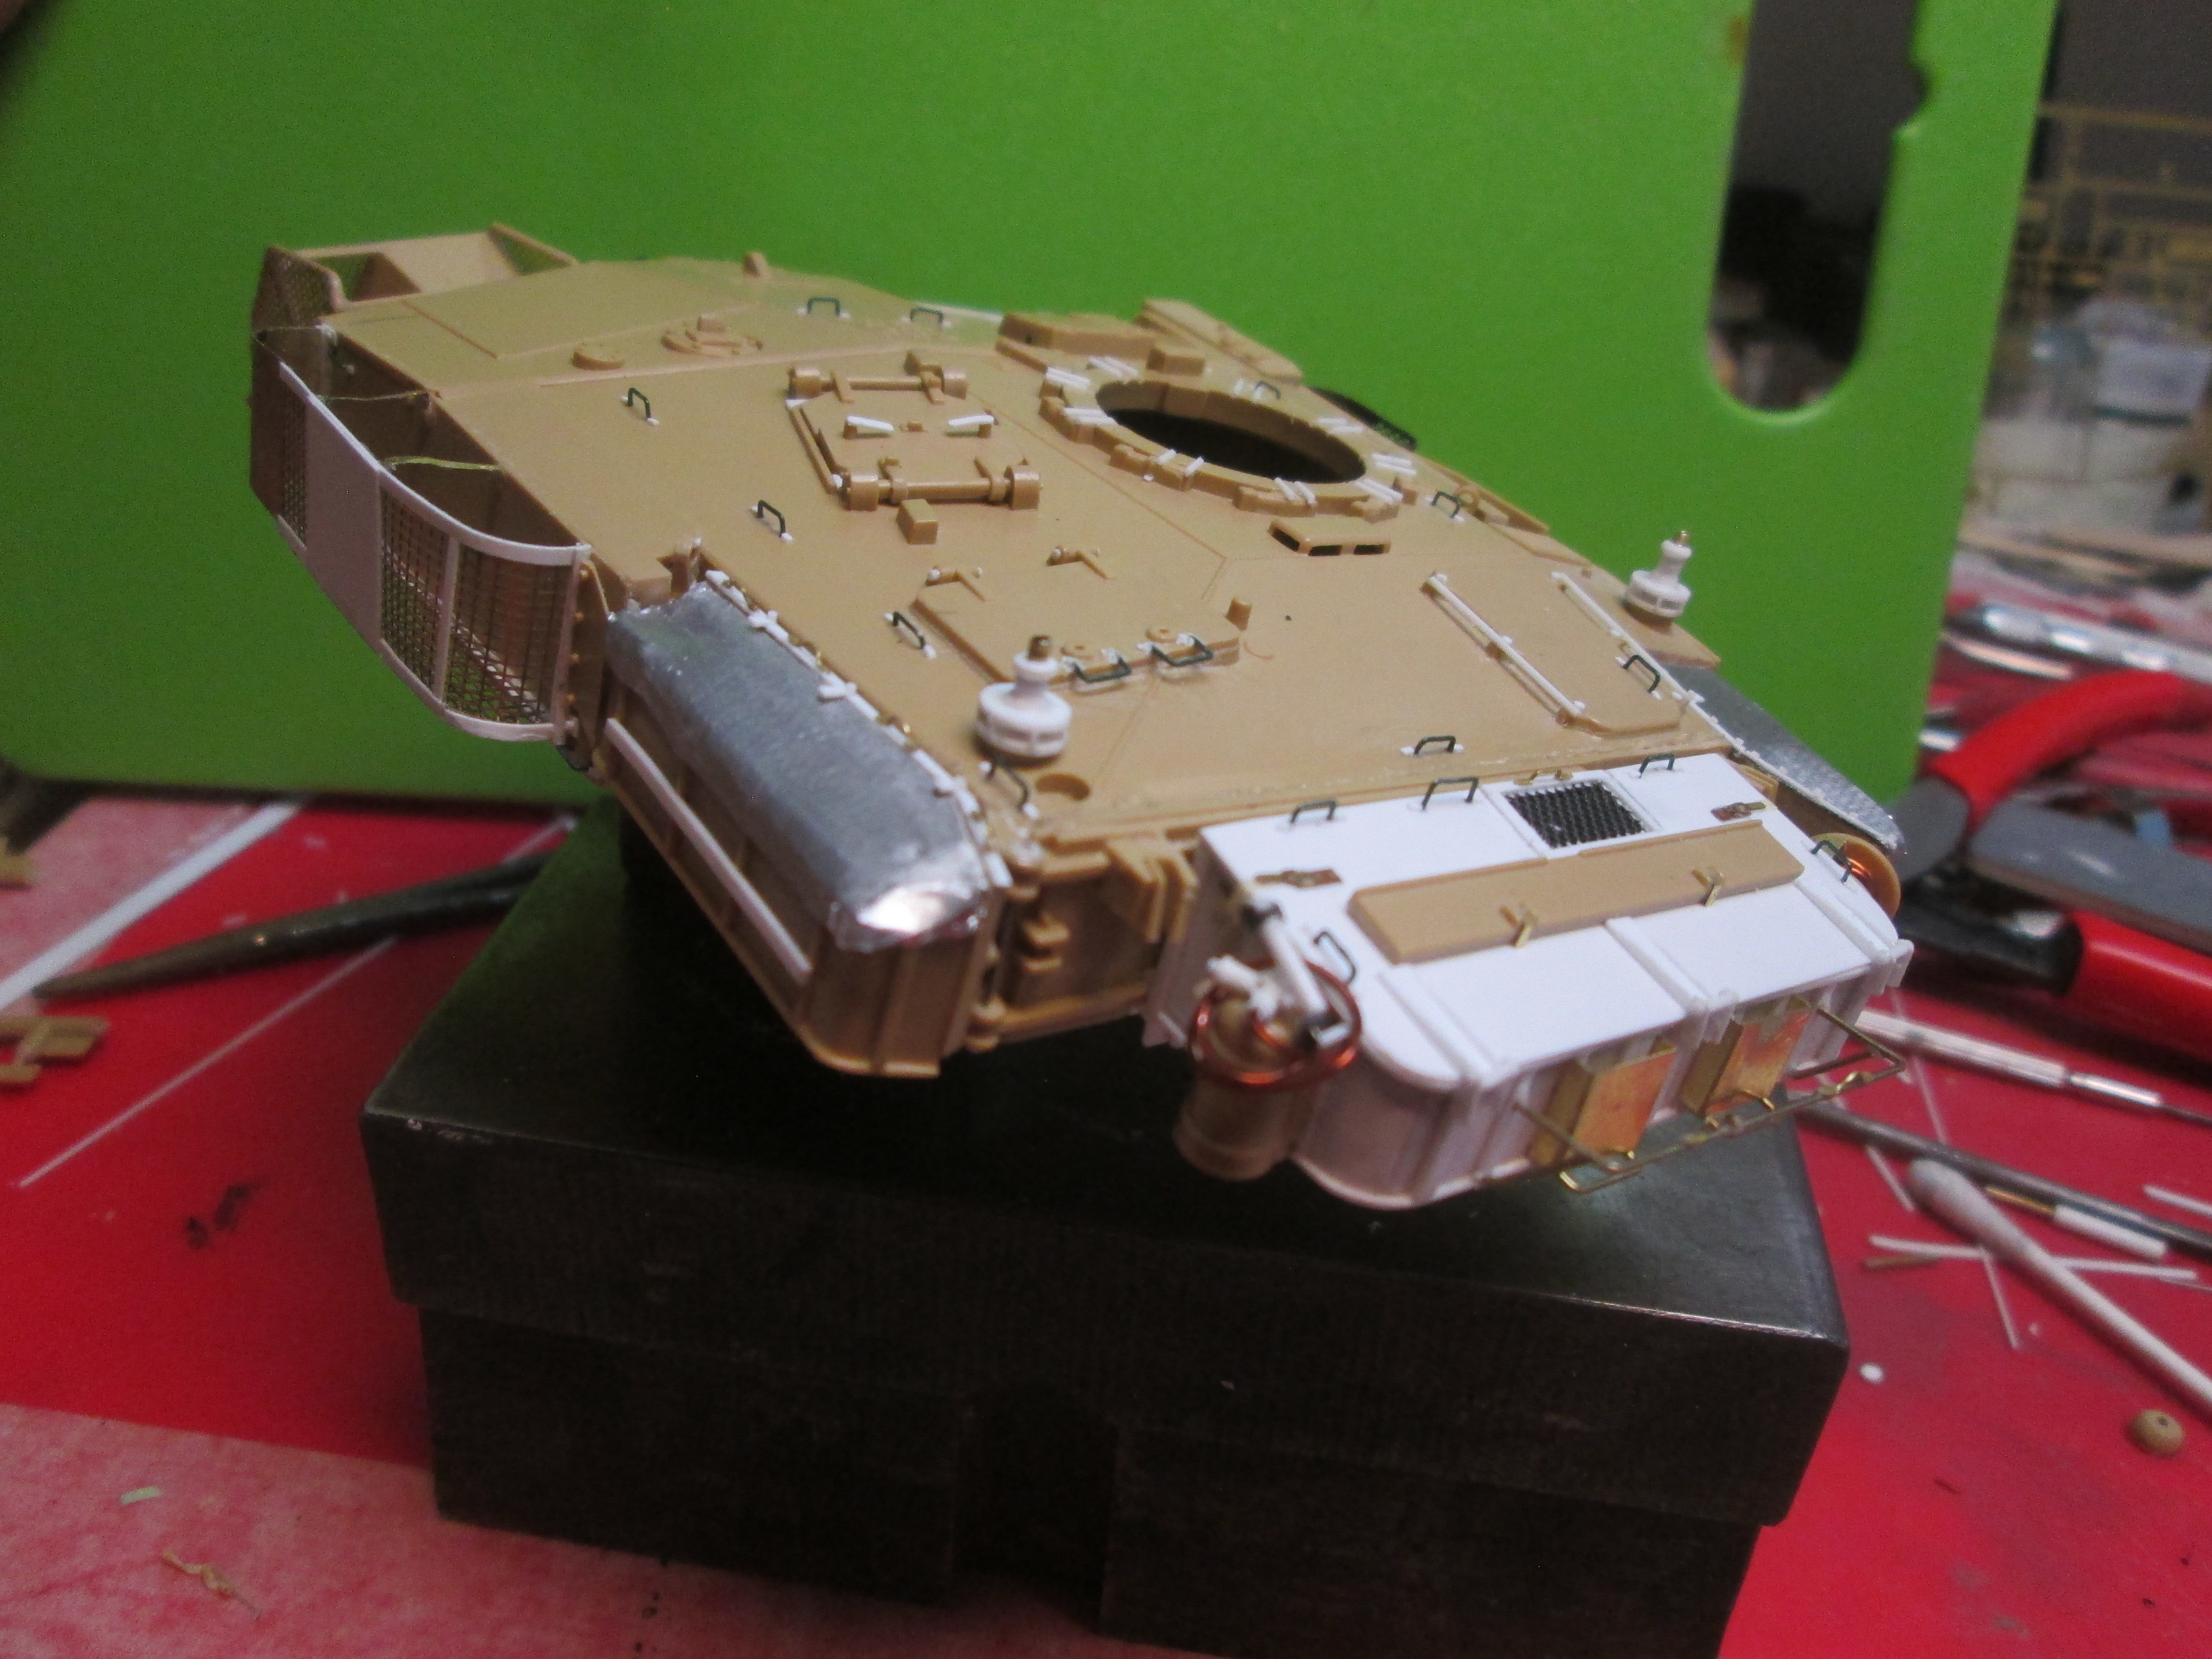 IMG_3478 IMG_3478 by Russel Baer, on Flickr |
|
|
|
Post by ARMORGUY on Jul 12, 2022 0:28:49 GMT -6
Ok I'm totally blown away now, most Incredible!!!!
|
|
rustybaer
ROLLING ON
 
Posts: 854
Likes: 1,932
Mini-Profile Background: {"image":"","color":"bde619"}
|
Post by rustybaer on Jul 15, 2022 14:39:37 GMT -6
Just about ready for paint. 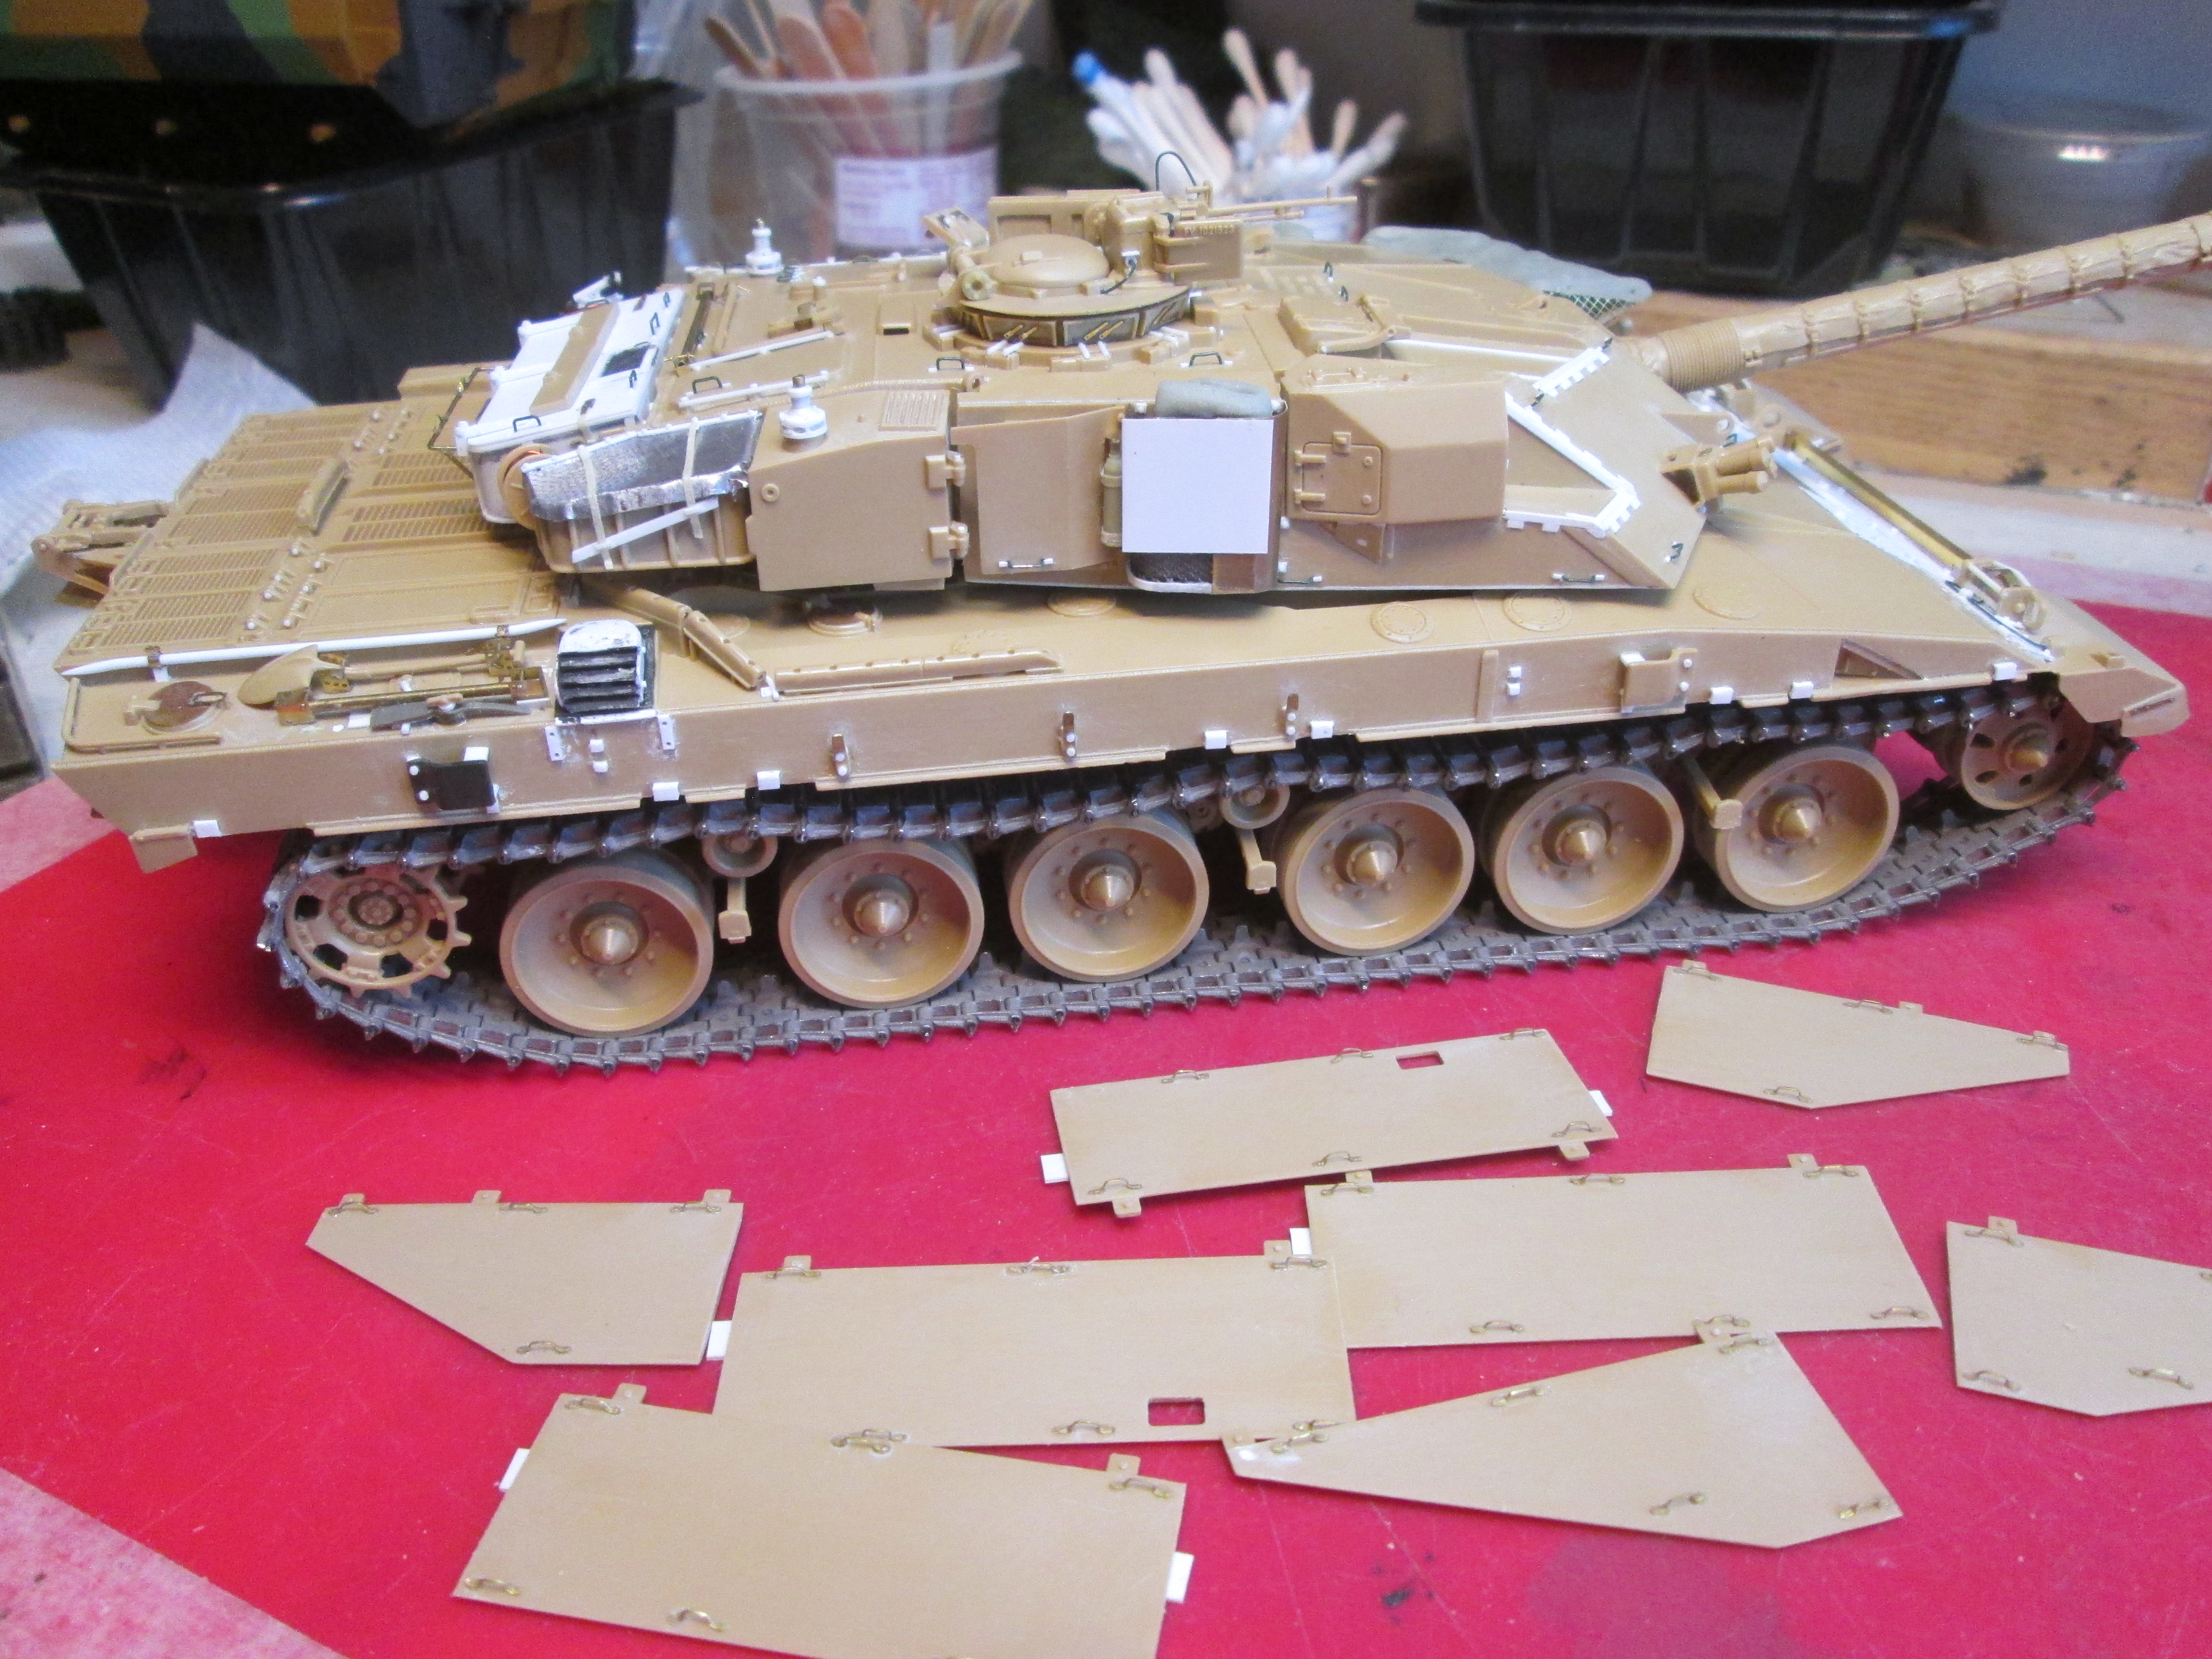 IMG_3480 IMG_3480 by Russel Baer, on Flickr  IMG_3481 IMG_3481 by Russel Baer, on Flickr 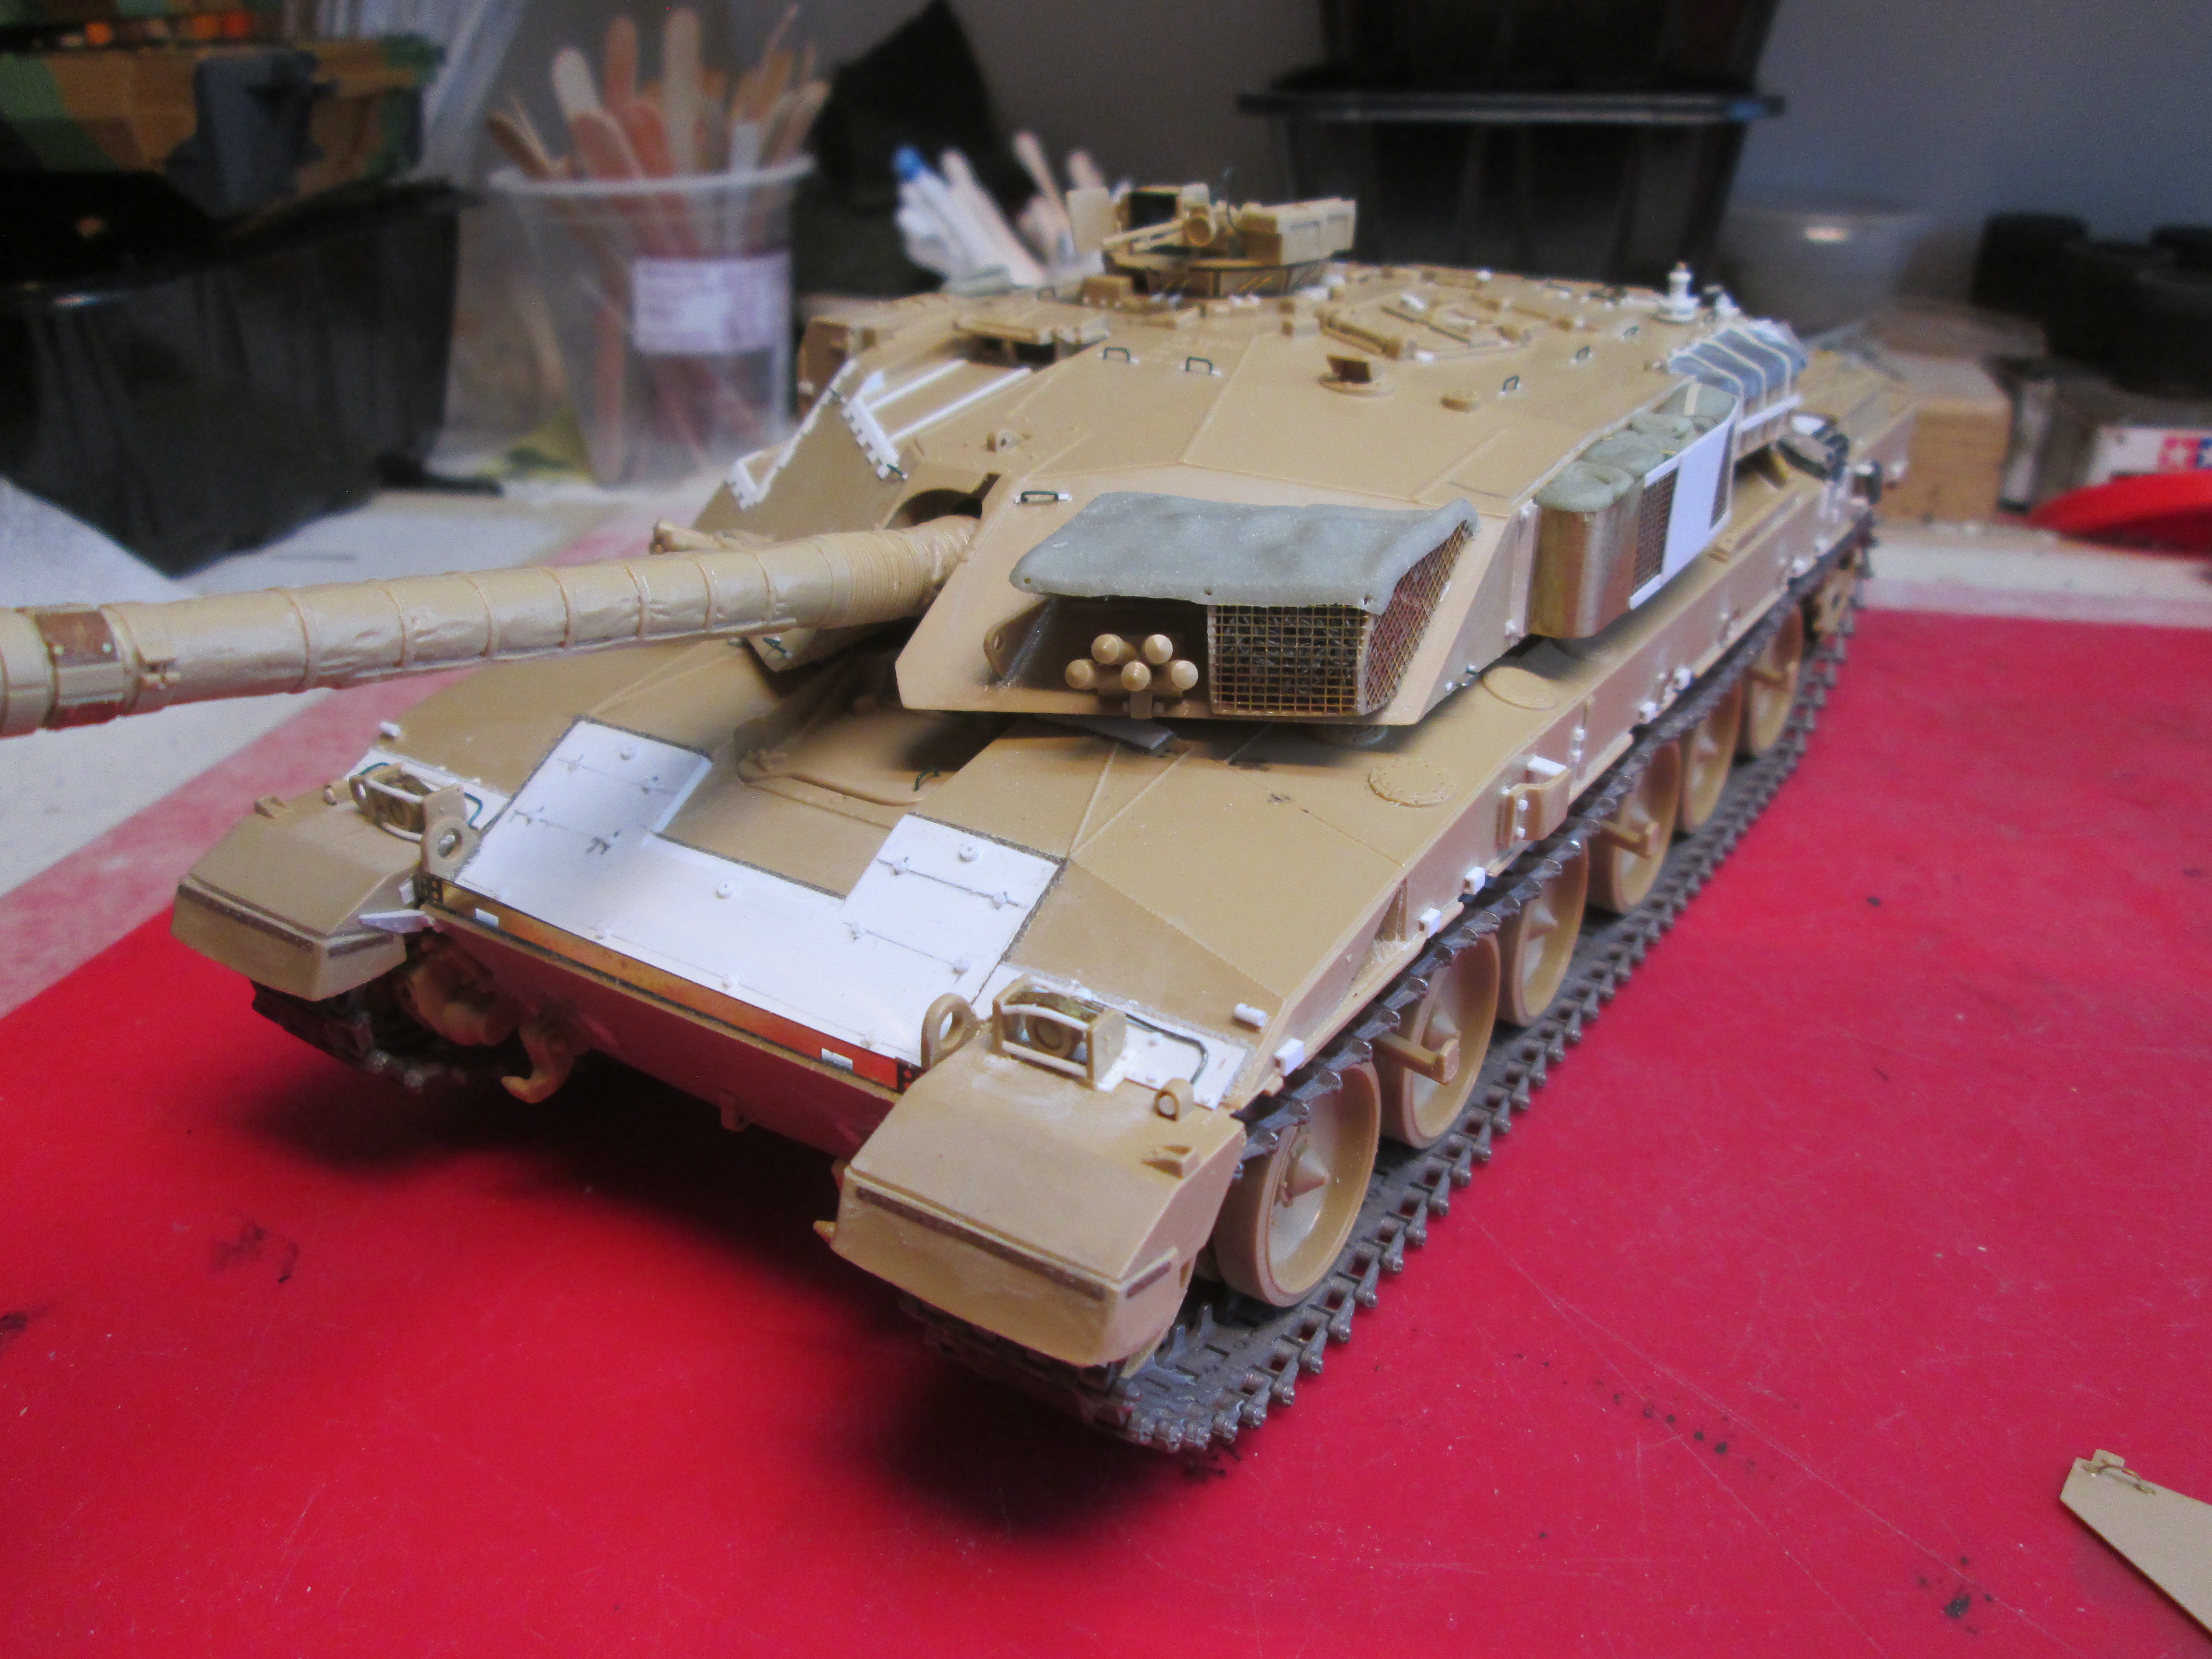 IMG_3482 IMG_3482 by Russel Baer, on Flickr I made up some typical stowage from Aves 2-part putty last night and did the cover for the front turret basket while I was there too. The skirts took 46 new grab handles. |
|
|
|
Post by mustang1989 on Jul 17, 2022 6:20:38 GMT -6
All of these details are really adding up Russ. I don't know if I've ever asked this question of you but I'm sure you've been asked a million times already. How in the HECK do you get the paint into all of those tiny little crevices and crannies when applying the base and camo coats? I've gotta know because I plan on tackling something along these lines soon.
|
|
|
|
Post by JCON on Jul 20, 2022 9:34:02 GMT -6
Looking amazing as usual!!!
|
|
rustybaer
ROLLING ON
 
Posts: 854
Likes: 1,932
Mini-Profile Background: {"image":"","color":"bde619"}
|
Post by rustybaer on Jul 21, 2022 20:43:18 GMT -6
All of these details are really adding up Russ. I don't know if I've ever asked this question of you but I'm sure you've been asked a million times already. How in the HECK do you get the paint into all of those tiny little crevices and crannies when applying the base and camo coats? I've gotta know because I plan on tackling something along these lines soon. Excellent question... answer is, it varies. On this one I'll brush on a color very close to but darker than the base coat, using those little tiny sponge-head brushes, getting color into the places I know I can't get with spray. Then it's rattle can time. On the first one, since the majority of the model was green plastic, I sprayed first, checked for missed areas, got what I could with the rattle can and then used a brush and acrylics to touch up. If I'm patient with the rattle can, I normally don't have much brush work to do. I do the same or similar for stowage, using a disposable brush and just getting a darker than base color in the cracks and voids. Then I detail paint. If I can't get to it at all, then it's not visible so I leave it in its base color or something several shades darker. Second and third camo colors involve medium to very small brushes and patience. Here's a pic of what I'm talking about re stowage: the bed rolls are all in a very dark green. Eventually, they'll be somewhat lighter.  IMG_3498 IMG_3498 by Russel Baer, on Flickr I'm almost ready to paint this one too, and since it's tan plastic and will get a dark green primer, I'll have to go slow and carefully to avoid flooding the details with paint. It would be a LOT easier with an air brush, I realize, but until I'm set up where I can use the one I have, it's rattle cans on the back deck for me. |
|