rustybaer
ROLLING ON
 
Posts: 854
Likes: 1,932
Mini-Profile Background: {"image":"","color":"bde619"}
|
Post by rustybaer on Apr 8, 2022 12:24:03 GMT -6
Can't help it, still too windy to paint the AMX or the M60 I have ready, so I stood in front of the stash, pulled a couple out, pondered and selected this:  IMG_2851 IMG_2851 by Russel Baer, on Flickr I bought it out of a consignment at least four years ago, and have peeked but not been otherwise fired up about it since. Then I saw a build of a Turkish tank, pretty much this one with the exception of NATO radios and a storage box somewhere, and thought: hey, I have one of those in the stash. It looked to be a nice kit: good detail, good molding, included PE, what could go wrong? Thinking I'd do a nearly OOB build I started yesterday (I think, coming off a hospital stay I'm still a little dipsy) and got into the running gear right away. And bingo: nothing fit: roadwheels polycaps and axles all just a tic "off", hull halves "off" a bit, swing arms loose in the mounts, and on and on. I almost grabbed something else and then I remembered a Tamiya Leo2A5 I just snagged for six-pack money, pulled it out and did some test fitting. Shoot me now, but the Tamiya swing arms were a PERFECT fit in the HB hull, and of course the Tamiya wheels are a breeze, so in a couple of hours I was here:  IMG_2852 IMG_2852 by Russel Baer, on Flickr Since I was into the Tamiya kit anyway, I'm robbing the better detail parts as well:  IMG_2853 IMG_2853 by Russel Baer, on Flickr Gray is HB, green is Tamiya. And here, a pic of the idler mount, a near perfect fit on the HB hull:  IMG_2854 IMG_2854 by Russel Baer, on Flickr Goofy. Anyway, I get to build my favorite Leo, the slab-nosed turret A4, scratch my itch for not working OOB and still do something relatively simple. Obvious in the last pic is just one example of many pin marks and gaps to fill. |
|
|
|
Post by JCON on Apr 8, 2022 12:50:07 GMT -6
Good start Russ!!!
|
|
|
|
Post by JED on Apr 10, 2022 6:44:04 GMT -6
NICE, and I guess this is another reason why we have a stash!!
|
|
|
|
Post by Dukemaddog on Apr 11, 2022 11:55:53 GMT -6
Beautiful work so far Rusty! This is gonna be fun!
|
|
rustybaer
ROLLING ON
 
Posts: 854
Likes: 1,932
Mini-Profile Background: {"image":"","color":"bde619"}
|
Post by rustybaer on Apr 12, 2022 7:18:28 GMT -6
Thanks all, and Jed, you nailed it. I told my Doc how I calmed down during modeling and he said "You're meditating". Bingo, a medical reason to model. So, the latest. I see now why the HB kit (the initial Leos anyway) were so poorly reviewed: lots of pieces are simply unusable due to sink marks, pin marks and short shots, so I'm scavenging the Tamiya kit mercilessly. The next shot shows something else too, notice the dimensions between the insides of the front fenders:  IMG_2857 IMG_2857 by Russel Baer, on Flickr No major thing unless I'm having to use all the grousers and stuff from the Tamiya kit 'cause the HB parts were riddled with pin marks right where they're impossible to remove. My fix was to "narrow" the headlight mounting boxes, fill, sand and then take a bit of material off of all the grouser mounts. I'm meditating though, it's all good. And in case you're asking why I didn't use the Tamiya hull and just swap turrets:  IMG_2858 IMG_2858 by Russel Baer, on Flickr I'm learning a bit more about Leo2s than I may have wanted to. |
|
rustybaer
ROLLING ON
 
Posts: 854
Likes: 1,932
Mini-Profile Background: {"image":"","color":"bde619"}
|
Post by rustybaer on Apr 15, 2022 17:50:14 GMT -6
More tomfoolery: almost every single part on the turret is just off enough that I'm running out of putty and wearing out sanding sticks. The rear part of the turret, still not done, took around four hours to get this far:  IMG_2860 IMG_2860 by Russel Baer, on Flickr This is definitely not a Tamiya kit. It is however starting to resemble the end goal:  IMG_2859 IMG_2859 by Russel Baer, on Flickr All green parts are from the Tamiya -A5 kit, generally better parts. Honestly, if I didn't really want to build one of these I'd box it back up and wait till I could afford a Meng kit. It's that rough: stupid stuff like the tracks being about four links too short, good thing I'm scavenging the Tammy kit. |
|
|
|
Post by JCON on Apr 15, 2022 20:41:05 GMT -6
Beating it into submission!!!
|
|
rustybaer
ROLLING ON
 
Posts: 854
Likes: 1,932
Mini-Profile Background: {"image":"","color":"bde619"}
|
Post by rustybaer on Apr 15, 2022 21:15:02 GMT -6
Beating it into submission!!! With a stick! This is easily the most difficult build I've done in several years. Granted, it's one of HB's earlier efforts, but gee whiz Wally! I built the HB Merk3 a few years ago, much better engineering and fit. |
|
|
|
Post by ogrejohn on Apr 17, 2022 8:05:39 GMT -6
Looking good Rusty! I think the entire Leo series is cool looking.
|
|
rustybaer
ROLLING ON
 
Posts: 854
Likes: 1,932
Mini-Profile Background: {"image":"","color":"bde619"}
|
Post by rustybaer on Apr 21, 2022 11:05:30 GMT -6
Thanks OJ. I like them too, and fortunately for me, the Tamiya kit is fun and has enough detail to keep me happy, almost. They're also getting cheap at shows now that Meng and RFM have gotten so many to market. I can sure see why I got this HB kit so cheap though. I'd almost rather try and score the old Italeri kit and see what that looks like.
|
|
|
|
Post by mustang1989 on Apr 21, 2022 14:33:41 GMT -6
Good lookin' progress Russ and I hear you on wearing out sanding sticks. lololol.
Looks like another migrator from MSC. Good to see you again man.
|
|
rustybaer
ROLLING ON
 
Posts: 854
Likes: 1,932
Mini-Profile Background: {"image":"","color":"bde619"}
|
Post by rustybaer on Apr 22, 2022 11:06:24 GMT -6
Yup. Came over here a bit ago, I think MSC just expired.
Good to see you too!
|
|
|
|
Post by JCON on Apr 22, 2022 17:13:59 GMT -6
Their loss our gain!!!  |
|
rustybaer
ROLLING ON
 
Posts: 854
Likes: 1,932
Mini-Profile Background: {"image":"","color":"bde619"}
|
Post by rustybaer on Apr 23, 2022 15:27:30 GMT -6
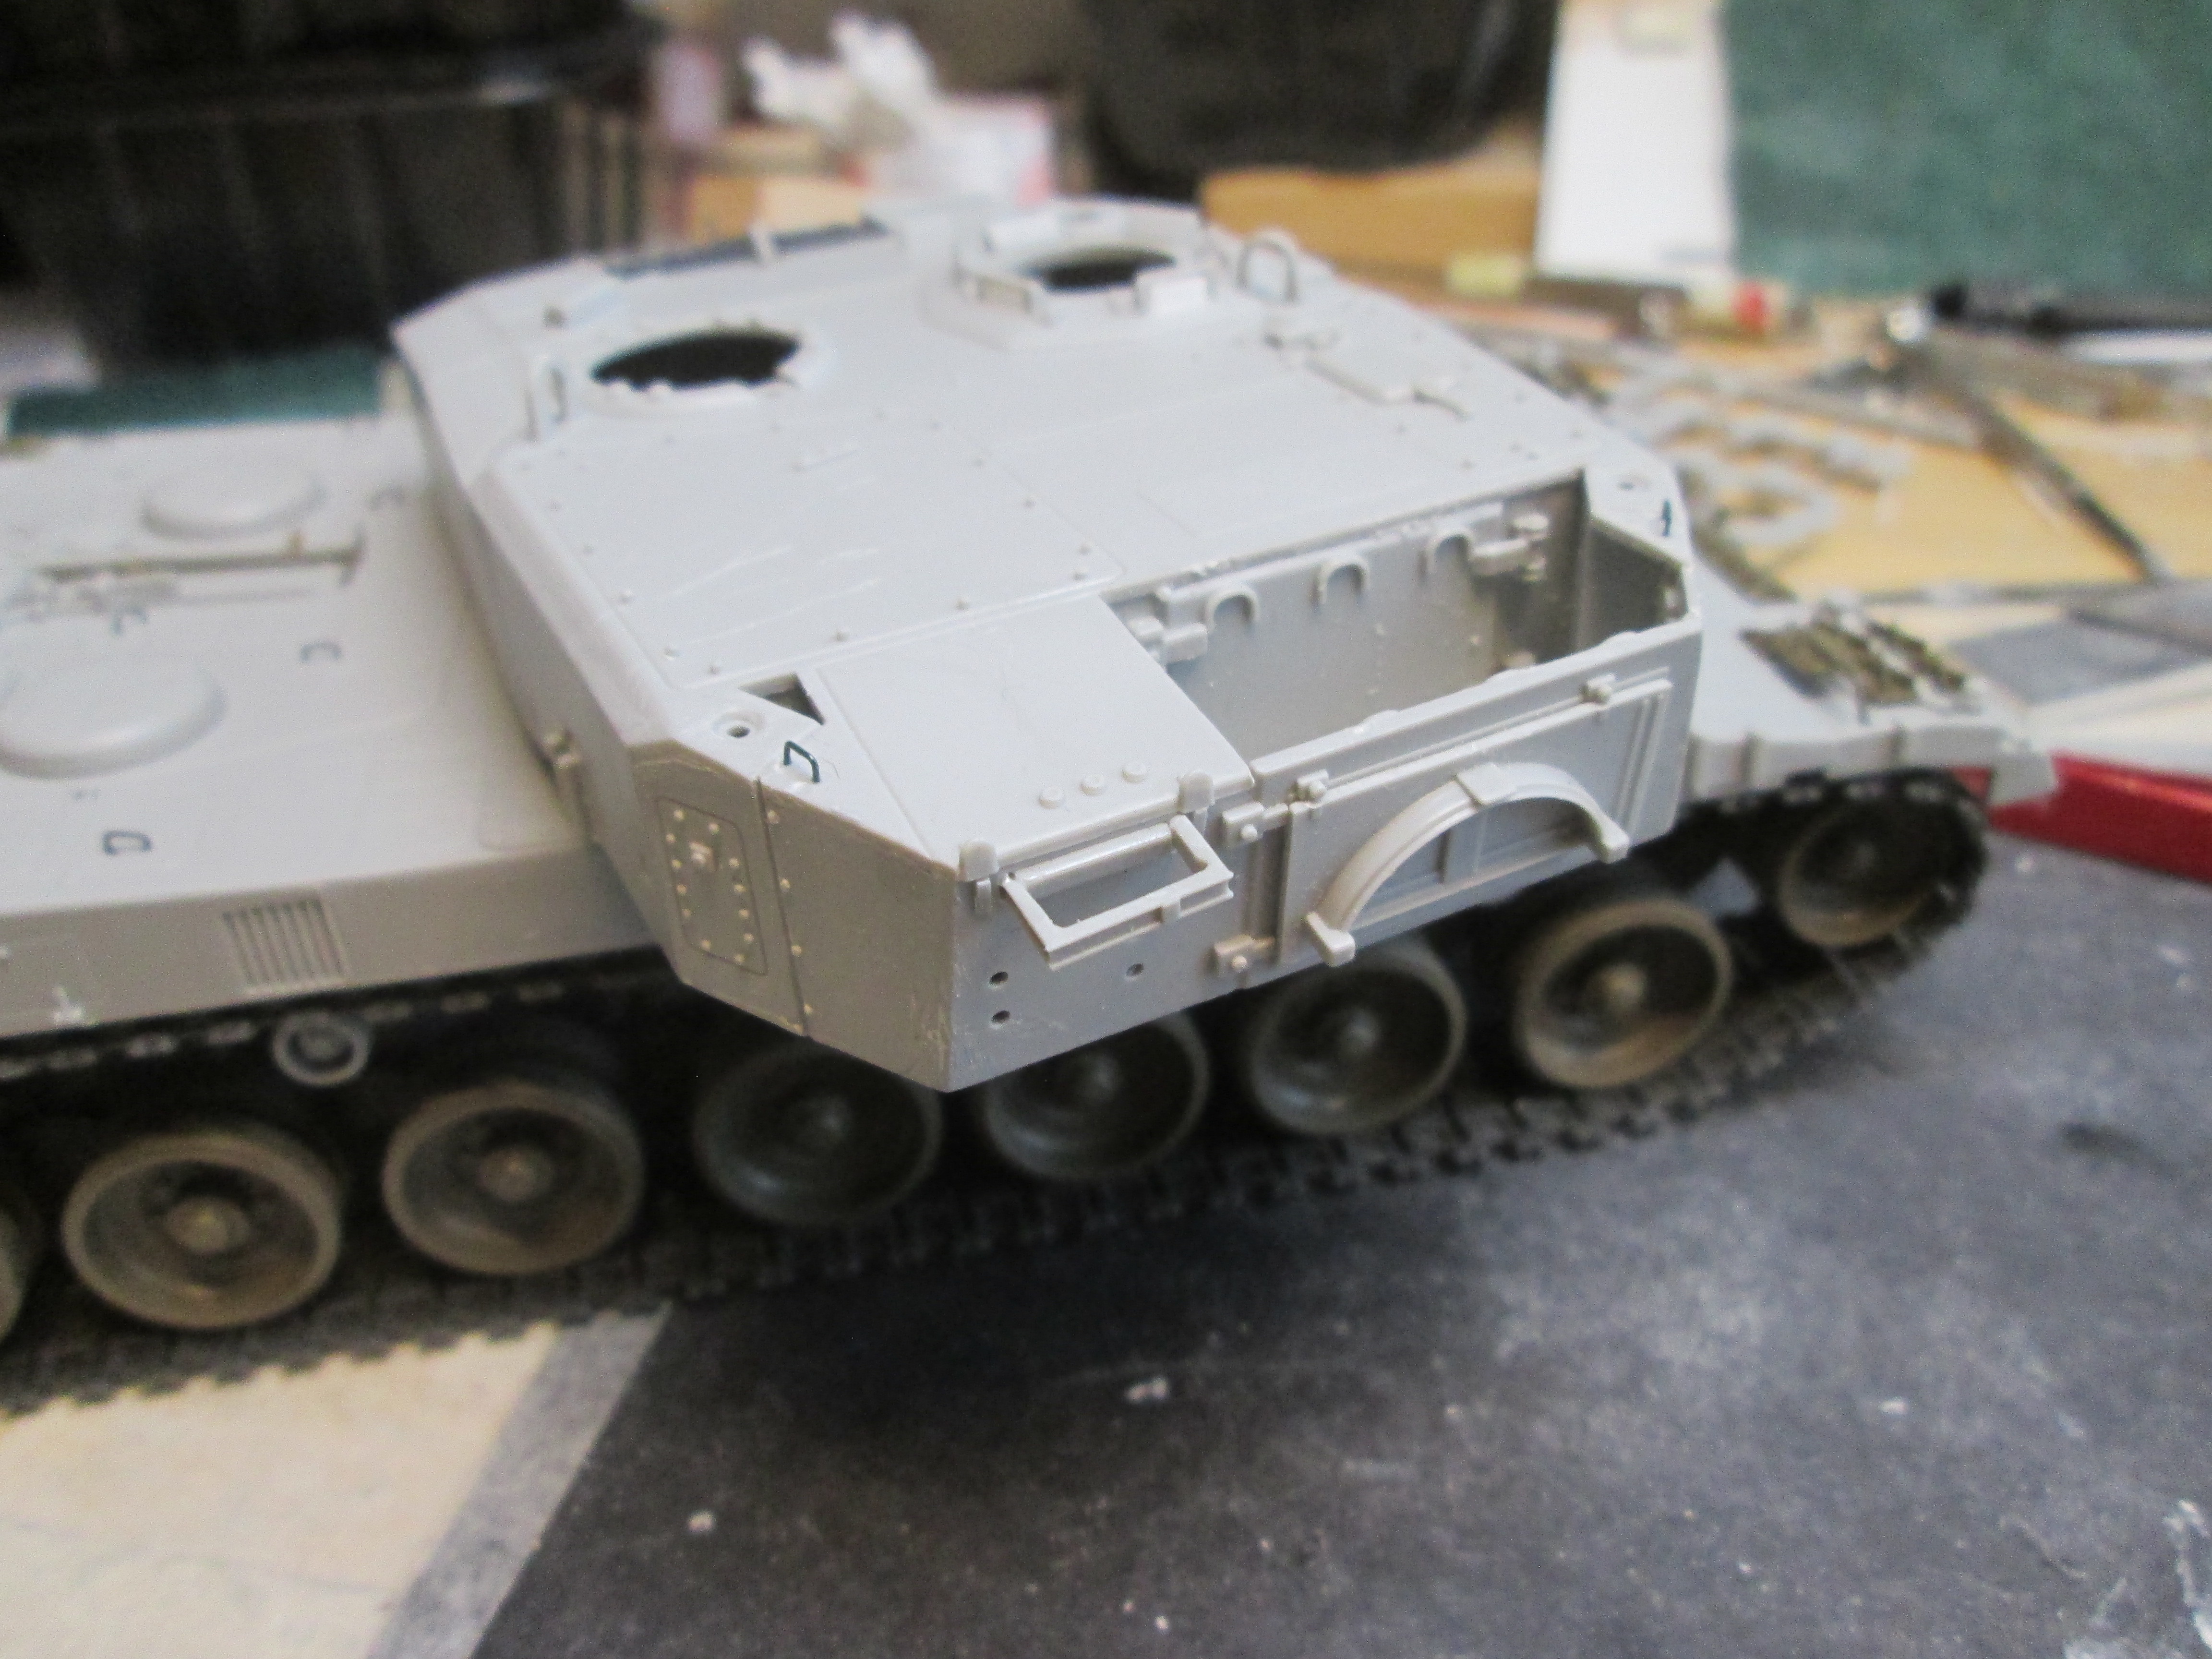
Me and this kit are officially at war. I looked at the kit smoke dischargers and said "no way": more flash and sink marks than part, so out came the Tamiya parts, adapted with no trouble. Then, just for giggles, I test fitted the side skirts: warped and maybe even too short. Bummer, cuz the Tamiya model is of the -A5, different skirts and armor packs. So, referencing an article on a German -A4 on exercise with no skirts, that's what I'll do. That however will involve adding enough detail the the hull mounts to make them look convincing, not like the bumps on the hull side they are now. I also removed the front mud flaps, revealing more hull fit issues. But remember, it's war! I also binned the kit hatches, poor parts and switched by HB: the loader's and commander's covers are different, and HB has them reversed. More Tamiya parts. The battle progresses:  IMG_2861 IMG_2861 by Russel Baer, on Flickr And then the hull rear: HB left off a couple of rather large access covers, so using the Sabot book on the Dutch -A4 I scratched them out of sheet and stock:  IMG_2862 IMG_2862 by Russel Baer, on Flickr That little box on the left of the turret rear, that took close to two hours to make it look like a box and not a piece of origami. |
|
|
|
Post by JCON on Apr 23, 2022 16:56:34 GMT -6
You are beating it into submission!!! Proud of you buddy!!!
|
|
rustybaer
ROLLING ON
 
Posts: 854
Likes: 1,932
Mini-Profile Background: {"image":"","color":"bde619"}
|
Post by rustybaer on Apr 26, 2022 7:42:06 GMT -6
Some just plain modeling done yesterday, I started the detailing on the side armor hangers based on pics in the Sabot Dutch Leo book, good clear shots. The lower part of the hangers are on, not really hard, but the uppers parts which look like a big cam lock are going to be a bit more difficult. HB completely ignored this in the kit.  IMG_2863 IMG_2863 by Russel Baer, on Flickr Also, from comparing with the Tamiya Leo I built a couple of years ago, it's obvious HB positioned the final drives too far to the rear by at least 2mm, maybe 3mm, so I fixed that and shortened the track by two links to compensate. "It's the little things, the itty bitty things......" |
|
Tobi
LOOKING AROUND
Posts: 88 
Likes: 152
Mini-Profile Background: {"image":"","color":"46250f"}
Mini-Profile Name Color: ffe69f
Mini-Profile Text Color: ffe69f
|
Post by Tobi on Apr 27, 2022 0:15:18 GMT -6
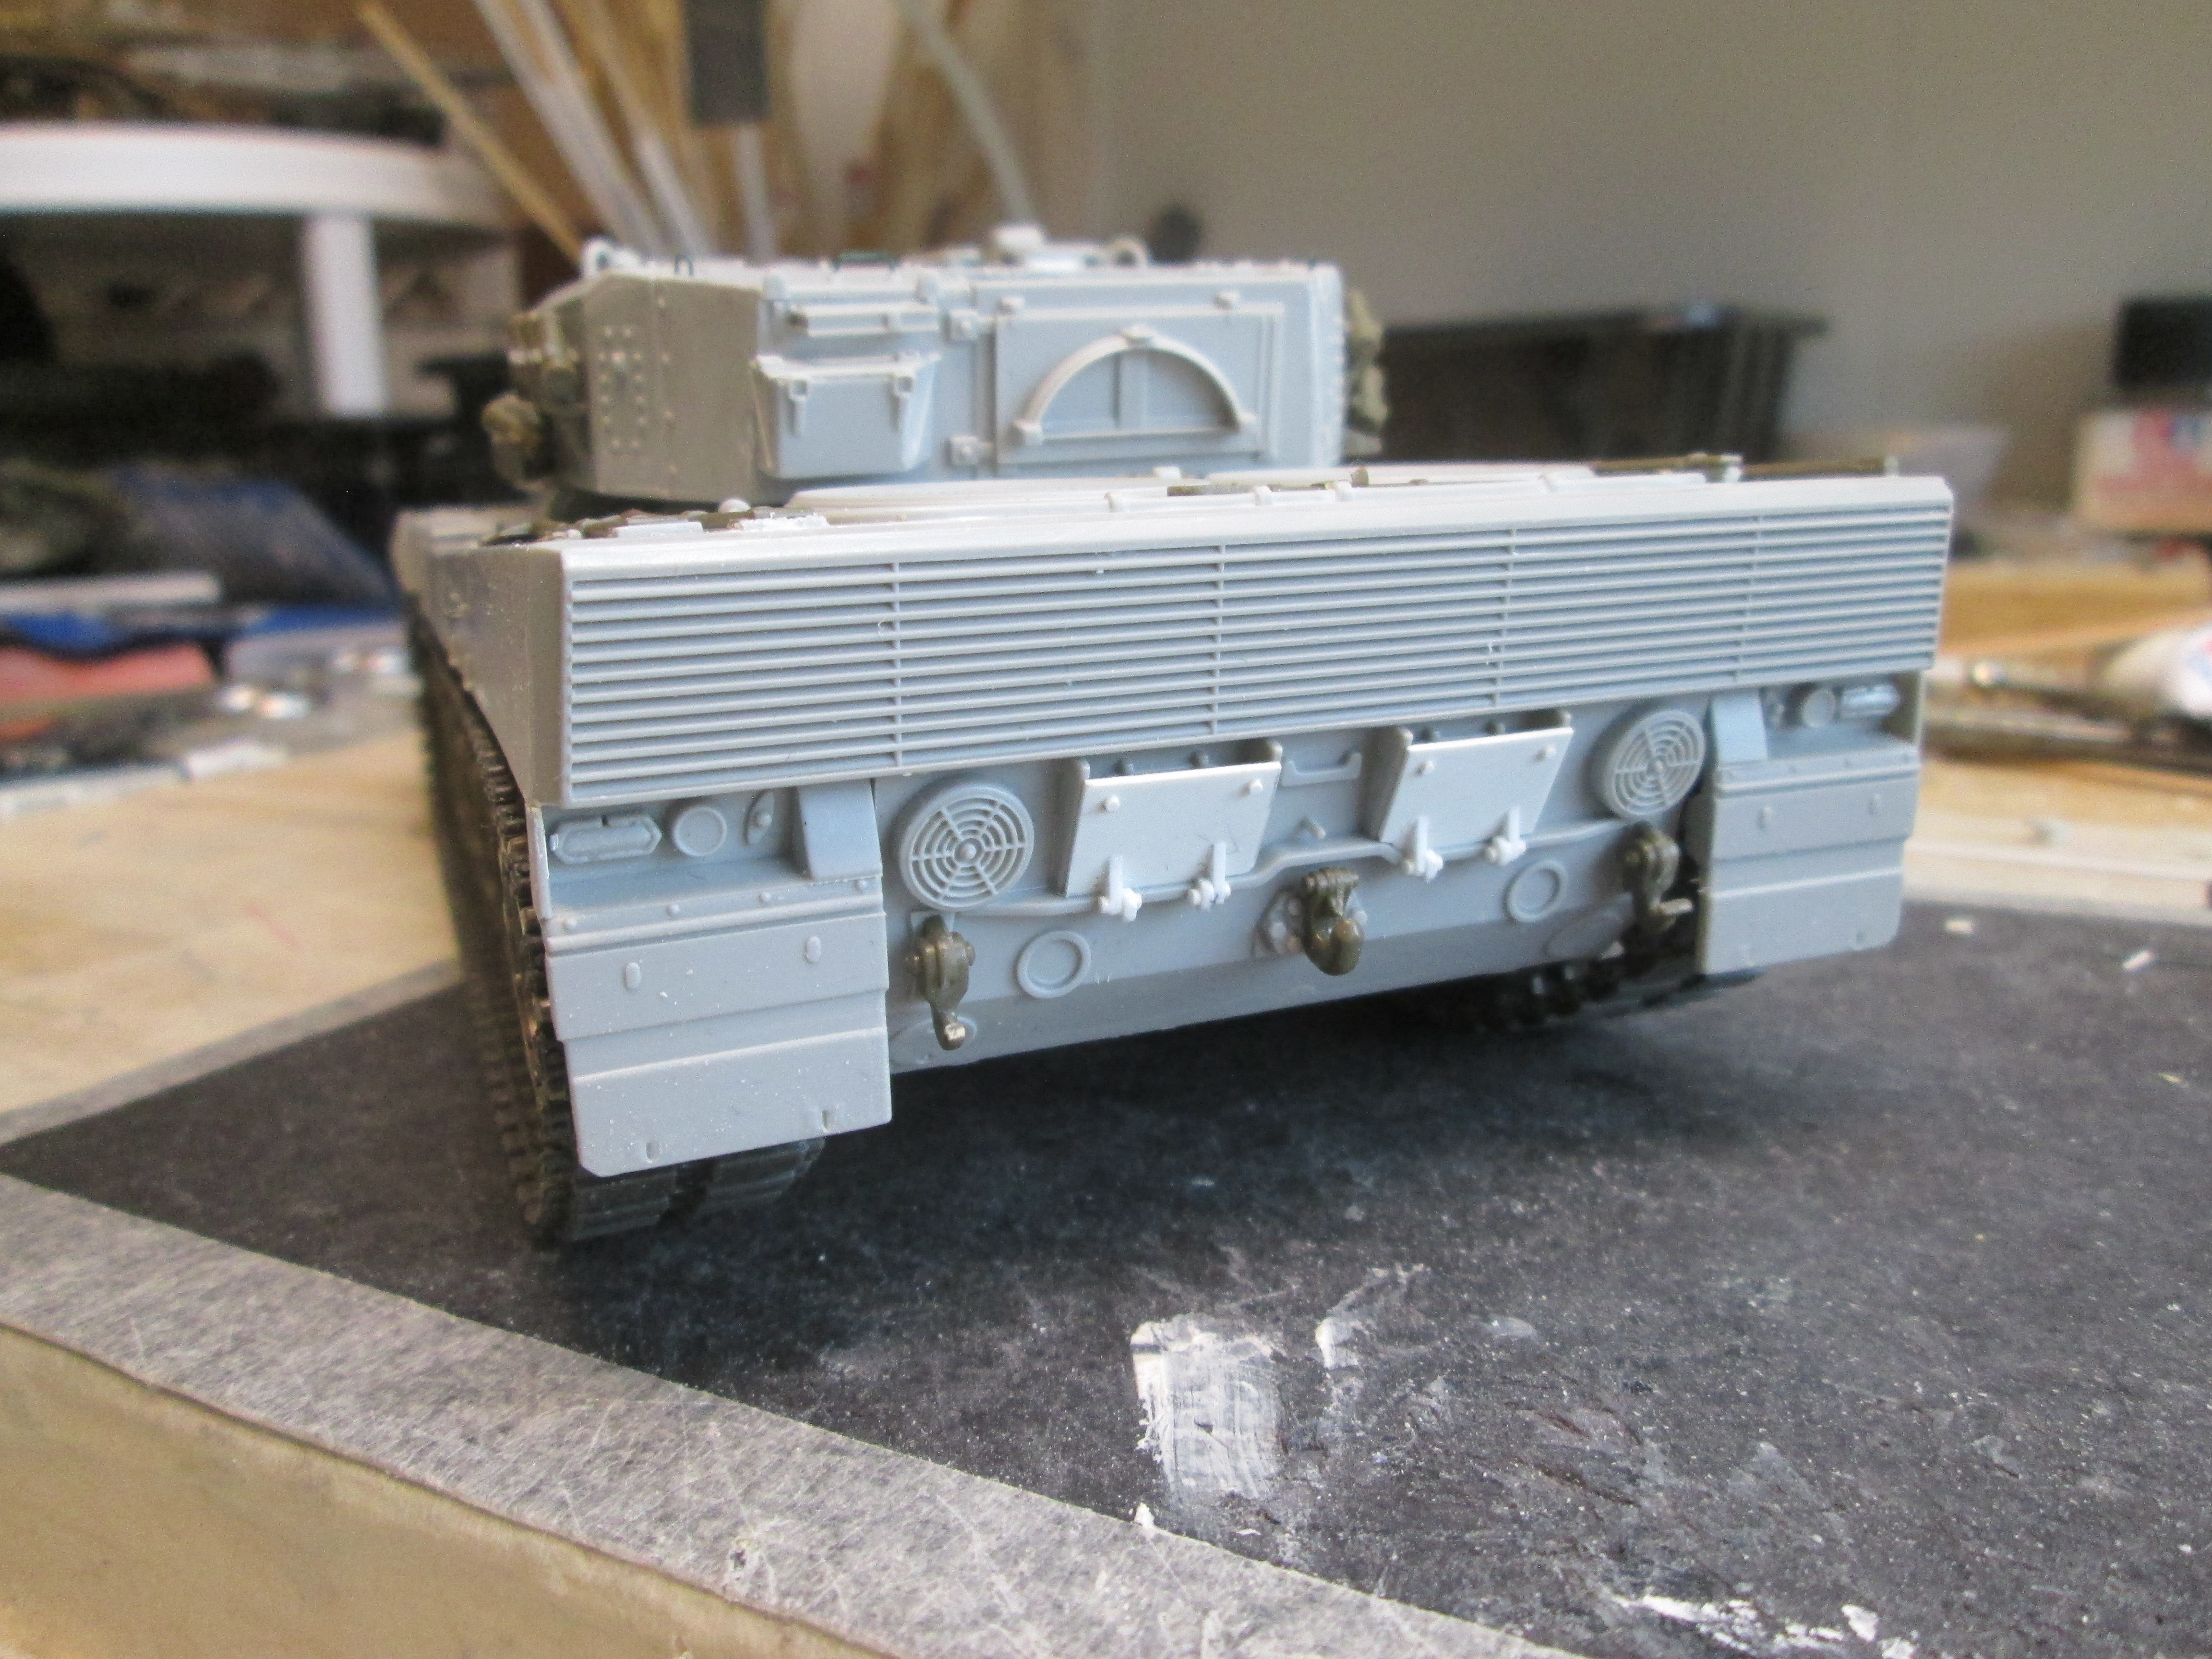
The two armored covers at the hull rear are hydraulically actuated and part of the wading system. The fans on the engine deck are switched off during wading operation and water passing around the coolers instead, leaving through these openings again. The engine compartment is separated from the coolers by a sealing.
The semi-circle like object on the turret rear belongs to a foldable TC's turret hatch extension made from canvas. The engine sucks the combustion air through this hatch while wading.
With this extension and some other onboard tools the Leopard 2 can pass water obstacles up to 2.25m without further assistance from outside. For deepths up to 4m's (underwater driving) there is a three-piece metal tower for the TC's hatch, but this is not carried onboard the tank.
Up to A4 the driver also had to manually pump up a turret ring sealing, but with tighter manufacturing tolerances on the ring mount this became obsolete on Mk. A5 and above.
|
|
rustybaer
ROLLING ON
 
Posts: 854
Likes: 1,932
Mini-Profile Background: {"image":"","color":"bde619"}
|
Post by rustybaer on Apr 28, 2022 11:20:16 GMT -6
Thanks Tobi. HB doesn't supply the covers at all, but since they do put the TC's wading tower in the kit, it makes one wonder what they intended. Oddly, there's no mention of the tower in the instructions. Oh well, chalk it up to the general nastiness of this kit. On the positive side, the latch mechanisms for the side armor are nearly done. In the pic, those on the driver's side are finished, the other side needs to dry for a day before I clean them up and blend the parts. Even though the parts are out of scale, I think something looks better than nothing in this case.  IMG_2865 IMG_2865 by Russel Baer, on Flickr |
|
rustybaer
ROLLING ON
 
Posts: 854
Likes: 1,932
Mini-Profile Background: {"image":"","color":"bde619"}
|
Post by rustybaer on May 1, 2022 10:01:00 GMT -6
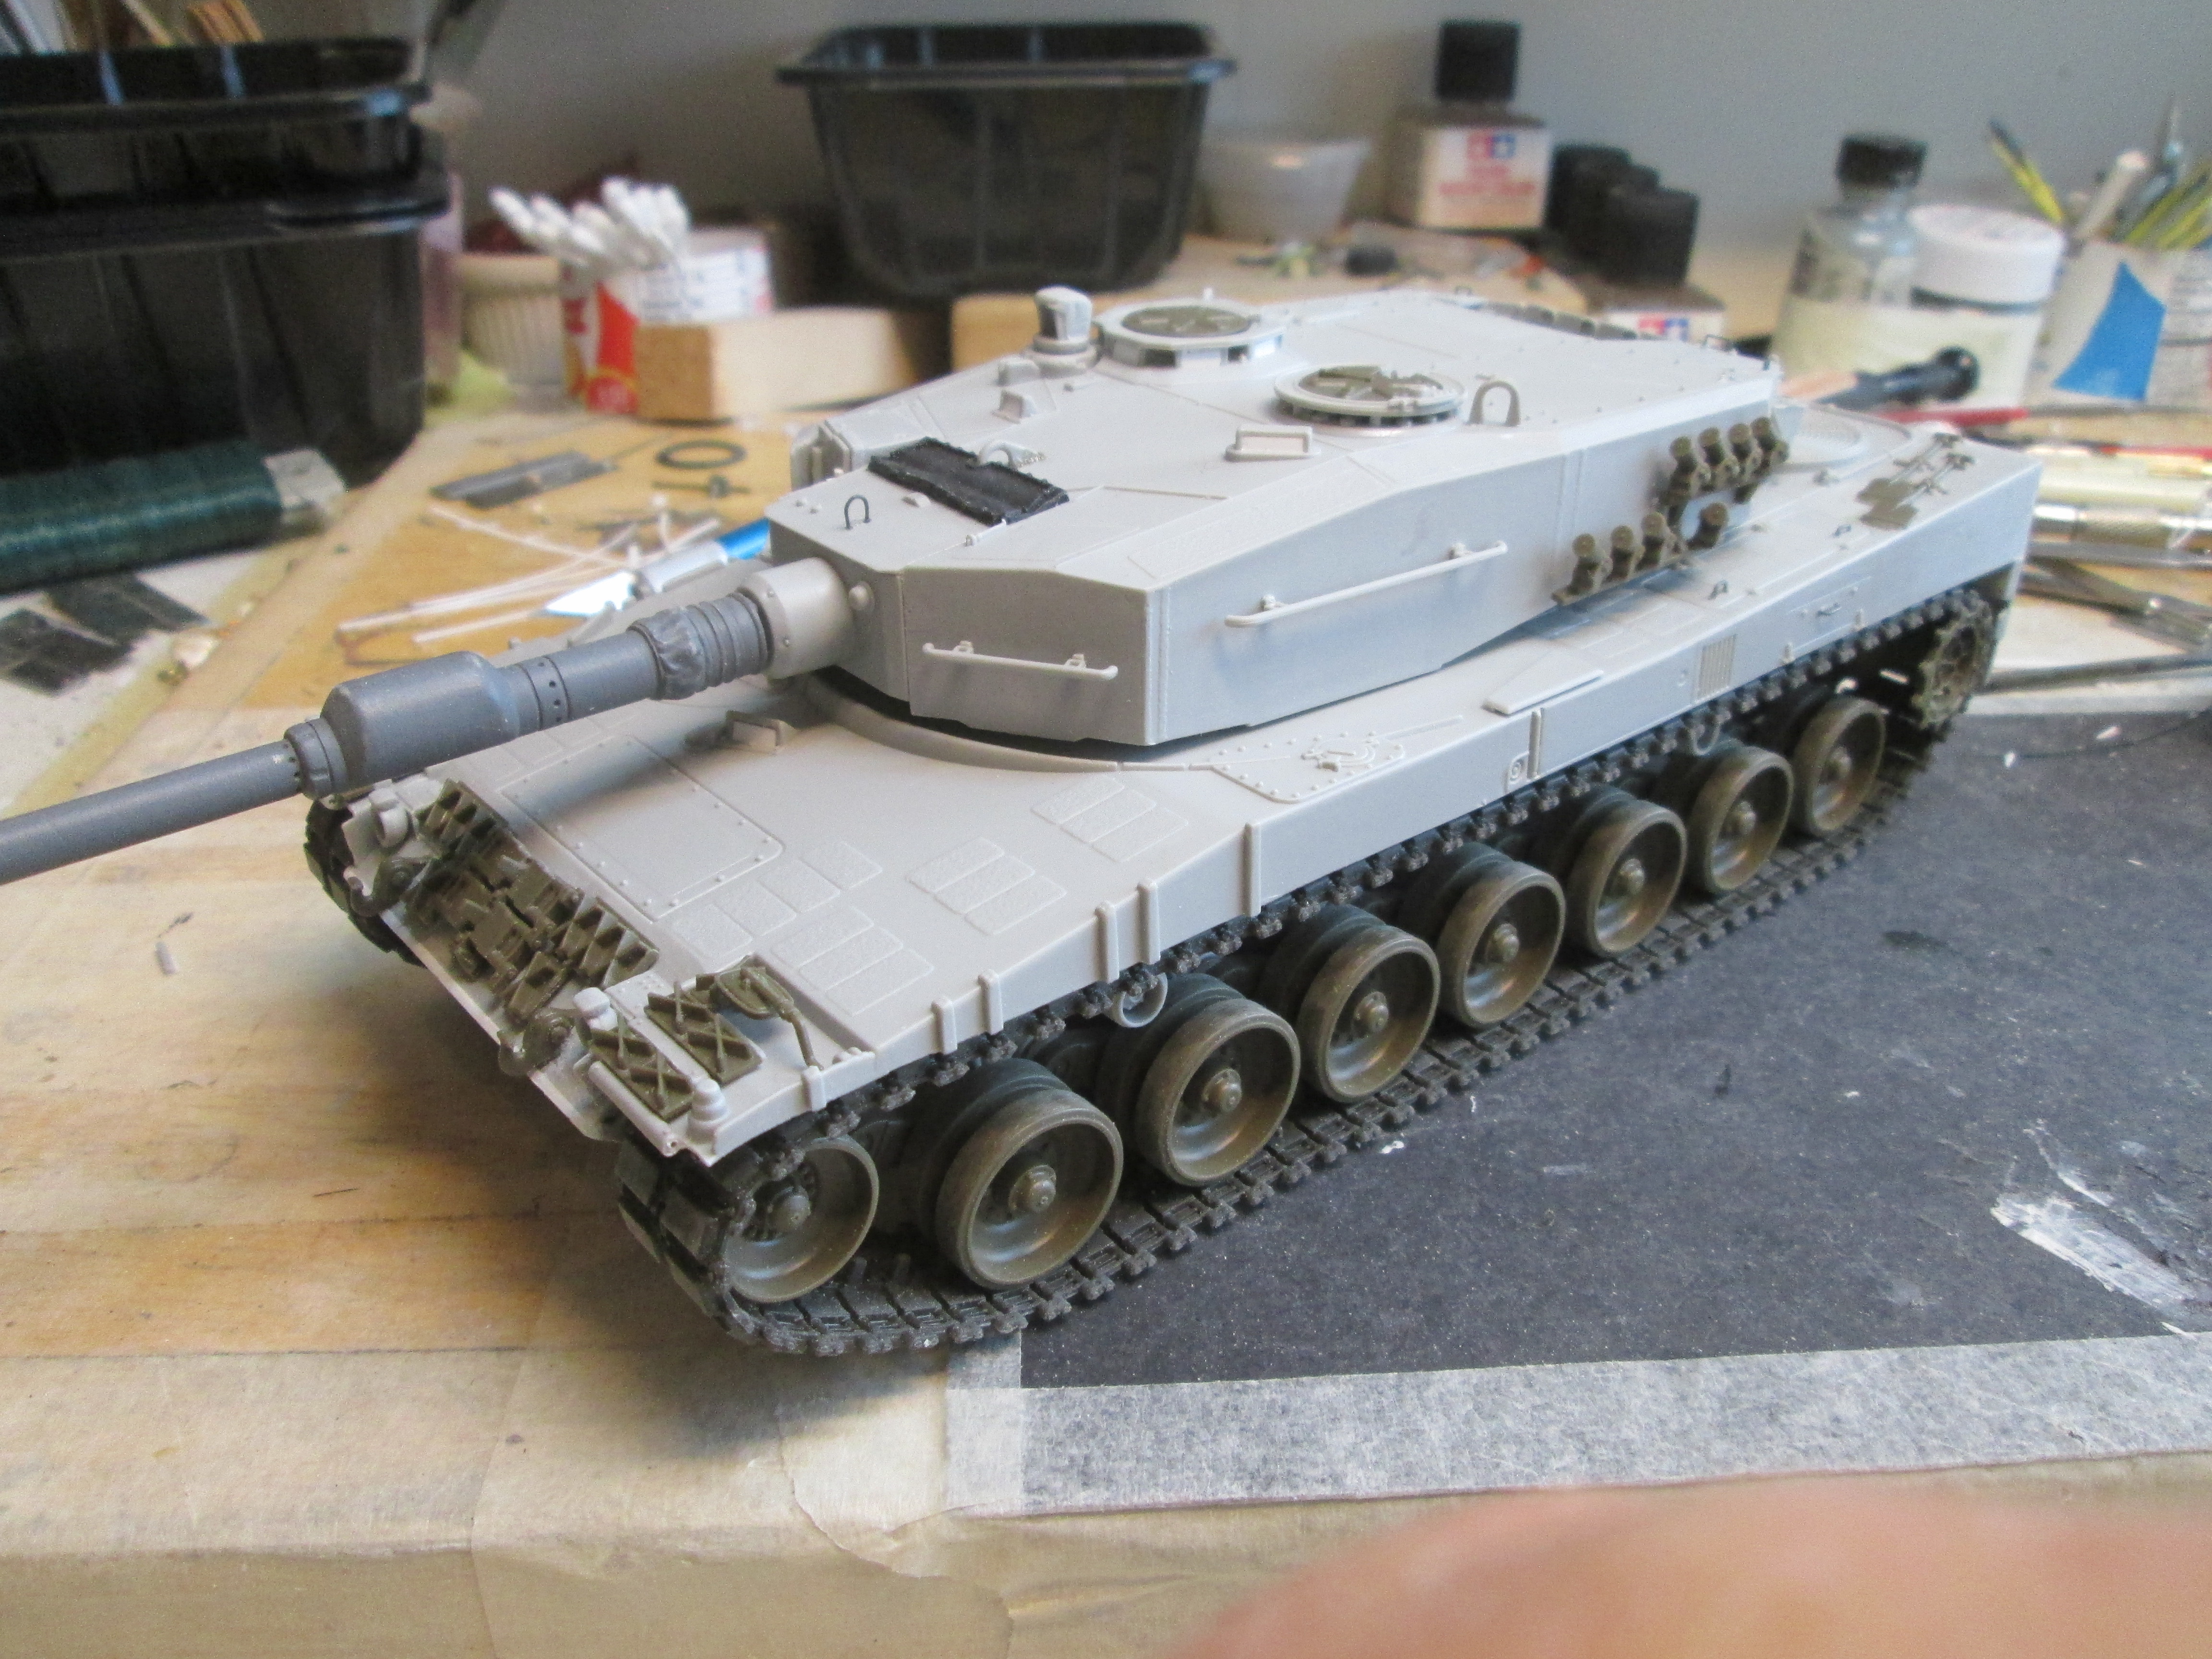
Finished except for tow cables and antennae, almost time to move on to the next one. I just don't feel like painting yet....  IMG_2866 IMG_2866 by Russel Baer, on Flickr  IMG_2867 IMG_2867 by Russel Baer, on Flickr I actually enjoyed the extra detailing, the agony was from poor kit engineering and lousy parts, both fit and accuracy. I'm still out to lunch on whether to go ahead and do the mods to build a Turkish tank or go for German in NATO colors. |
|
Tobi
LOOKING AROUND
Posts: 88 
Likes: 152
Mini-Profile Background: {"image":"","color":"46250f"}
Mini-Profile Name Color: ffe69f
Mini-Profile Text Color: ffe69f
|
Post by Tobi on May 2, 2022 7:28:39 GMT -6
The shape of the bolted cover plate on the bow looks wrong. Should be four identical rounded edges, but for my eye with smaller radius than on the upper two. You could overcome this by filling in the engraving and adding a weld bead around instead.
From production batch 6 onward the plate was welded shut (for which you have the wrong side skirts), but refurbished tanks could receive this modification as well. On these machines the bolts were kept.
|
|