|
|
Post by Steve Ski on Mar 21, 2018 20:30:01 GMT -6
I see the Snoop dog has borrowed my hog, again. Did you give him permission JCon?  , or was it Bucky? |
|
|
|
Post by BUCKY on Mar 21, 2018 20:44:49 GMT -6
Bwahahahahahaha!!!!!! I'll never tell!!!!!   |
|
|
|
Post by JCON on Mar 21, 2018 21:09:26 GMT -6
Joe Cool and I go hand in hand... Red's nickname for me from the beginning of our dating back in 73'... lol!!!
|
|
|
|
Post by BUCKY on Mar 21, 2018 21:16:28 GMT -6
Didja have the floppy ears back then, Joe??
|
|
|
|
Post by JCON on Mar 21, 2018 21:21:00 GMT -6
Couldn't see due to the long hair, lol!!!
|
|
|
|
Post by Steve Ski on Mar 22, 2018 23:00:32 GMT -6
Yall are crazy, but we still love yall, HA!
|
|
|
|
Post by BUCKY on Mar 22, 2018 23:23:16 GMT -6
Didn't you know "crazy" was a requirement, here??  |
|
|
|
Post by JCON on Mar 22, 2018 23:27:04 GMT -6
Thanks Ski, just remember you love to hang out with us crazies!!!
|
|
|
|
Post by Steve Ski on Mar 23, 2018 11:17:26 GMT -6
Thanks Ski, just remember you love to hang out with us crazies!!! That's alright, my wife thinks I'm crazy too, so it's a fit. Now, if I could only get rid of this tick!
Ya Bucky, it ain't a requirement if yuz already crazy Bro, you're good, HA!.
|
|
|
|
Post by BUCKY on Mar 23, 2018 11:36:27 GMT -6
LOL!!!
|
|
|
|
Post by JCON on Mar 23, 2018 11:38:50 GMT -6
Who is crazy?  |
|
|
|
Post by Steve Ski on Aug 15, 2020 1:34:26 GMT -6
Okeydoky Gents,
Just poured our resin counter tops, we're almost done with the re-mod, which means I can start gearing up for the SNOW FLY!!! Actually they won't be installed for at least another 4 weeks, cure time.
I was able to recover a lot of original pics and some of a mock write-up I had done quit awhile ago on the R75 and the Harley Hog, so I'm going to post what I have so yall can see the SBS from way back. I won't be going over the figures, there's just way too much to cover before I close this dio out this winter with the veggies. I still need to find cabinet space for this bugger, yikes.
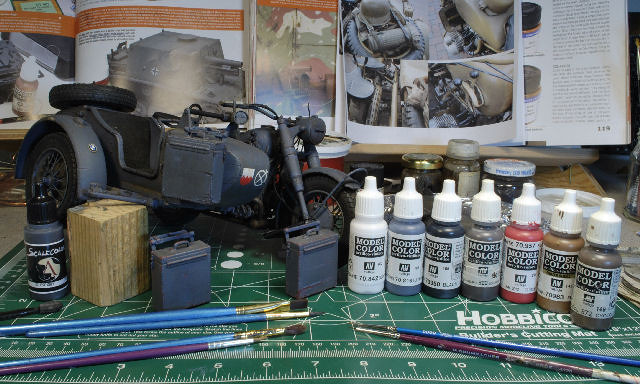
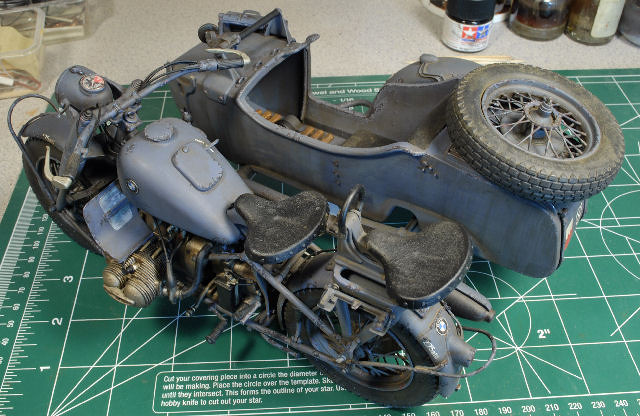
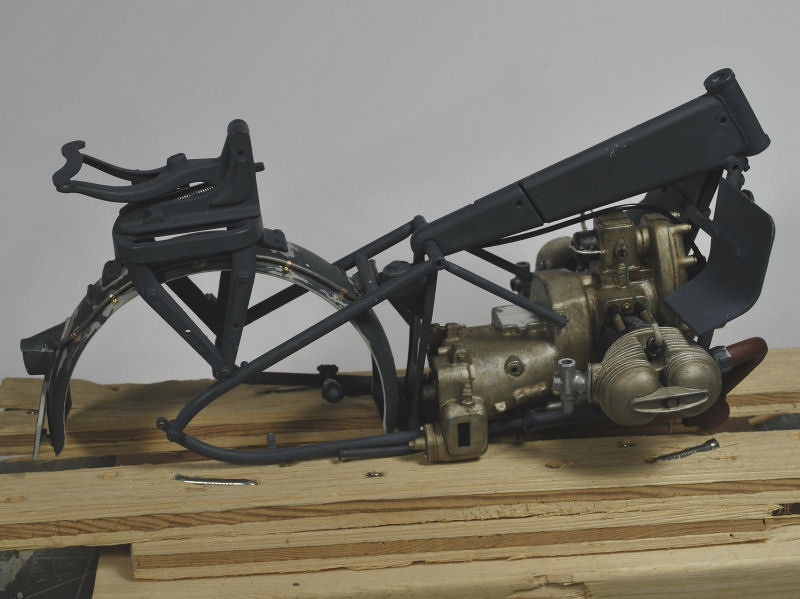
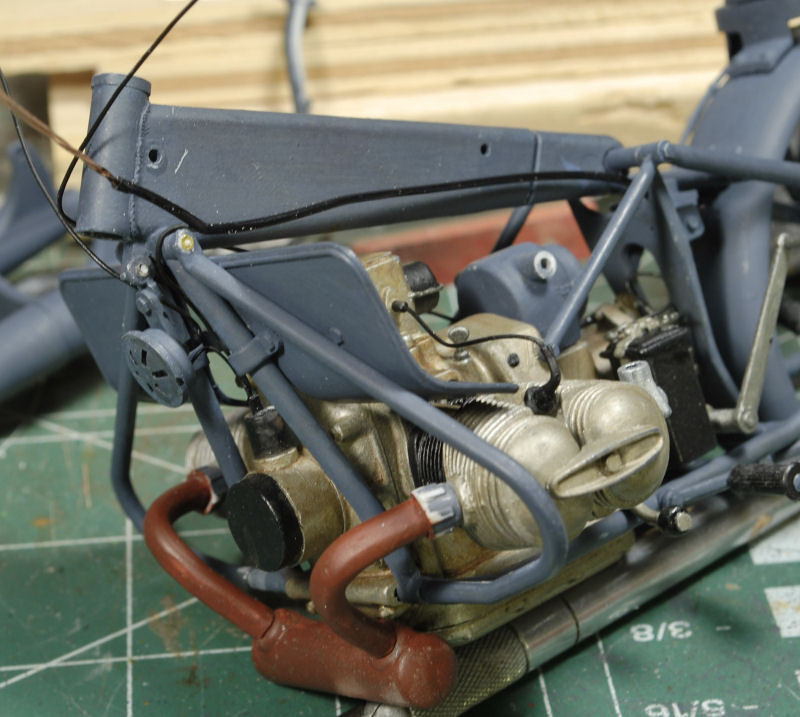
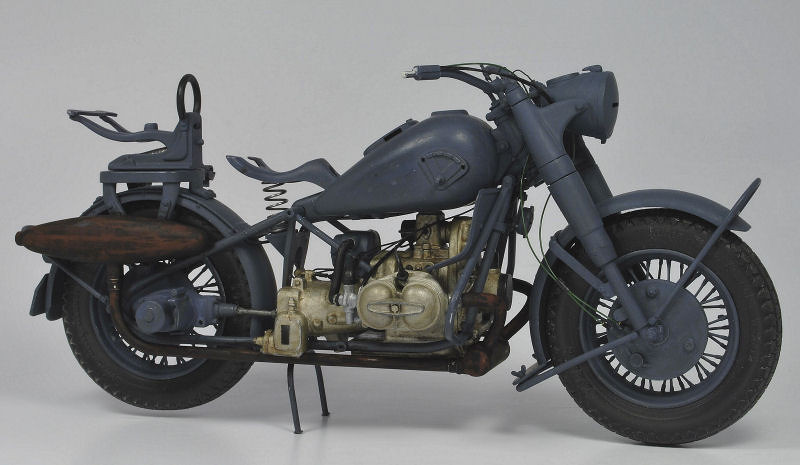
The R75 with Side Car
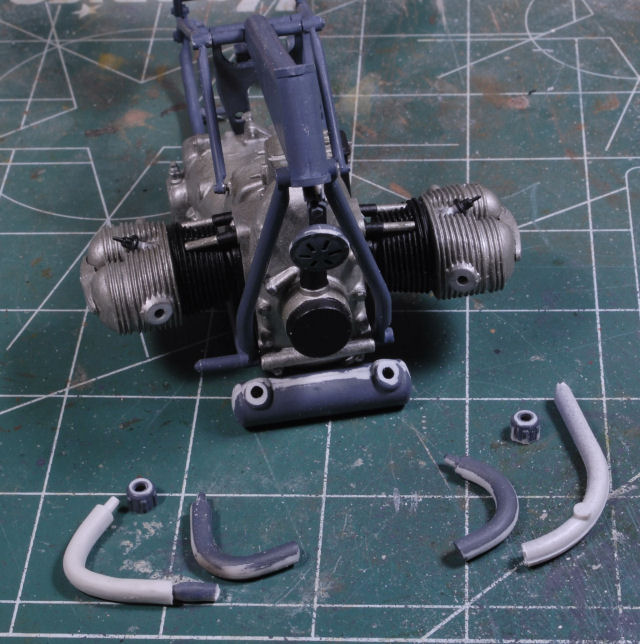
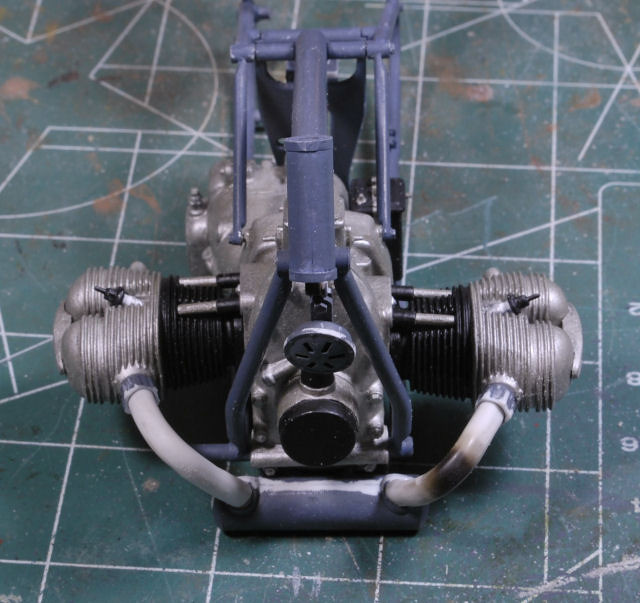
Many of the original pics were not found for this portion of the build, so here's what I've got to start off with. The engine is already installed and now the exhaust pipes are prep'd and installed.
Air Box, more wiring
I find using copper sheet works as well as brass, but easier to work with and the scale is still acceptable, even 1/9th.
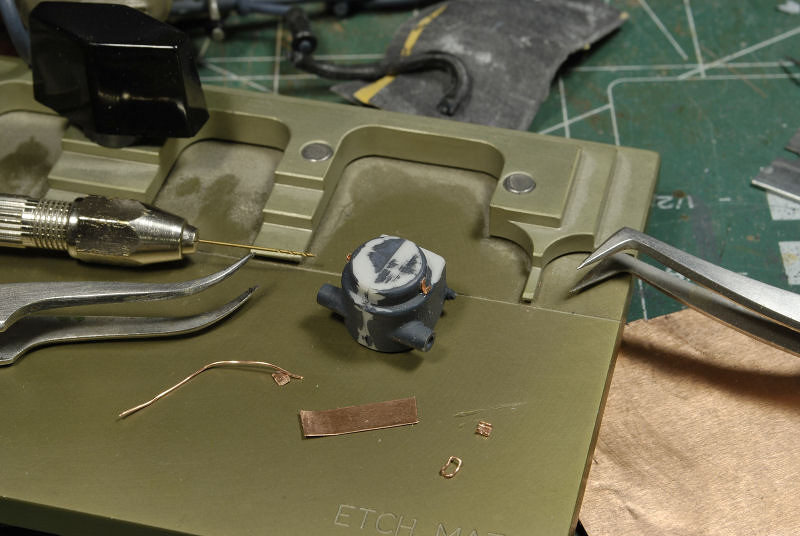
A closer look at the wiring and where the air box will go. The instructions for this come way too late in the game to install in the end. Trying to get it into this tight spot after the throttle cable and wiring is installed would be a major mistake and result in broke parts and the temptation to launch this sucker into the abyss, lol.

The right side view, which is often omitted from the instructions only to say, do the same on the right. The instructions are rather vague, so I'm taking my time.
This gig I made for the Harley looks rather crude, but it works well, especially after I get the tires on. Keeps my hands free to work.
Fender Wiring, etc.
Ok, been working the wiring and had to remove the fuel tank to get to some of the tight spots. Another example of going backward to go forward. The rear fender and wiring with clamps. I'm using phone line wire and shoving copper wire into the ends where needed to show the splits.
A closer look with a few of the copper clamps.
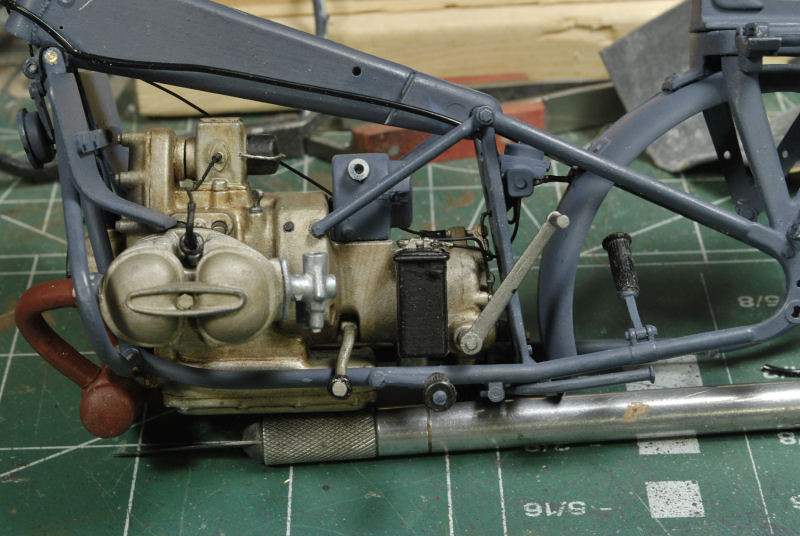
And there's that wonderful fuse box that eluded me for so long, right in the middle of the pic, kinda the brains of the system from the battery on.
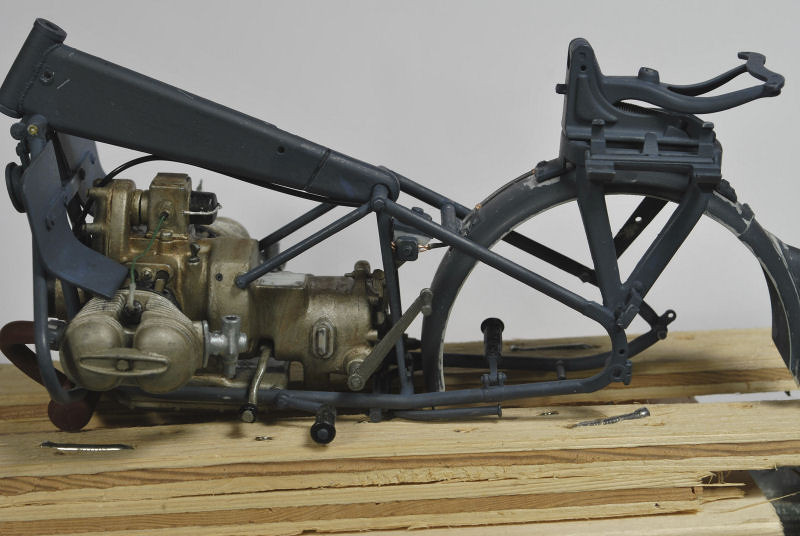
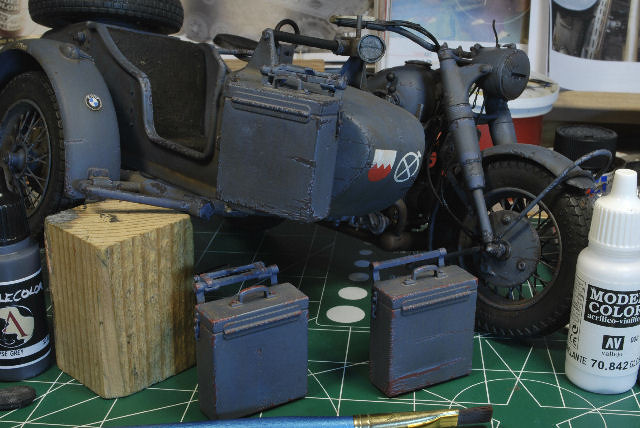
Battery and fuse wiring
I wired and installed the battery, fuse box, and air box.
The clutch cable and new plug wires are visible. Also, the horn wires and the rest of the rear cables ready for the front fork installation.
The intake air tubes with clamps and fuel lines installed.
Right side view of the fuel and air intake lines with clamps. I also closed off the knee pad locations on both sides of the fuel tank. I used green floral wire for all the cables and wires as well as some copper wire. Thin strips of sheet copper were used to fashion the line clamps. The battery terminal hook ups were fashioned out of scrap sprue and drilled to replicate actual connections.
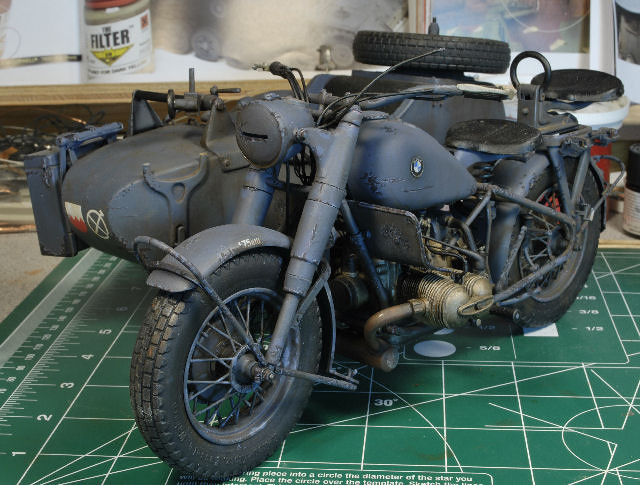
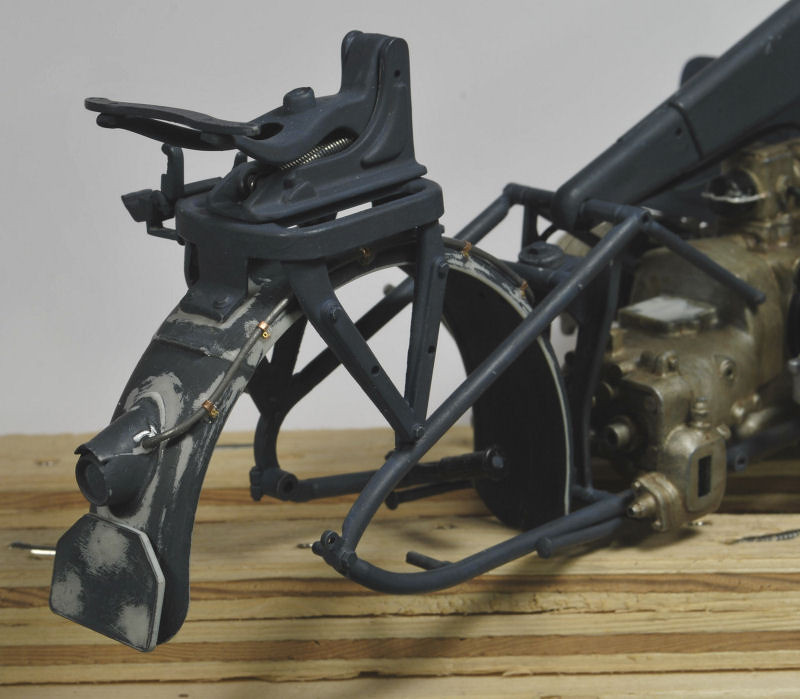
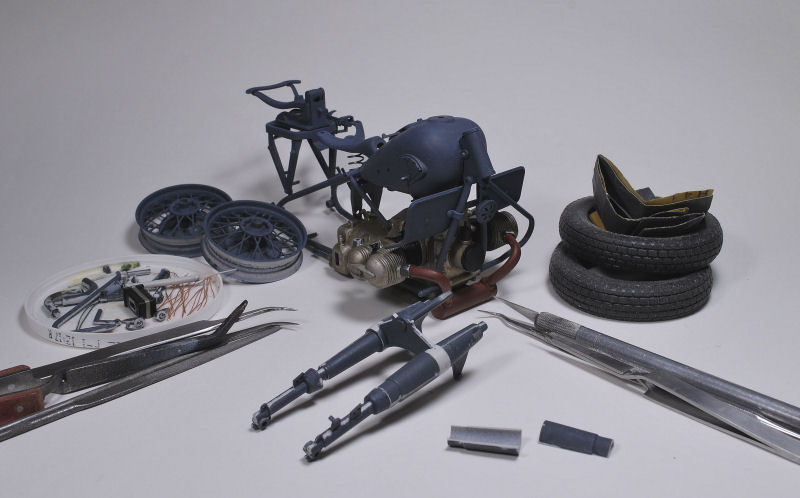
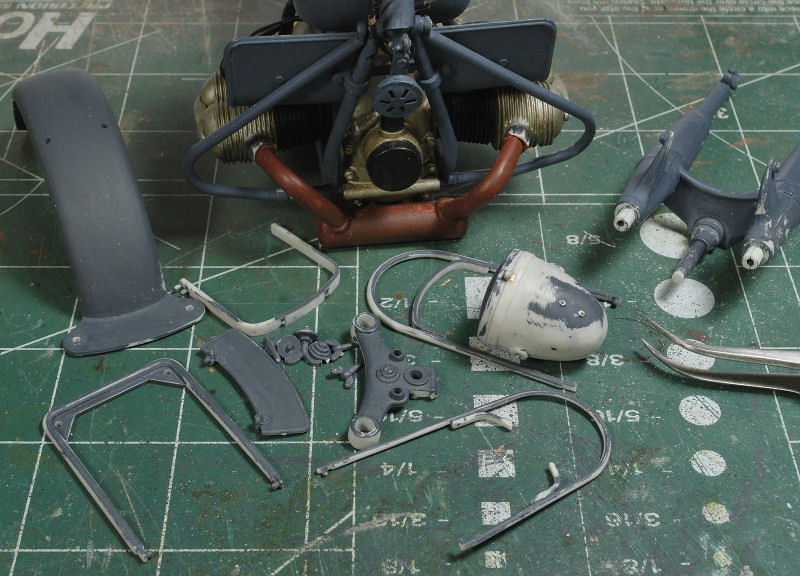
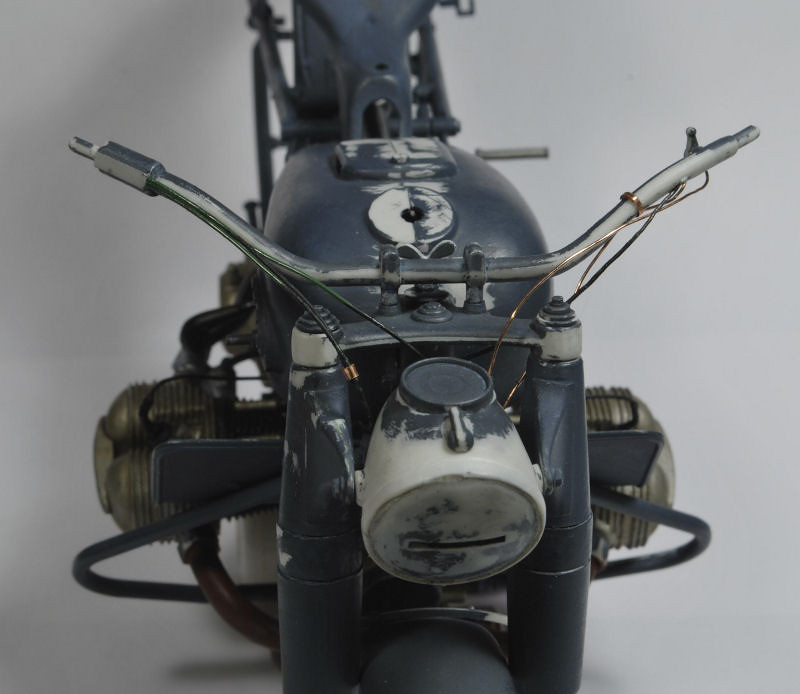
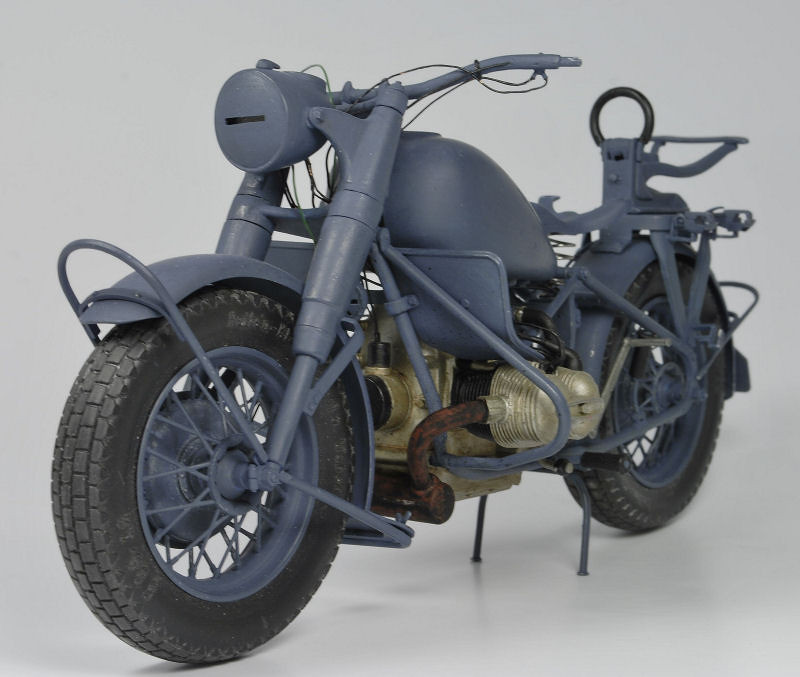
Forks and Fender work
Continuing on with the fork and fenders to the wiring of the head lamp and prep'd the wheels for installation. I also coated the seats to give a rougher look, but did not tear them or cut into the covering. I still need to add the rivet heads in the rear of each seat as well. The wiring was a challenge given that my sausage fingers get in the way and the carpet Monster consumes so much of my work, lol. At any rate I'm trying to keep the momentum going.
Most of the parts that will be installed.
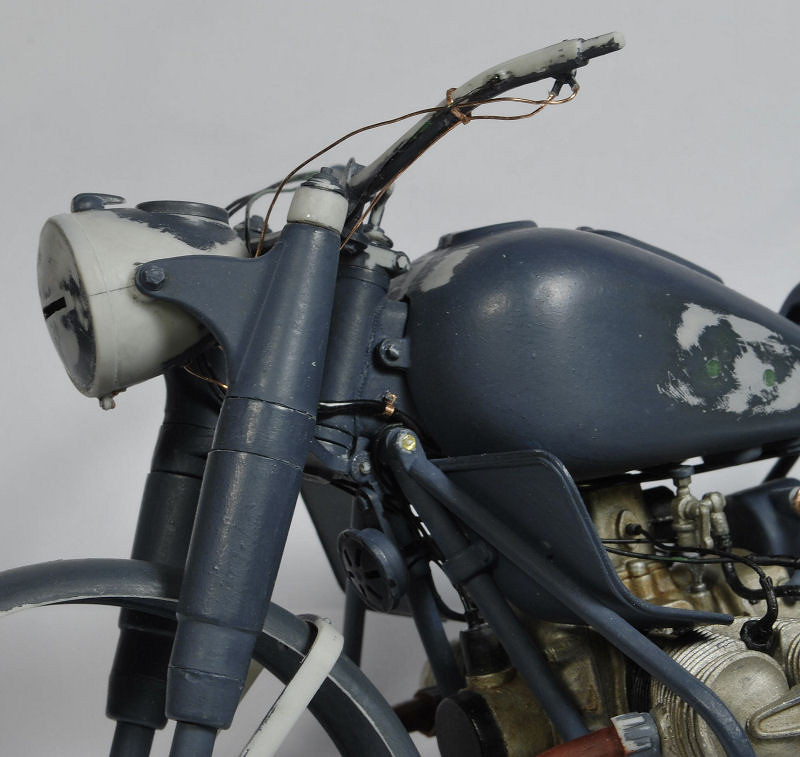
That head lamps has been modified further, not just reconfiguring the clamp, but also the cover has been recessed to its correct dimension.
These wires were a pain to install and I'm not quite sure I have them right still. Oh well, I'll get that straightened out soon. Copper strips are used to clamp the throttle cables together.
 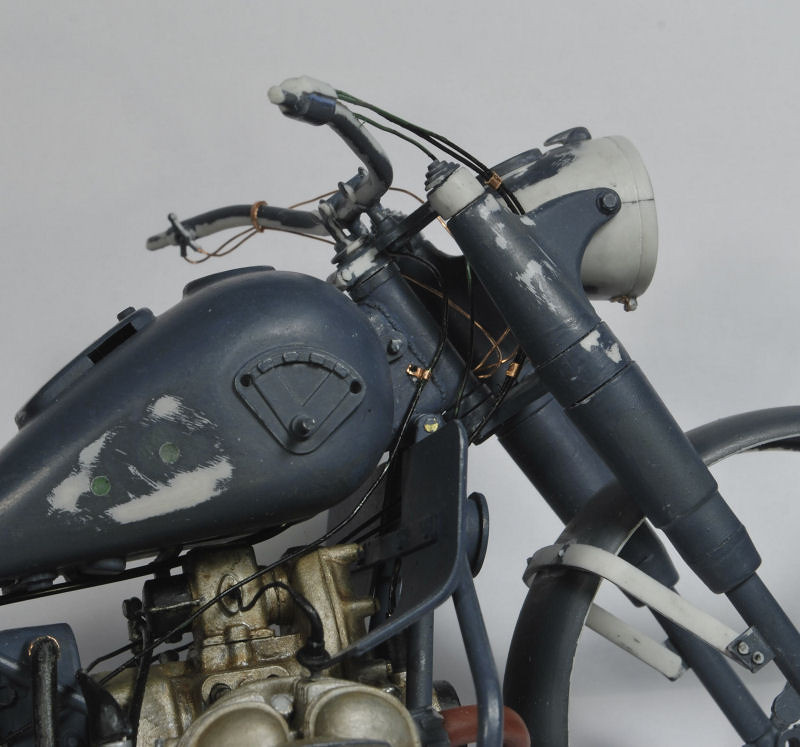
Small copper clamps were added against the frame and drilled, then a piece of stretched sprue was added and touched with a hot Xacto knife, filed and smoothed to simulate the screw heads. I still need to visit a train supply store to acquire supper small micro screws and nuts.
Left side view of the wiring, etc coming along the fork frame.
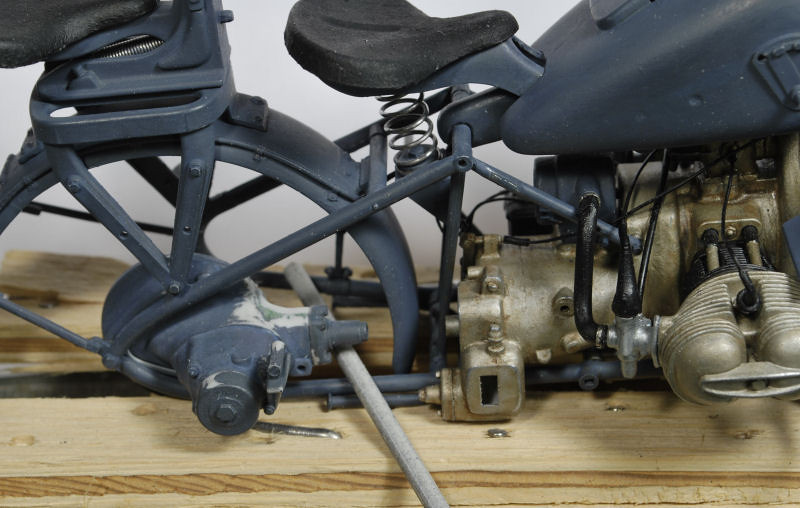
The drive shaft supplied is by no means accurate and requires some retooling, so the sprue is ready for working. That shaft has a tapered portion on each end with keyways which are not done with any accuracy. So, I'll break out the file and fabricate the correct configuration.
Not clearly visible is the wheel well contact points which required extensive filing to bring it into a more workable and accurate configuration. There's still lots to do before the final wheel installation.
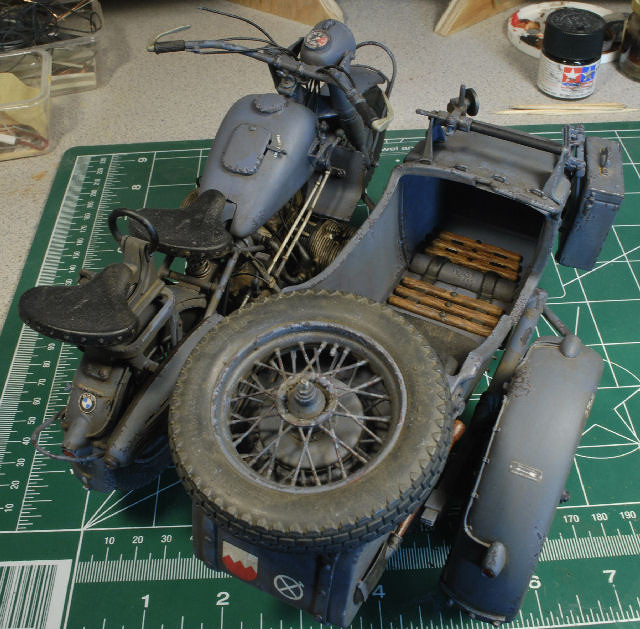
The driver and passenger seats have been modified with a layer of tissue paper for visible texture and temporarily installed.
 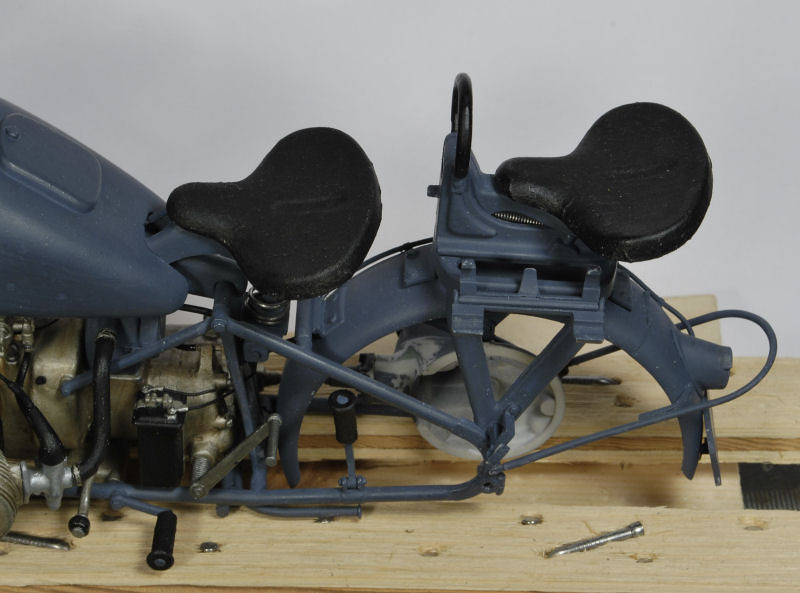
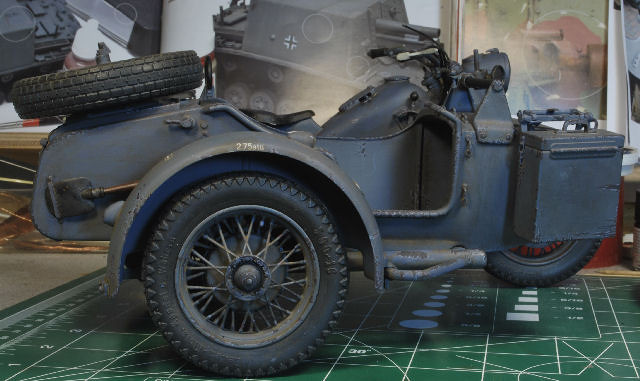
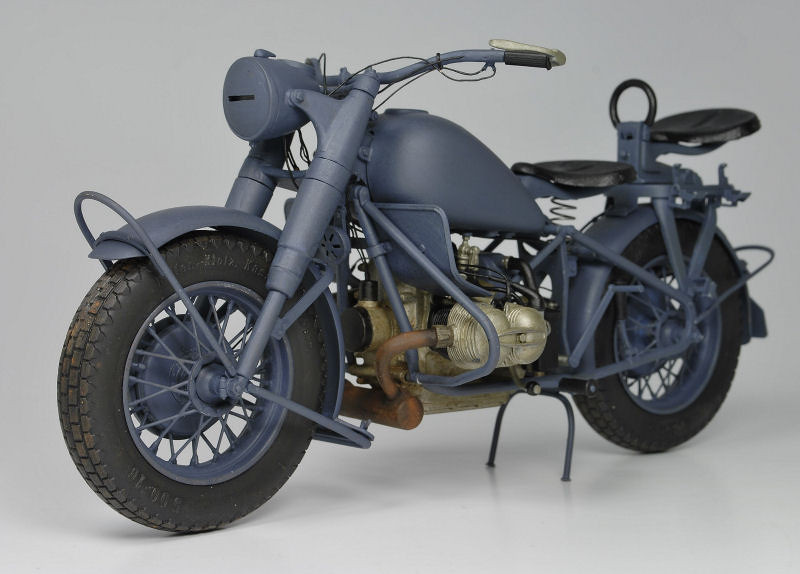
Major leap forward
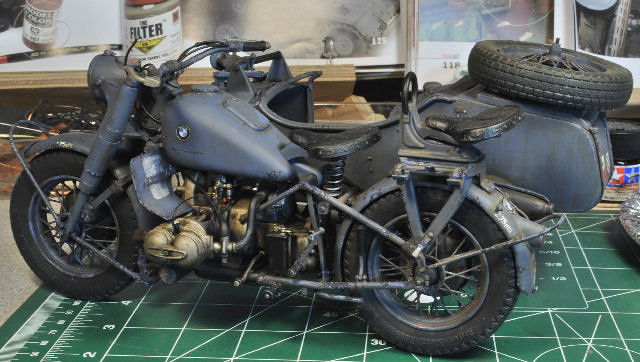
The wheels have been installed, not fun, and the bike is ready for pre-weathering.
I started working the exhaust weathering to avoid tight spots later. I used some decanted Hair Spray and brushed it on the pipes. Then after a quick blast from the hair dryer I brushed on some Tamiya XF-1 Flat Black. This of course goes against the grain as to how to utilize the Hair Spray method, but I'm experimenting right now. I know it doesn't look like much just yet, but we are far from done.
Also visible are the front disc brake and speedo cables.
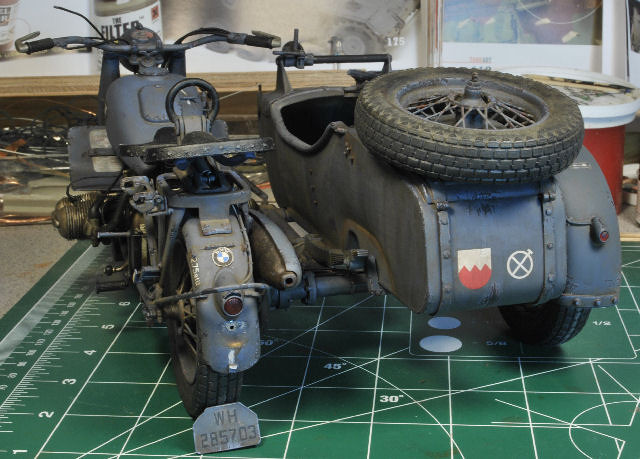
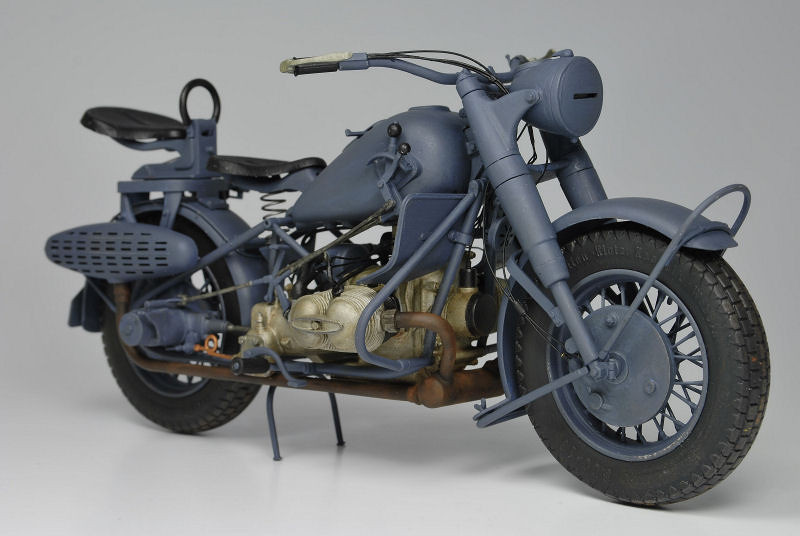
I just added the last bit of detail until I weather the rigs for the base. I left off the side storage box for now and the speedo glass, etc. You may be able to tell the pigments used on the pipes. All that pretty detail went away when I blasted it with Dull Coat, but it will come to life again in the final process.
I think it may be time to put this Beemer aside and get started on the side car
Driver seat, passenger seat and muffler cover installed.
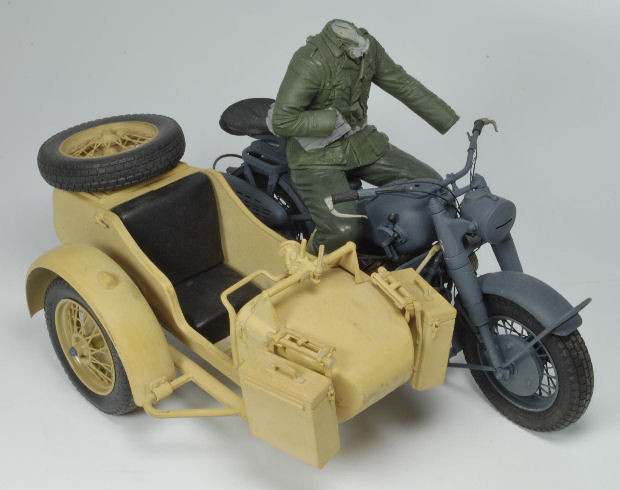
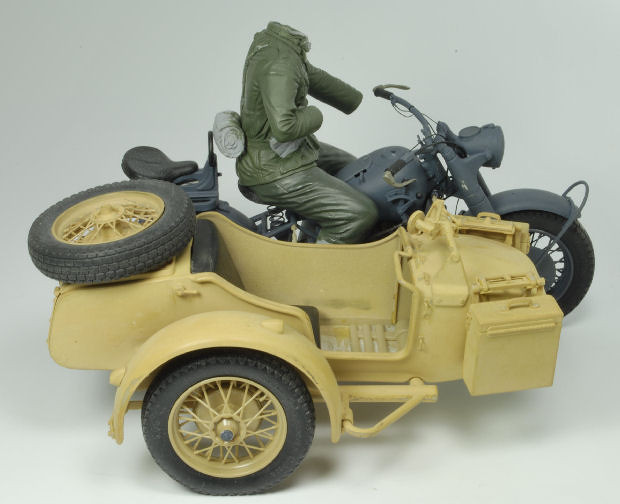
Time for a Side Car
This side car was actually sent to me from ReeDee's Miniatures already assembled. Steve had one sitting on the shelf unused and sent it along with the driver figure, how cool is that? there really wasn't much to do to it except modify the gun mount a bit, but other than that it was a straight install, yehaaaa!
The driver figure initially had short pants, so some putty work has been done, plus a few other mods.
That was a boat load for now, but the initial weathering will be next.
Thanks for watchin, Ski.
|
|
|
|
Post by RLFoster on Aug 15, 2020 7:05:15 GMT -6
Absolutely stunning, Ski!  Seeing detailing like this is always inspiring...you've really done a fantastic job on this! Well done! |
|
|
|
Post by dogfish7 (R.I.P.) on Aug 15, 2020 11:24:00 GMT -6
WOW!! Amazing work and details. 
|
|
|
|
Post by Steve Ski on Aug 15, 2020 12:42:01 GMT -6
Tanks Gents, more to follow soon. I have only one issue when we get to the Harley, there wasn't any notes to go with the pics,.......this is gonna be fun  |
|
|
|
Post by JCON on Aug 15, 2020 13:32:23 GMT -6
Nice use of whatever you can add to make it realistic!!! Well played bro!!!
|
|
|
|
Post by Dukemaddog on Aug 15, 2020 13:57:39 GMT -6
Wow! What a brilliant reminder of what an incredible Master you are! Stunning work Steve! I'm thrilled to see this moving forward!
|
|
|
|
Post by Steve Ski on Aug 18, 2020 4:40:12 GMT -6
Thanks Duke, you are too kind, Ma Brotha!
|
|
|
|
Post by Steve Ski on Aug 18, 2020 4:52:53 GMT -6
|
|
|
|
Post by dogfish7 (R.I.P.) on Aug 18, 2020 6:18:39 GMT -6
Over the top, awesome! |
|


 , or was it Bucky?