Post by Ernie on Mar 10, 2024 0:02:11 GMT -6
This was a Christmas present from a friend Christmas before last. This is another LA Class sub, and also shares her namesake with Hampton New Hampshire so That was a cool bonus. It is also a flight III boat, so has some differences from the USS Portsmouth which was an earlier boat in the class. This kit was originally released in 1991, with this particular boxing released in 1997. As a result, the kit needs a little help to bring it up to snuff.
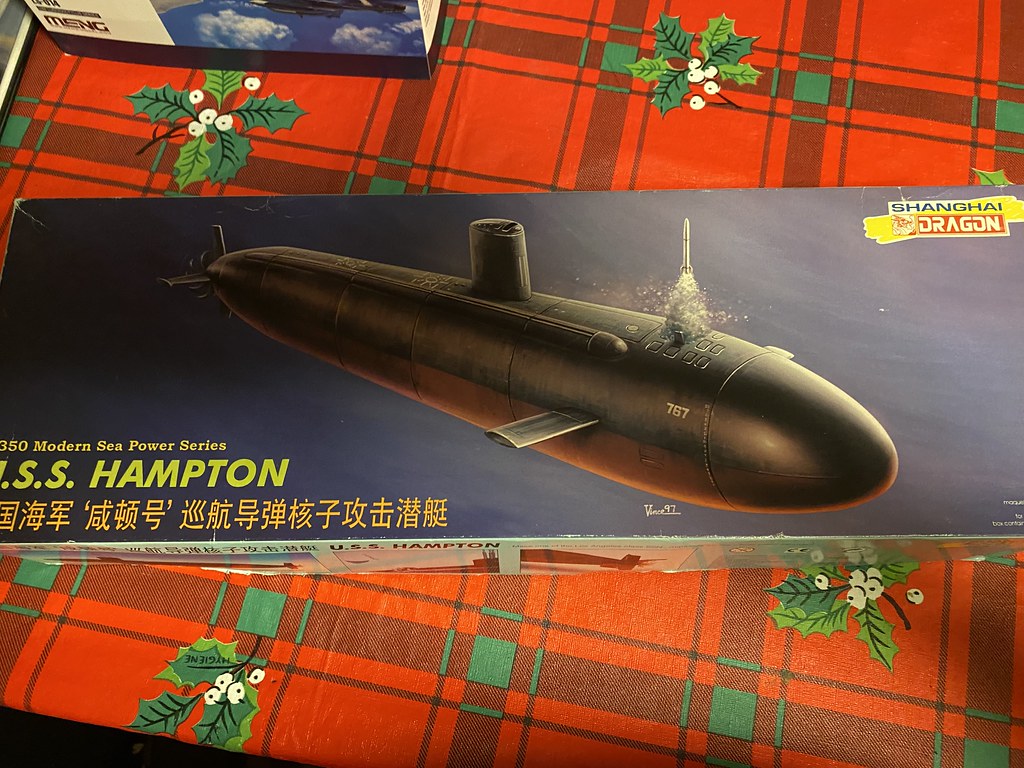
The first thing to be addressed was the stern. The kit is molded with end plates on the horizontal stern planes, which is fictional, but representative of the USS Dallas from the movie Red October. The kit supplies a correct stern, which can be attached after the incorrect stern is cut off. Fortunately, Dragon provides cutting guides in the inside of the hull halves to make the job easier.

Next up was the bow. The Hampton has the vertical launch tubes in the bow. The kit supplies separate bows with or without the hatches. The one with hatches has them as separate parts, and a test fit showed that as expected the fit was poor. I decided to use the bow without hatches and hoped that at some point I would arrive at a uniquely brilliant solution to replicate the hatches.
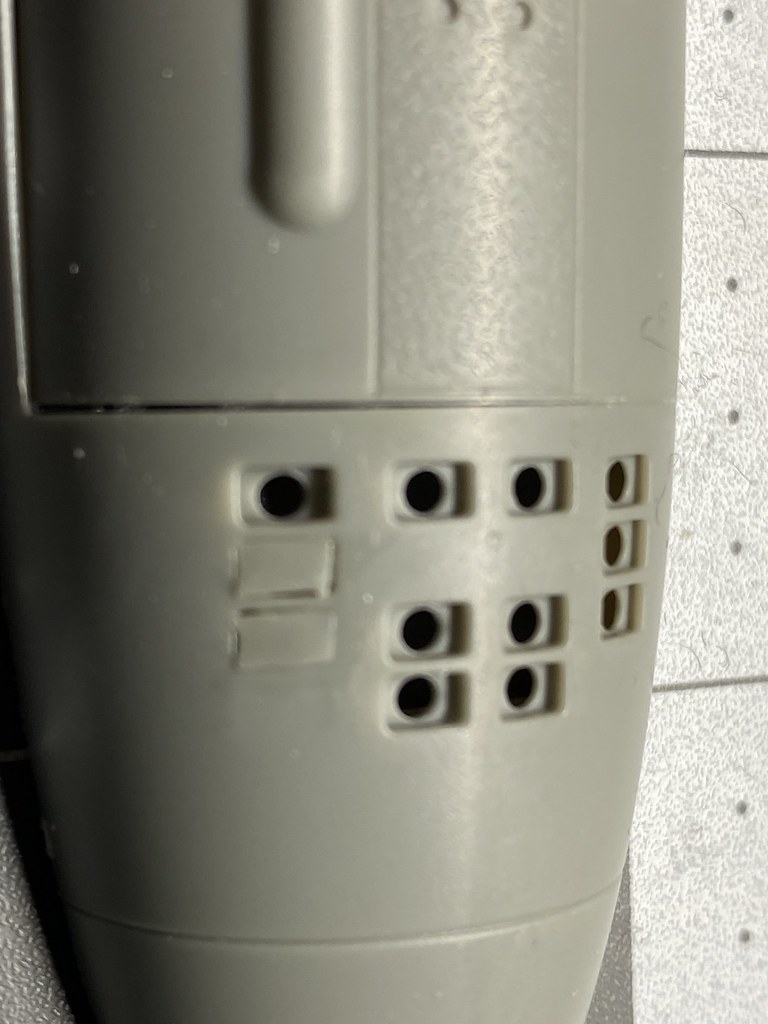
The hatches and bollards on the deck were a poor representation of the real items. So, I sanded off the bollards and drilled a small hole where each one was, and then super glued a 1/72 individual seat belt buckle vertically into the hole to represent the recessed bollard. The buckles came from a Tom's Model works sheet of generic P/E cockpit details. I used a hollow punch to punch out 2 disks from .010 sheet styrene which were cemented to the hatch locations on the deck to build up the raised casements around the hatches. These were feathered into the deck with several layers of Mr. Surfacer smoothed with a Q-Tip dampened with Mr. Leveling Thinner.
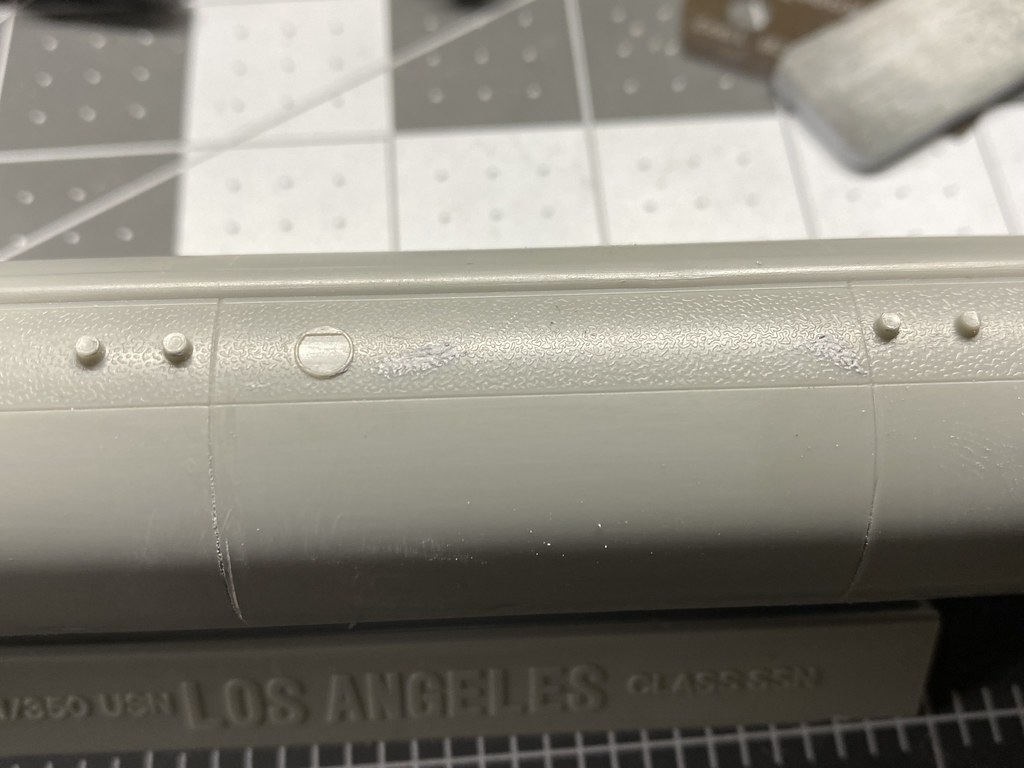
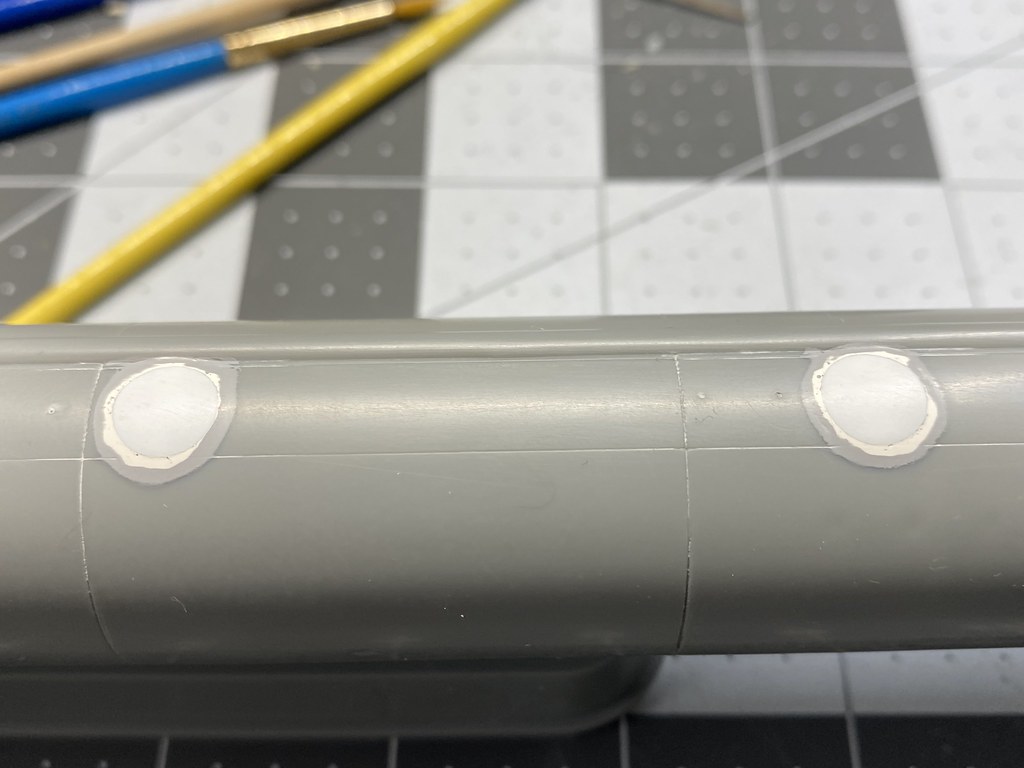
Next to be addressed were the outer torpedo tube doors. The kit has them in the wrong spot, and wrong shape. Scribing is not one of my stronger skills, especially on curved surfaces. Again, I got creative and filled the kit outlines, and then applied two layers of decal stripe material to give the impression of the doors in the correct location. I figured I could emphasize these during the painting process. I also cut out the openings for the bow planes, as they were not present on the early bow section in the kit, which is correct, but I was using the early bow section on a late boat.

One item missing in the kit was the anhedral stern planes on the lower aft hull. These were taken from a HobbyBoss LA class sub kit and grafted onto the DML hull. These help keep the sub from rolling over when preforming sharp turns while submerged. The pods on the ends are also a convenient location for counter measures to be stored.

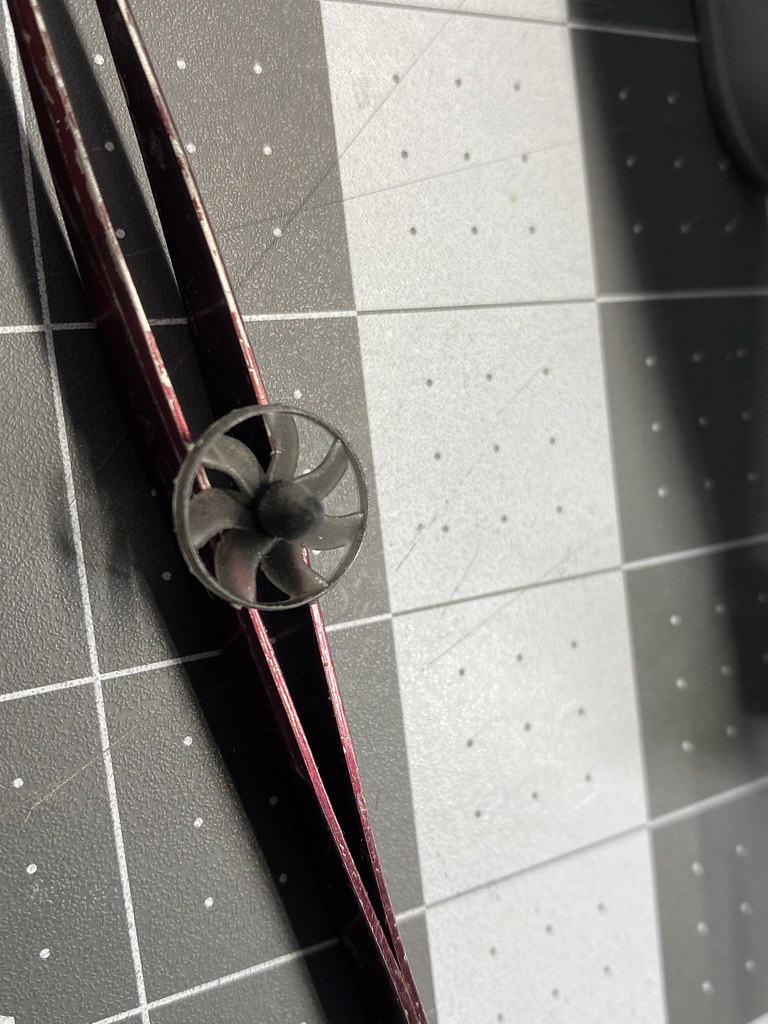
Finally, I got a 3D printed prop that is appropriate for the Flight III boats. They are fitted with an annular ring propeller that protects the prop if the sub surfaces through the ice.
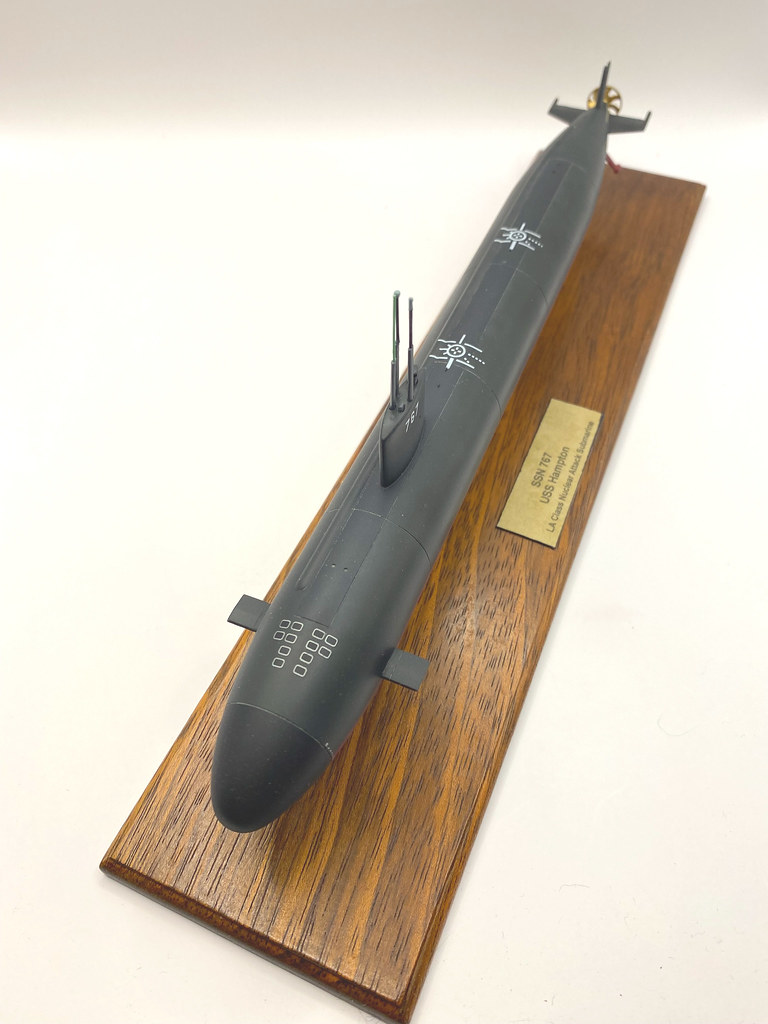
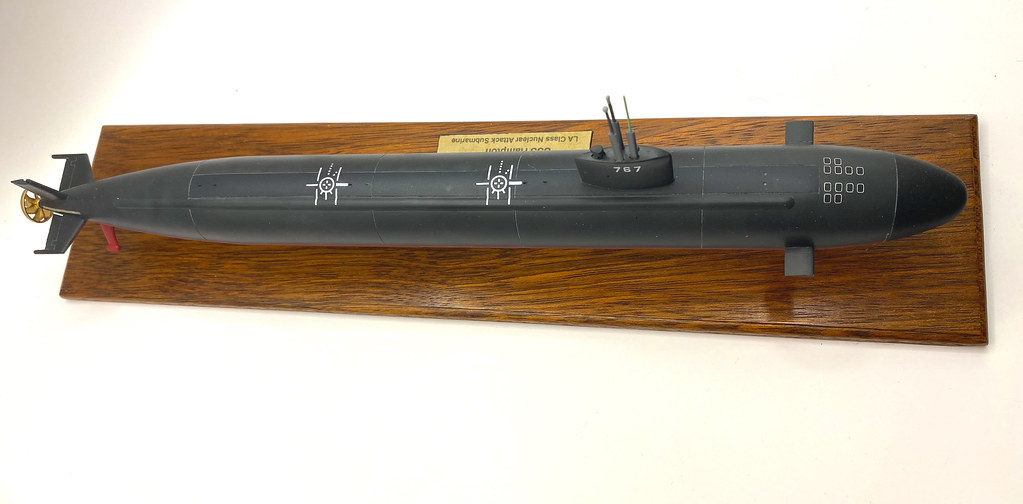
Once all the seams etc. had been all cleaned up the model was painted in the typical paint schemes for these boats, and then the decals were applied. Typical of old DML / Dragon decals, they were useless being discolored, thick. and brittle. Most to the decals came from leftovers from the Hobbyboss 688 Class kit as well as some generic sheets I got off Ebay. I used watercolor pencils to highlight the coloring of the torpedo doors, I sprayed some clear decal film with AK Real Color silver grey, then cut into strips and applied to the stern between the horizontal and vertical fins to represent the sacrificial Zinc bars. Finally, for the vertical launch tube hatches on the bow I used some suitably sized 1/144 airliner window decals. The first I tried were solid black and looked quite satisfactory, however they were well beyond their use by date and refused to stick to the model. I next tried some that had a silver out line and these worked, though giving a slightly exaggerated stylistic look, though I kind of like it! The masts were modified from the kit parts to represent a typical fit seen on these subs.
Overall, I am very happy with how this turned out, it took some extra work, but it was rather enjoyable. It was quite satisfying to take an older kit and spruce it up and make it a better representation of the real life subject.


The first thing to be addressed was the stern. The kit is molded with end plates on the horizontal stern planes, which is fictional, but representative of the USS Dallas from the movie Red October. The kit supplies a correct stern, which can be attached after the incorrect stern is cut off. Fortunately, Dragon provides cutting guides in the inside of the hull halves to make the job easier.

Next up was the bow. The Hampton has the vertical launch tubes in the bow. The kit supplies separate bows with or without the hatches. The one with hatches has them as separate parts, and a test fit showed that as expected the fit was poor. I decided to use the bow without hatches and hoped that at some point I would arrive at a uniquely brilliant solution to replicate the hatches.

The hatches and bollards on the deck were a poor representation of the real items. So, I sanded off the bollards and drilled a small hole where each one was, and then super glued a 1/72 individual seat belt buckle vertically into the hole to represent the recessed bollard. The buckles came from a Tom's Model works sheet of generic P/E cockpit details. I used a hollow punch to punch out 2 disks from .010 sheet styrene which were cemented to the hatch locations on the deck to build up the raised casements around the hatches. These were feathered into the deck with several layers of Mr. Surfacer smoothed with a Q-Tip dampened with Mr. Leveling Thinner.


Next to be addressed were the outer torpedo tube doors. The kit has them in the wrong spot, and wrong shape. Scribing is not one of my stronger skills, especially on curved surfaces. Again, I got creative and filled the kit outlines, and then applied two layers of decal stripe material to give the impression of the doors in the correct location. I figured I could emphasize these during the painting process. I also cut out the openings for the bow planes, as they were not present on the early bow section in the kit, which is correct, but I was using the early bow section on a late boat.

One item missing in the kit was the anhedral stern planes on the lower aft hull. These were taken from a HobbyBoss LA class sub kit and grafted onto the DML hull. These help keep the sub from rolling over when preforming sharp turns while submerged. The pods on the ends are also a convenient location for counter measures to be stored.

Finally, I got a 3D printed prop that is appropriate for the Flight III boats. They are fitted with an annular ring propeller that protects the prop if the sub surfaces through the ice.

Once all the seams etc. had been all cleaned up the model was painted in the typical paint schemes for these boats, and then the decals were applied. Typical of old DML / Dragon decals, they were useless being discolored, thick. and brittle. Most to the decals came from leftovers from the Hobbyboss 688 Class kit as well as some generic sheets I got off Ebay. I used watercolor pencils to highlight the coloring of the torpedo doors, I sprayed some clear decal film with AK Real Color silver grey, then cut into strips and applied to the stern between the horizontal and vertical fins to represent the sacrificial Zinc bars. Finally, for the vertical launch tube hatches on the bow I used some suitably sized 1/144 airliner window decals. The first I tried were solid black and looked quite satisfactory, however they were well beyond their use by date and refused to stick to the model. I next tried some that had a silver out line and these worked, though giving a slightly exaggerated stylistic look, though I kind of like it! The masts were modified from the kit parts to represent a typical fit seen on these subs.
Overall, I am very happy with how this turned out, it took some extra work, but it was rather enjoyable. It was quite satisfying to take an older kit and spruce it up and make it a better representation of the real life subject.


