|
|
Post by BUCKY on May 26, 2018 11:26:01 GMT -6
Thanks, bro!!
|
|
Gothic
SETTLING IN
   AKA Gothic Kustom'z, lost member since 11-12-11
Posts: 468 
Likes: 664
|
Post by Gothic on May 26, 2018 14:26:53 GMT -6
Looks great, tho I'm sure ya will clear coat the the primer before paint, why you ask?? here's a tip for ANYONE who's into body mods, or thinking of body mod's, clearing the primer will show all the lil mistakes I call GHOSTIES!, yep all those lil pesky panel lumps and bumps, if ya didn't fill all the way, will even show where ya took the badges off, and if ya did it good enough, other wise ya might find a few surprises after final paint and clear, TRUST ME, they will show up,
Great job man, gives me a few ideas.
|
|
|
|
Post by BUCKY on May 26, 2018 14:57:55 GMT -6
Thanks for that tip, Gothic! I'll give it a try.
|
|
|
|
Post by JCON on May 26, 2018 16:23:38 GMT -6
Sounds good to me!!!
|
|
Gothic
SETTLING IN
   AKA Gothic Kustom'z, lost member since 11-12-11
Posts: 468 
Likes: 664
|
Post by Gothic on May 27, 2018 1:30:26 GMT -6
Well you guys have painted before, and have had the issue of weird nasty stuff show up after clear, the fly fart bubble, ect, ect, this is the same thing, only this way ya catch it now, so ya wont have to strip the puppy later, after that way kewl wicked paint job, thast ya didnt make enough paint for, or write the formula, like ya shoulda, but didn't, but you guys get the idea.....
|
|
|
|
Post by JED on May 30, 2018 13:00:33 GMT -6
Pretty cool looking Bucky
|
|
|
|
Post by Buddho on May 30, 2018 16:20:45 GMT -6
Awesome looking, Bucky!
|
|
|
|
Post by CarlRF (R.I.P.) on Jun 4, 2018 21:55:37 GMT -6
Nice primer job buddy .
|
|
|
|
Post by BUCKY on Jun 5, 2018 0:11:55 GMT -6
Thanks for the great comments, gennamen!!
|
|
|
|
Post by JCON on Jun 5, 2018 7:57:34 GMT -6
You're welcome brother!!!
|
|
|
|
Post by BUCKY on Jun 22, 2019 1:07:48 GMT -6
Well.....I can't believe it's been over a year since I posted in this thread!! I have the Puma back on the bench, working on the interior. 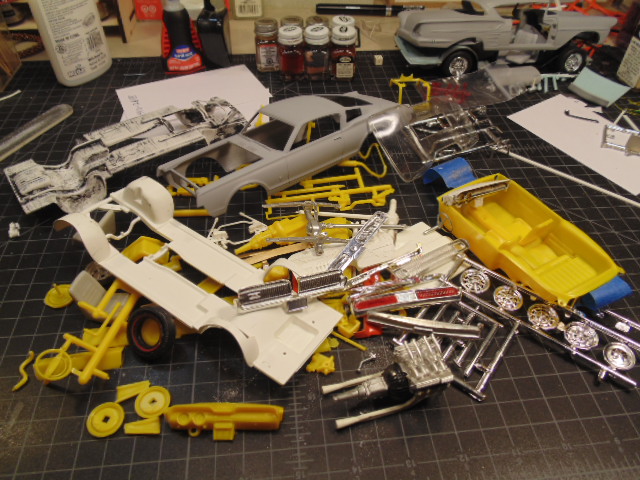 Mixing a Cougar kit with a Mustang kit is challenging. They are not as close as you might think. Modifications are necessary on several areas, other than just the body. |
|
|
|
Post by BUCKY on Jun 22, 2019 1:56:38 GMT -6
One misguided razor saw and a Band-Aid later, and I have the Cougar dashboard modified to fit the Mustang interior tub: 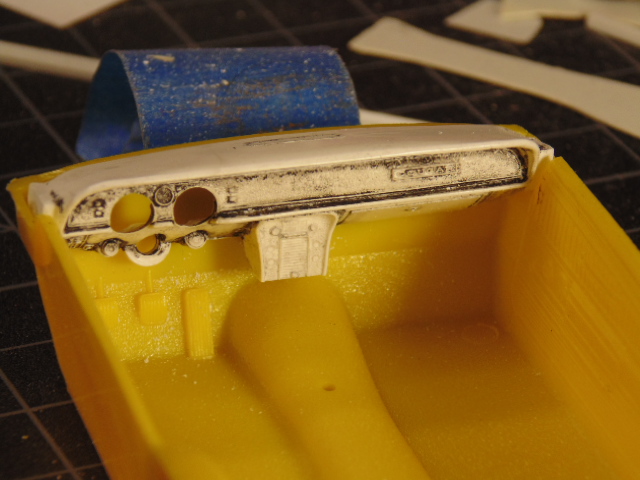 |
|
|
|
Post by JCON on Jun 22, 2019 12:36:17 GMT -6
So glad to see this back at the bench!!!  |
|
|
|
Post by BUCKY on Jun 23, 2019 0:31:07 GMT -6
I needed a few parts for this project, so I started looking in the stash. Enter this kit:  I was looking for a set of finned valve covers for the engine from the Mustang kit.  I found them in this Cougar kit. And, I found out that a great deal of the parts in this kit are identical to the '67 Cougar kit. The body in the '69 kit is severely warped, so I'll use this kit as a donor for the PUMA GT project. Here are some of the parts that will find their way into the PUMA GT: 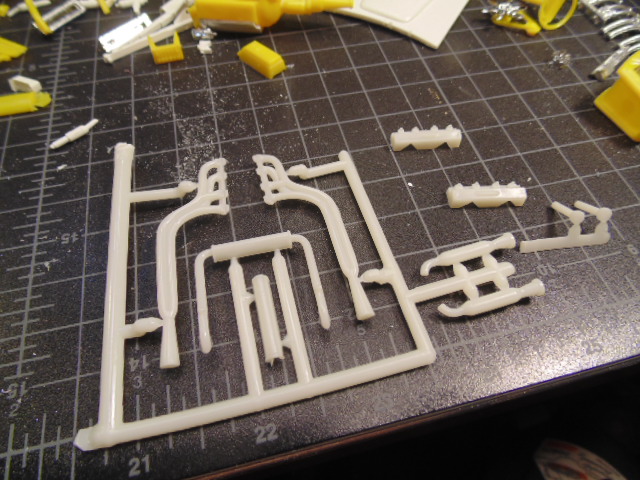 |
|
|
|
Post by JCON on Jun 23, 2019 8:40:47 GMT -6
Nice scalping sir!!!  |
|
|
|
Post by dogfish7 (R.I.P.) on Jun 24, 2019 8:24:25 GMT -6
You da man Bucky.
|
|
|
|
Post by BUCKY on Jun 24, 2019 9:13:24 GMT -6
Thanks, guys. Just trying to make something out of this old glue bomb.
|
|
|
|
Post by BUCKY on Jun 27, 2019 0:28:39 GMT -6
While the blue paint dries on the engine, I thought I'd take a look at the grille. This is the stock grille, as it comes in the kit: 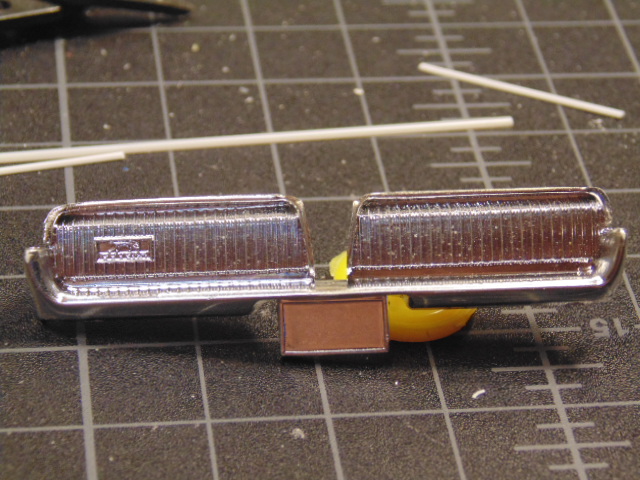 I'm tinkering with the idea of adding a piece of trim:  This is .040" half round. I would add a piece on the other side, too. |
|
|
|
Post by BUCKY on Jun 27, 2019 1:49:25 GMT -6
Here's a mock-up with the strips on the grille: 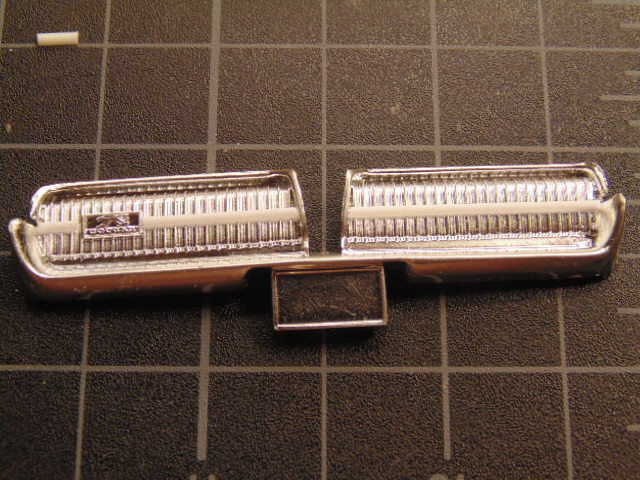 Comments are welcome. |
|
|
|
Post by JCON on Jun 27, 2019 10:51:03 GMT -6
I like the extra strip...
|
|